

Managing a Remix Site's Content With Sanity.io
Build a Remix application and set up Sanity.io to manage its content

In this day and age, the world runs on data. Your phone, your favorite game, the internet itself! Everything comes down to data. This has lead to a realization by developers over the years: data is hard to manage.
Introduction
In this article, you will learn how to use Sanity.io, a content platform that includes the Content Lake where your content is stored, a content management studio and various APIs to access your content from. Sanity will be used to manage the content (data) of a book catalog's website built with Remix.
By the end, you will have Sanity set up to manage your content and a fully functional Remix application. This application will use Sanity's GraphQL API to retrieve your content.
Finally, you will deploy your finished website using Vercel.
Prerequisites
While not completely necessary, I believe you will get the most out of this article if you come with:
- A basic understanding of JavaScript and its tooling
- Experience working with React
- A basic understanding of GraphQL
Make sure you have node.js installed on your machine.
Tools you will use
Below are the various tools and technologies you will get to touch in this tutorial:
- Remix, your application framework
- Sanity, a headless CMS to manage your data
- graphql-request, a minimal GraphQL client
- GraphQL Codegen, generates TypeScript types from a GraphQL schema
- TailwindCSS, as your CSS framework
- Vercel, as your website hosting provider
Set up a Sanity.io project
Sanity gives you the ability to set up Sanity Studio, an application that allows you to configure different content types and inputs. The studio interacts with Sanity's APIs, allowing you to manage your data from a self-hosted application.
In order to set up a Sanity project, you first need to install the Sanity CLI:
npm i -g @sanity/cli
Next, initialize a Sanity project in a directory where you would like the project to live. For the purposes of this tutorial I will work in /Documents/projects:
# /Documents/projects
sanity init
Note: If you did not already have a Sanity account set up,
sanity initwill walk you through setting up a new account.
This will walk you through setting up your project and will download a starter template of Sanity Studio. You will be prompted for a few bits of data and asked a few questions about your project. I chose the name catalog-sanity for my project and will use that for the remainder of this tutorial.
At some point in the process, you will be asked to Select project template. Select the Clean project with no predefined schemas option, as you will configure this project yourself.
Once your project has been set up, follow the instructions outputted to start up Sanity Studio:
# /Documents/projects
cd catalog-sanity
sanity start
Sanity Studio should start up at localhost:3333. Pop that open to see what the starter template looks like:
Note: You will be asked to sign in to the studio. Use the credentials you used when creating an account on Sanity.io.
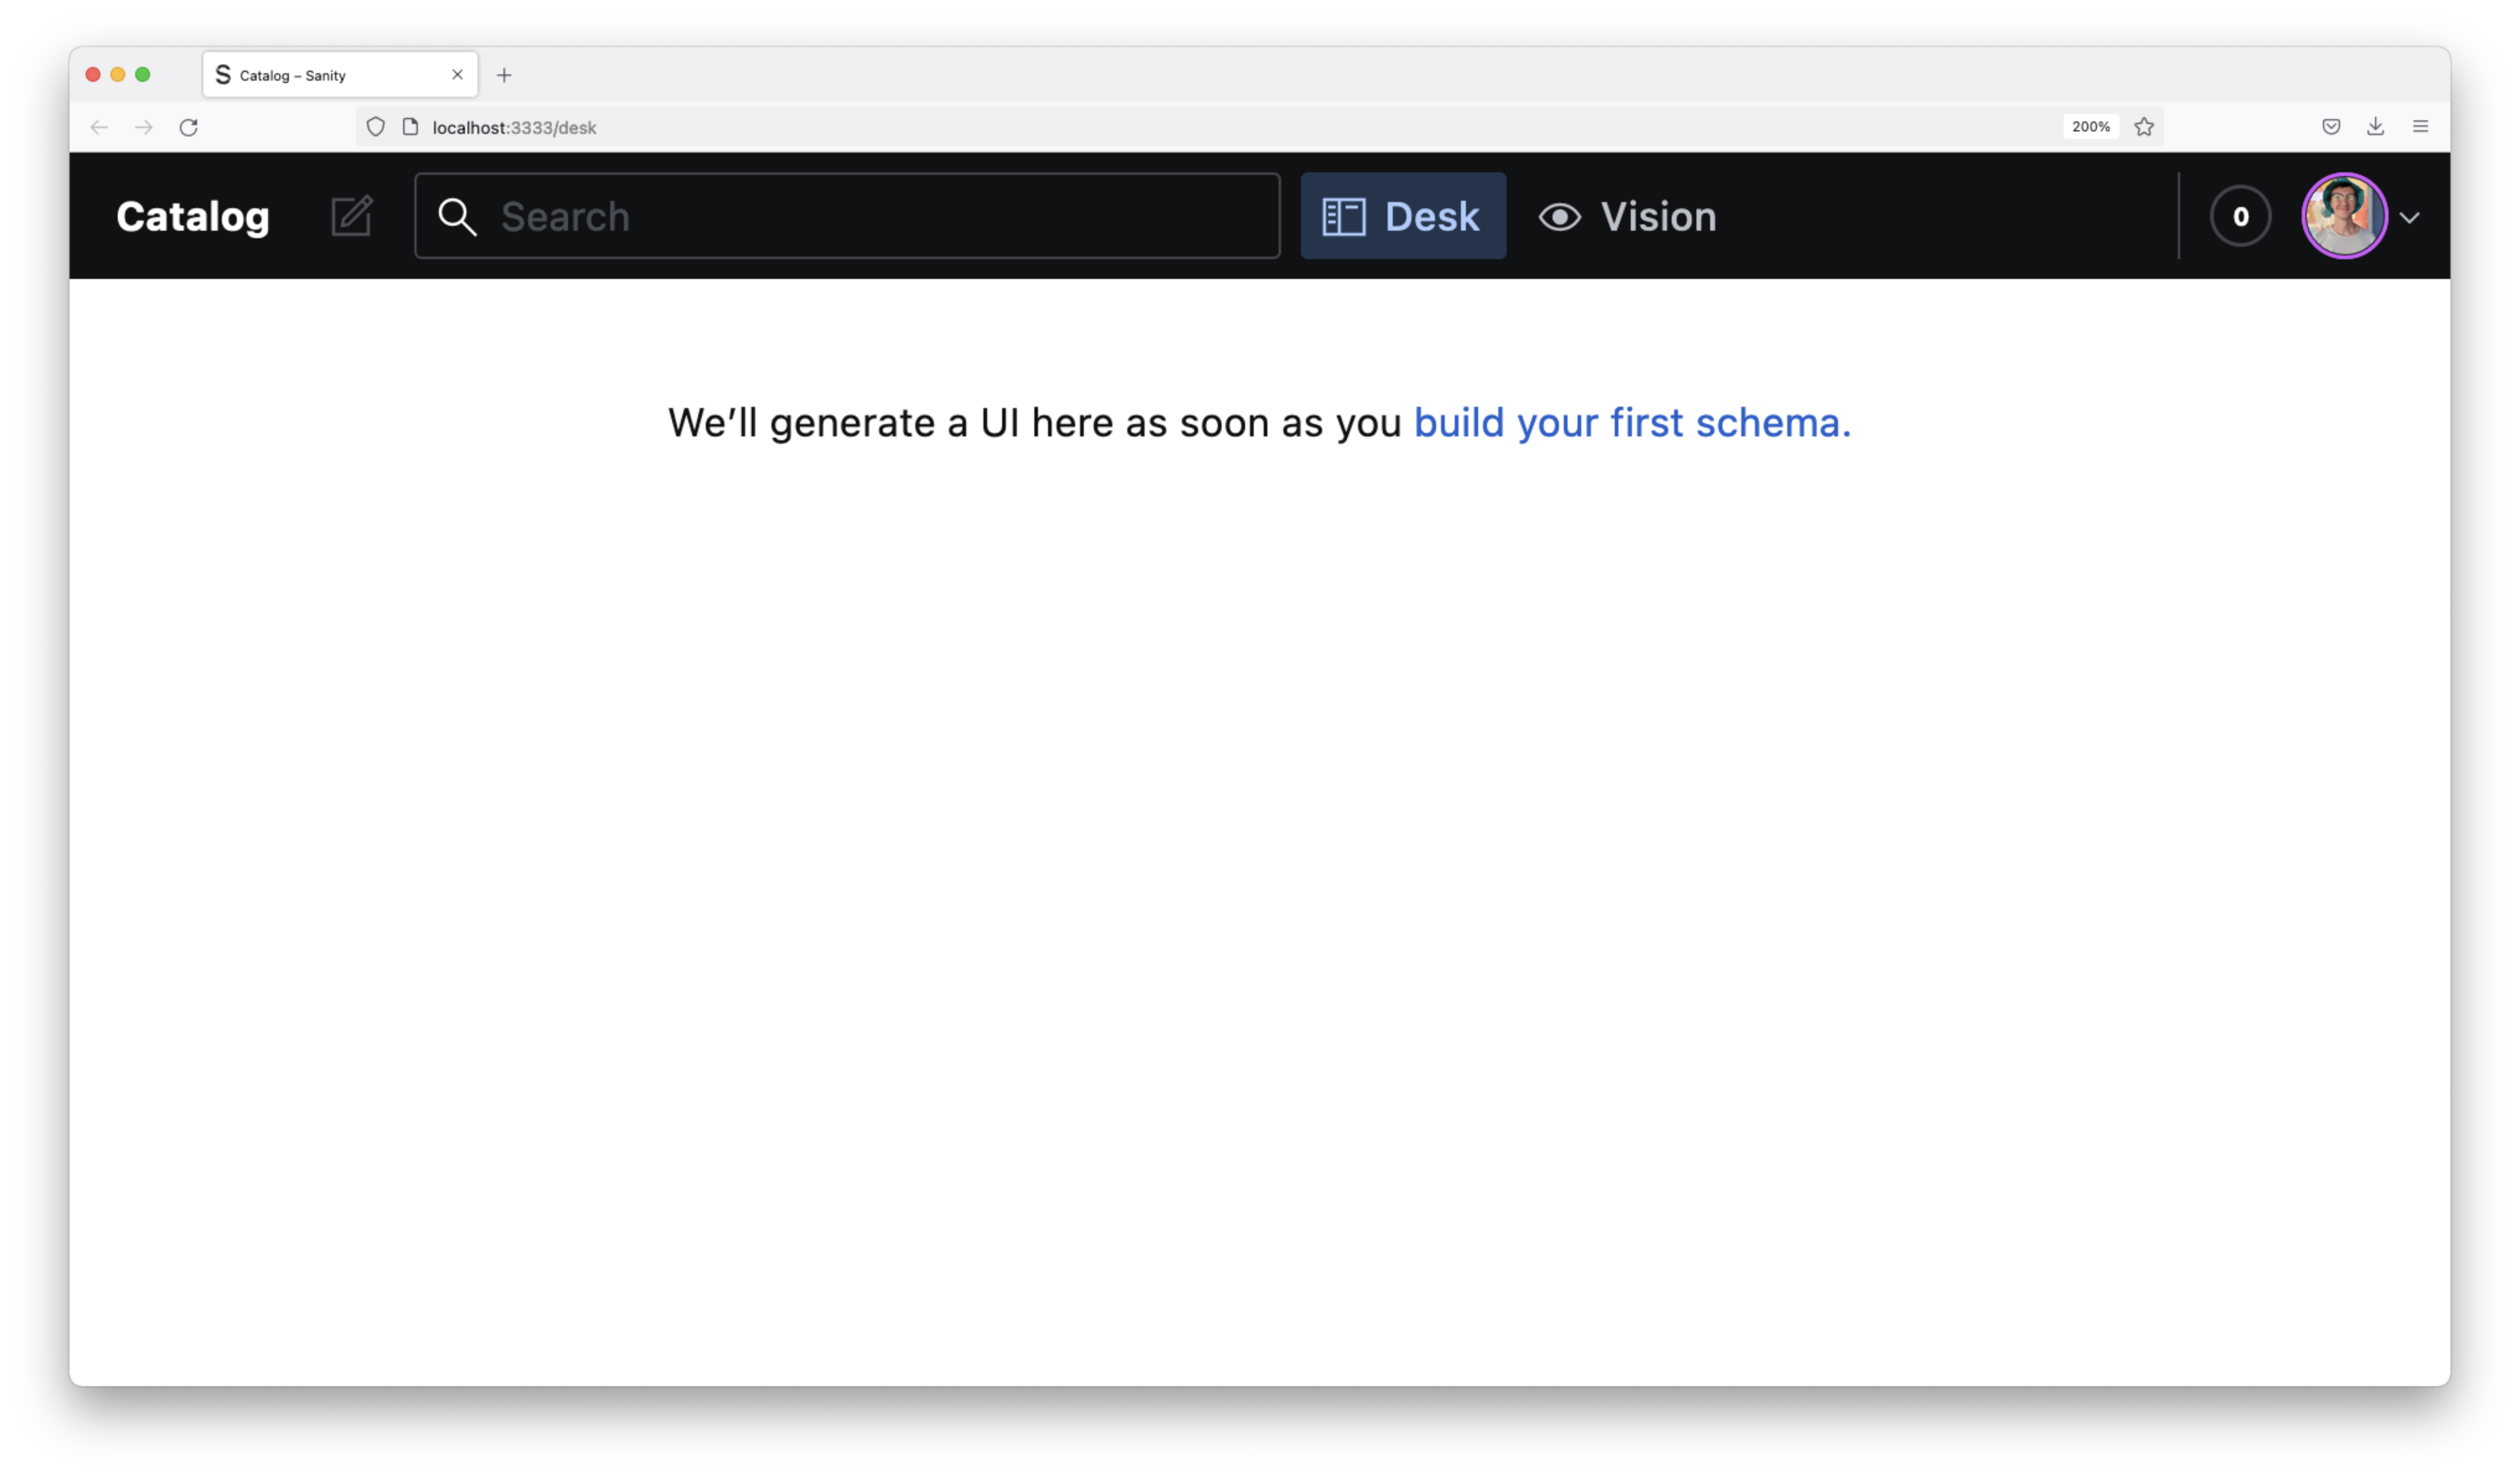
You should see a page similar to the one above. As the message on the page indicates, you have not yet configured a schema.
In the next section, you will set up a schema to define a Book document and its fields.
Define a Book document type
In Sanity, JavaScript objects are used to build schemas that define your content model. This model consists of "documents", or the types of content you are creating. In this catalog scenario, the only type of content you will create is Books.
Open up your Sanity project in a code editor. You will find a folder within named schemas. This is the folder that will contain all of your project's schemas.
Create a new file within the schemas folder named book.js:
# /Documents/projects/catalog-sanity
touch schemas/book.js
Add the following code to the new book.js file:
// /Documents/projects/catalog-sanity/schemas/book.js

export const book = {
  name: 'book',
  type: 'document',
  title: 'Book',
  fields: []
}
This object defines a document named book. Within Sanity Studio, this document will be referred to as Book because of the title field. The fields array is empty at the moment.
In your application, a book will have three pieces of data associated with it:
Title: The title of the bookAuthor: The author of the bookDescription: A quick description of the book
Update the fields array to define these data points:
// /Documents/projects/catalog-sanity/schemas/book.js

// ...
fields: [
    {
        name: "title",
        type: "string",
        title: "Title",
    }, {
        name: "author",
        type: "string",
        title: "Author",
    }, {
        name: "description",
        type: "text",
        title: "Description",
    },
],
// ...
Apply Book to your schema
At this point, you have completely defined the Book document type, however that type has not yet been applied to the project's schema.
In schemas/schema.js, import the new Book type and add it to the types array within the createSchema configuration object argument:
// /Documents/projects/catalog-sanity/schemas/schema.js

import createSchema from "part:@sanity/base/schema-creator";

import schemaTypes from "all:part:@sanity/base/schema-type";
import { book } from "./book"; // <- Import the type

export default createSchema({
  name: "default",
  types: schemaTypes.concat([
    book // <- Add it to the array
  ]),
});
Once you save all of your changes and head back to the browser, you should now see the UI updated with your new content type.
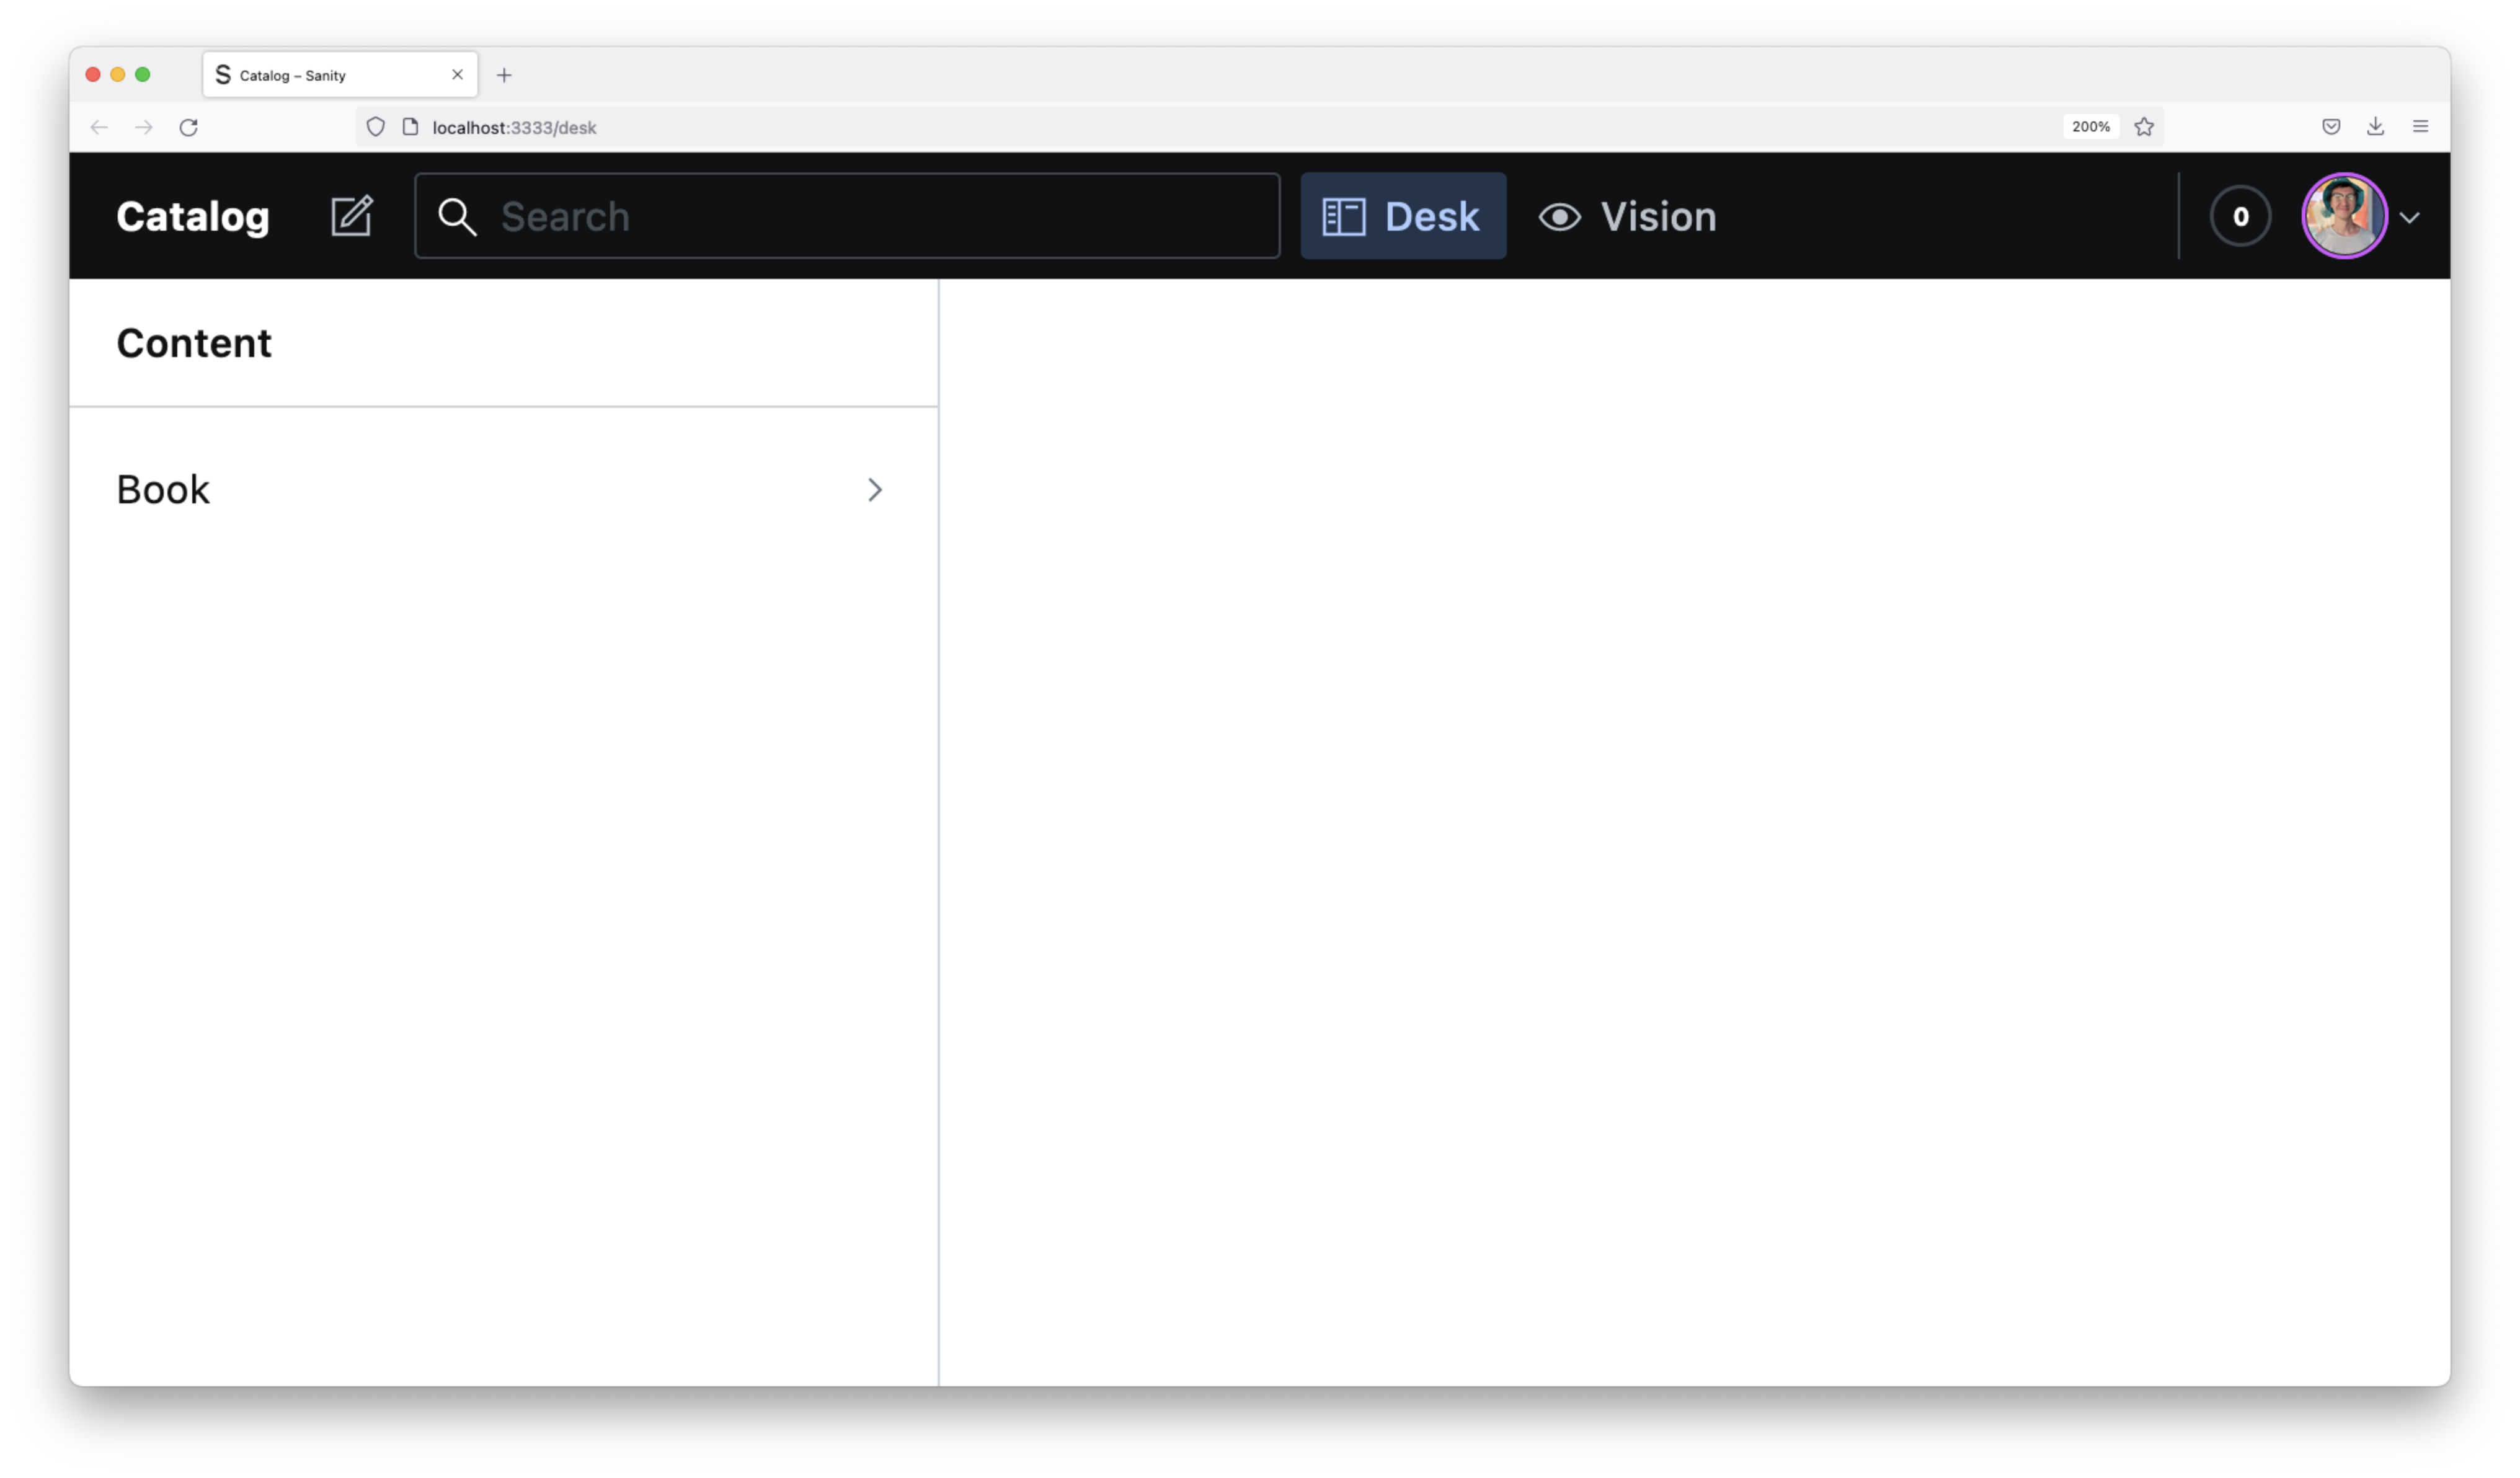
Clicking the Book option under the Content header will reveal a list of your existing books (it will be empty for now). Here, you are provided all of the tools you need to create, update, and delete books.

Create a couple of books by clicking the pencil icon on the top right of that section:

Once you've added a few books, you are almost ready to move on to the last section!
The last thing you need to do, however, is install the @sanity/cli as a development dependency in the project:
npm i -D @sanity/cli
This will allow you to deploy to Vercel later on in this tutorial.
Build the Remix application
Now that Sanity is set up to manage your content, you need a way to display that content. You will use Remix, a full stack JavaScript framework, to create a book catalog website where your data will be displayed.
Initialize a Remix application
This application will be separate from the Sanity project. Navigate out of the Sanity project's directory and into a directory where you would like your Remix project to live. Then run the following command:
# /Documents/projects
npx create-remix@latest
This command will ask you a series of questions and scaffold the beginnings of a Remix application for you. Answer the questions with the following:
- Where would you like to create your app?:
catalog-remix - What type of app do you want to create?:
Just the basics - Where do you want to deploy?:
Vercel - TypeScript or JavaScript?:
TypeScript - Do you want me to run `npm install`?:
Yes
The options above will set up a Remix starter template in a folder named catalog-remix. This application will be a bare bones template configured to use TypeScript and deploy to Vercel.
Enter the new directory and run the dev script to start up the development server:
# /Documents/projects
cd catalog-remix && npm run dev
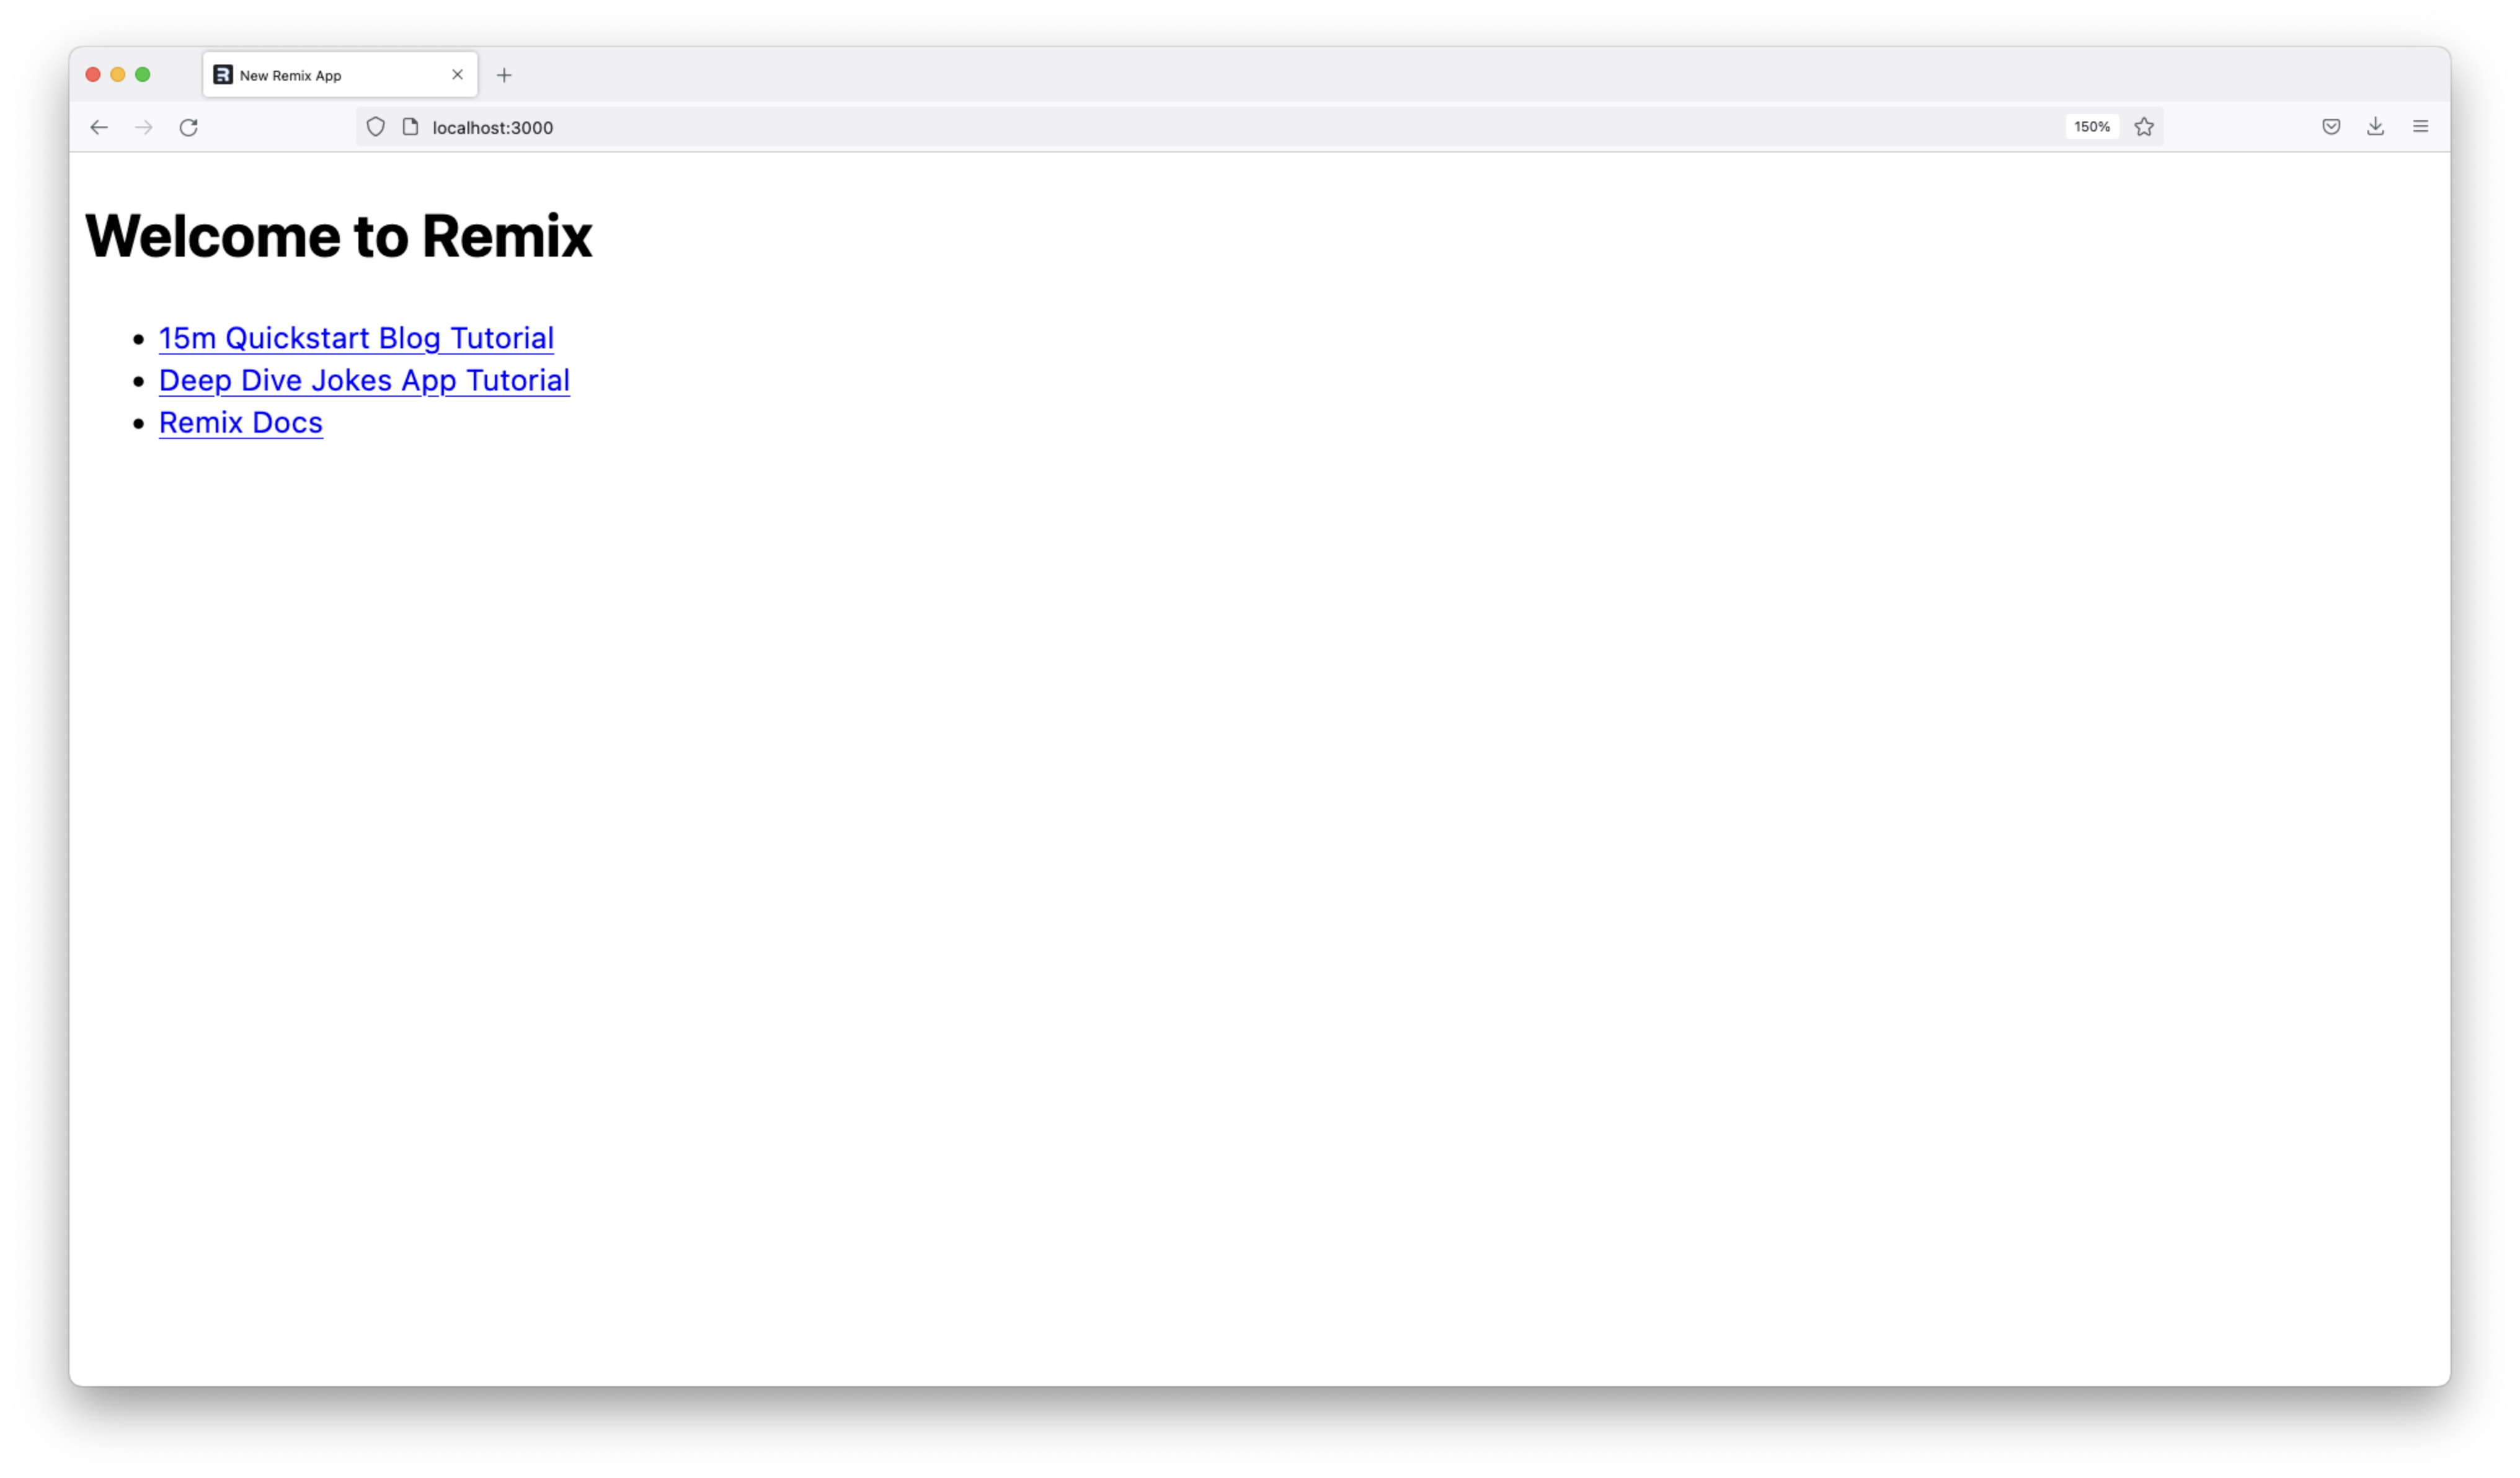
Now, if you open up a web browser and navigate to localhost:3000, you should see the starter page Remix provided!
Set up TailwindCSS
This starter is very basic and is not very visually appealing yet. To style your application, you will use TailwindCSS.
To set up TailwindCSS, you first need to install a few dependencies:
# /Documents/projects/catalog-remix
npm i -D tailwindcss postcss autoprefixer concurrently
These packages provide you the TailwindCSS CLI and PostCSS. You also installed autoprefixer, which is a PostCSS plugin needed to use TailwindCSS. concurrently is a tool that will allow you to run your development server and build your TailwindCSS styles at the same time.
With all of those pieces installed, run the following command to use TailwindCSS CLI to initialize TailwindCSS in your project:
# /Documents/projects/catalog-remix
npx tailwindcss init
This command will generate a new file at the root of your project named tailwind.config.js. This file is where you will configure TailwindCSS.
Open that file and add the following value to the content key's array:
// /Documents/projects/catalog-remix/tailwind.config.js

/** @type {import('tailwindcss').Config} */
module.exports = {
  content: [
    "./app/**/*.{js,ts,jsx,tsx}", // <-- Added this "blob"
  ],
  theme: {
    extend: {},
  },
  plugins: [],
}
What this does is tells TailwindCSS which files in your project will be using its utilities and classes. This helps TailwindCSS decide which of its utilities and classes should be generated into its minified output when a build is run on your project.
The next step is to update your development scripts to include a step to build your CSS when you build or develop your application.
Open up package.json and replace the contents in the scripts section with the following:
// /Documents/projects/catalog-remix/package.json

// ...
"scripts": {
  "build": "npm run build:css && remix build",
  "build:css": "tailwindcss -m -i ./styles/app.css -o app/styles/app.css",
  "dev": "concurrently \"npm run dev:css\" \"remix dev\"",
  "dev:css": "tailwindcss -w -i ./styles/app.css -o app/styles/app.css"
},
// ...
Now when you run npm run dev or npm run build, rather than simple starting up or building your Remix application it will also generate a CSS file based off of the TailwindCSS classes and utilities you are using in your application.
These steps require the existence of TailwindCSS's base "layers", as signified in the -i ./styles/app.css argument of the tailwindcss command. Those layers provide the pieces TailwindCSS uses to provide its styling.
Create a new directory named styles and within that directory create a new file named app.css:
# /Documents/projects/catalog-remix
mkdir styles && touch styles/app.css
Add the following CSS to that file to import TailwindCSS's layers:
/* /Documents/projects/catalog-remix/styles/app.css */

@tailwind base;
@tailwind components;
@tailwind utilities;
The new steps that build your CSS file will output your CSS into a file at app/styles/app.css. In order to actually use those generated styles, however, you will need to import that file into your application.
In app/root.tsx, add the following to import those styles and use them in your application:
// /Documents/projects/catalog-remix/app/root.tsx

import type {
  MetaFunction,
  LinksFunction // <-- Added the LinksFunction type
} from "@remix-run/node";

// ... other imports

import styles from "./styles/app.css"

export const links: LinksFunction = () => {
  return [{ rel: "stylesheet", href: styles }]
}

//  ...
Now TailwindCSS is configured and ready to use in your application!
To verify everything is working correctly, replace the contents of app/routes/index.tsx with the following code:
// /Documents/projects/catalog-remix/app/routes/index.tsx

export default function Index() {
  return (
    <div className="h-screen w-full p-4 font-mono">
      <div className="rounded-xl p-6 bg-gray-100 border-4 border-gray-600">
        <h2 className="font-bold text-4xl text-gray-600">Book Catalog</h2>
      </div>
    </div>
  );
}
If you run npm run dev and head back to localhost:3000, you should see a page similar to the following:
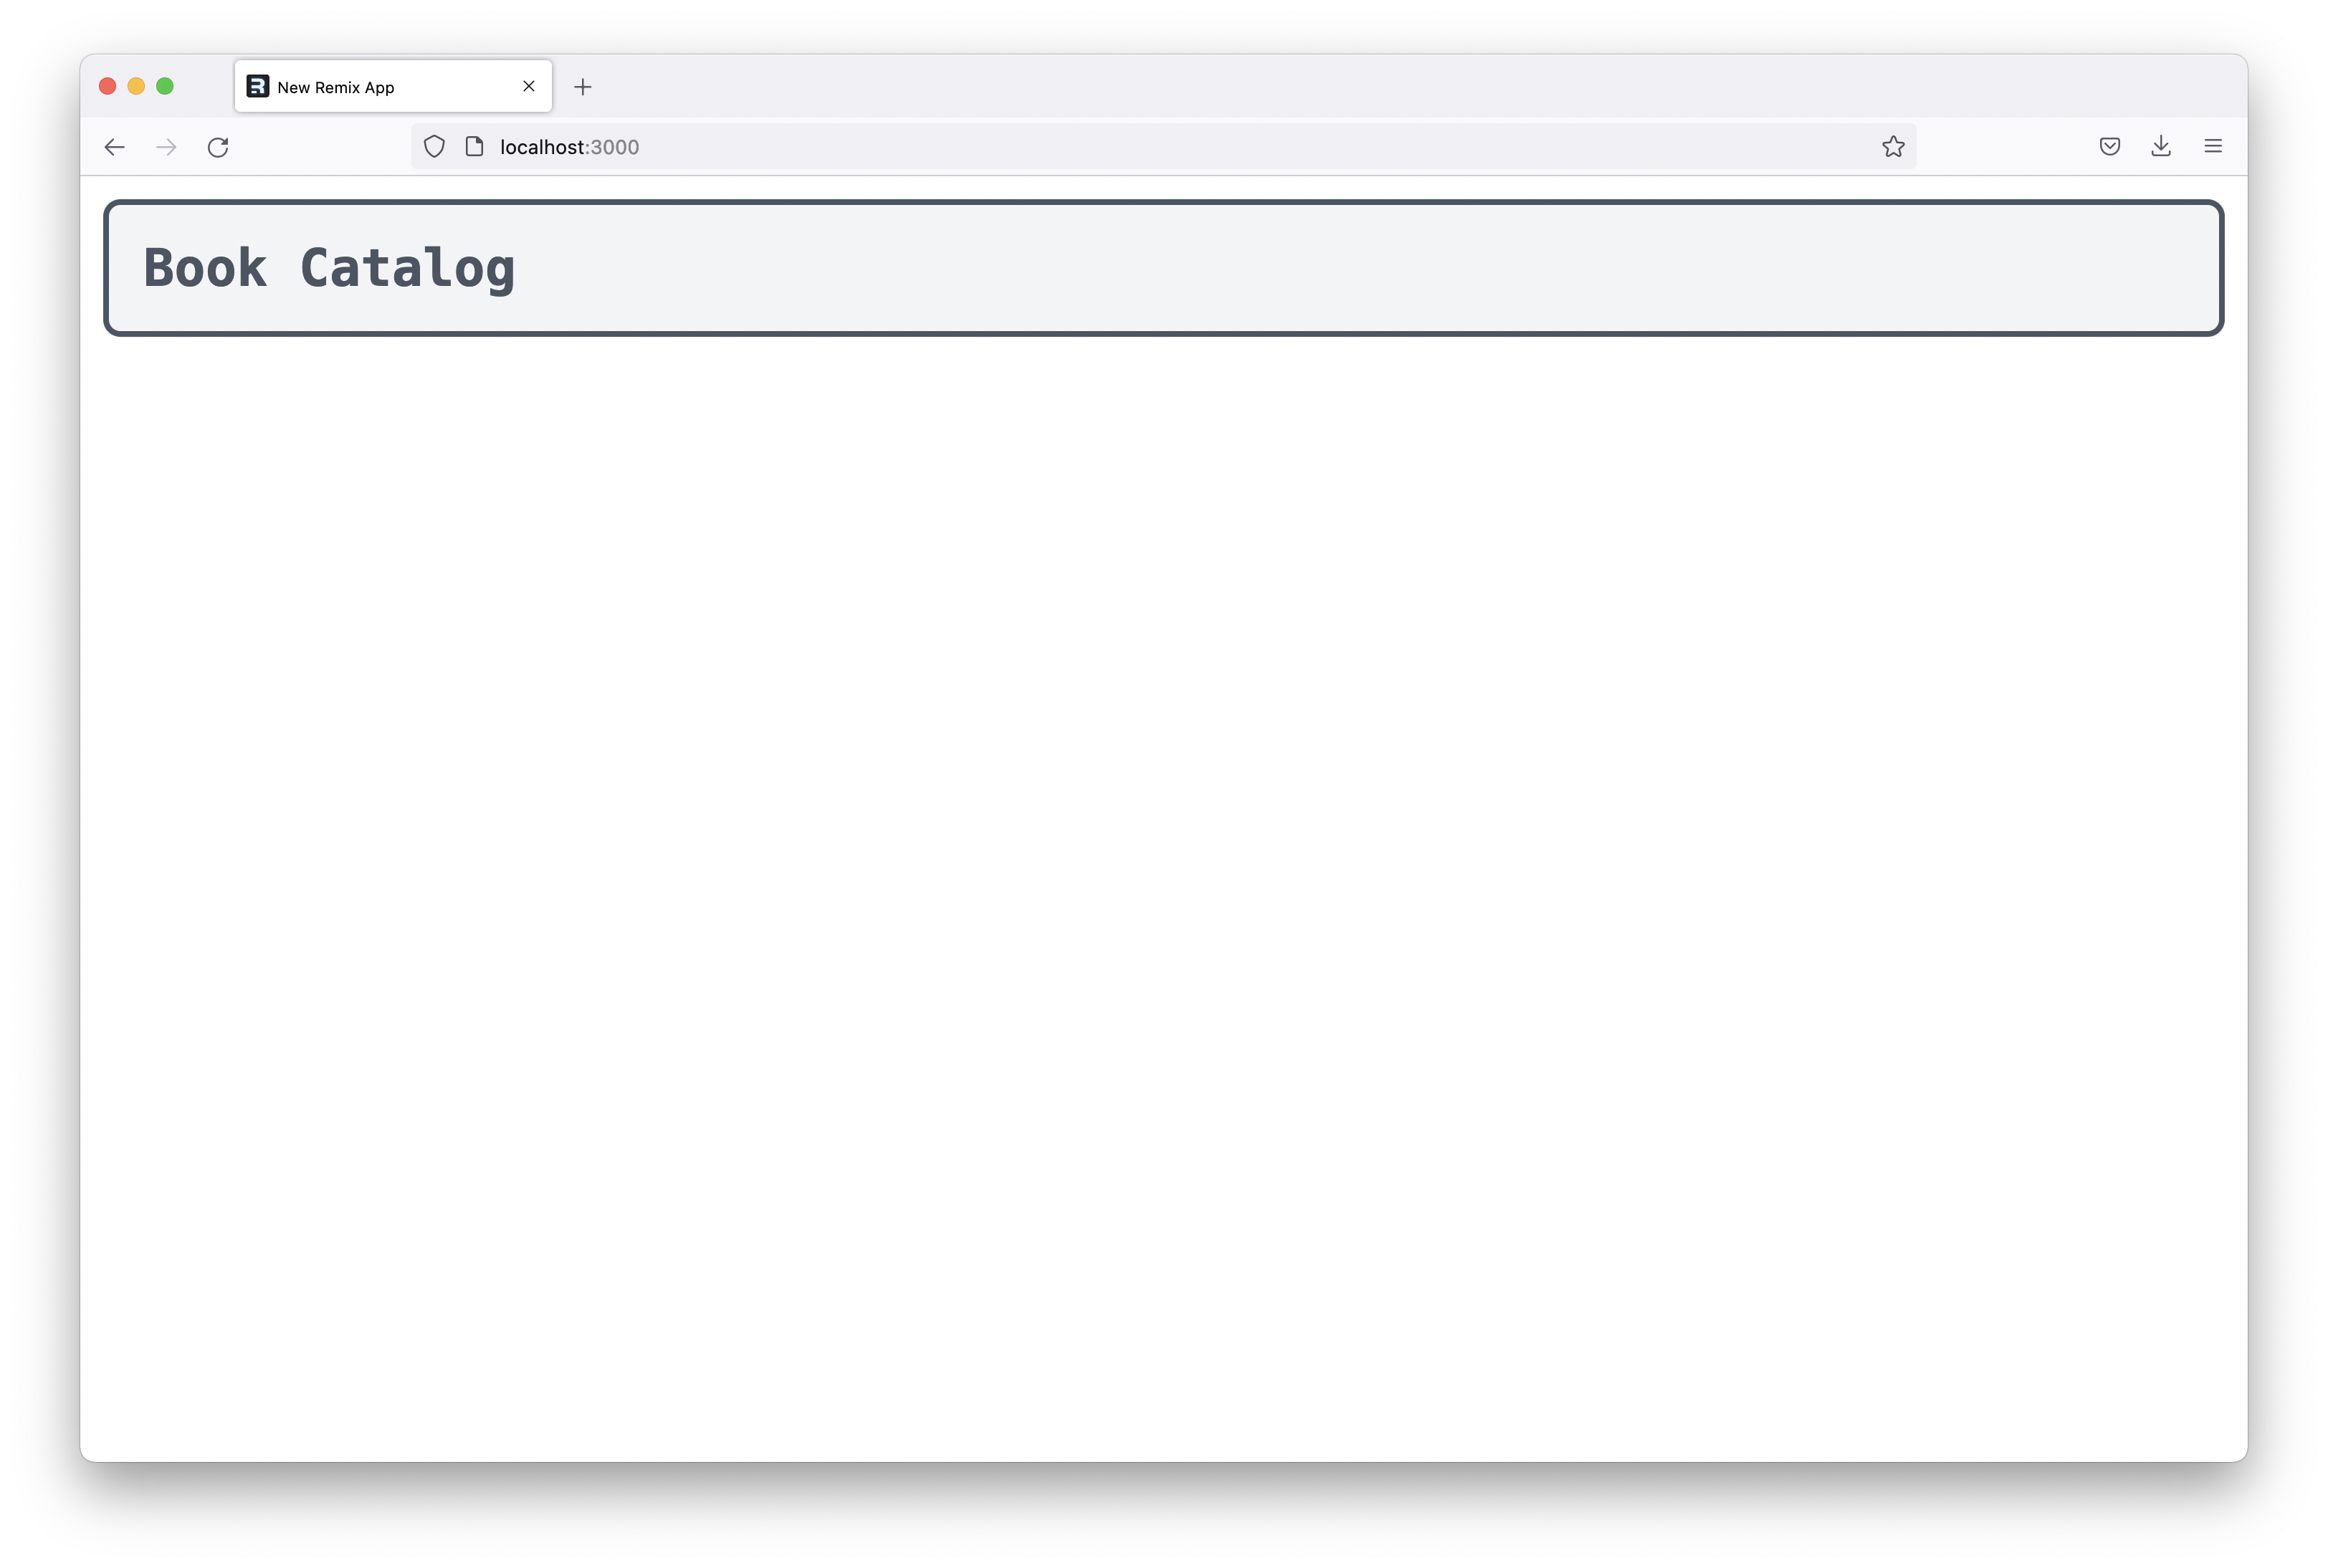
If you get a page similar to this one, TailwindCSS is set up and working!
Build a Book component
Now, you need a component that will display each book in your catalog.
Create a new folder in the app directory named components. Then create a file within that folder named Book.tsx:
# /Documents/projects/catalog-remix
mkdir app/components
touch app/components/Book.tsx
Paste the following function into that file:
// /Documents/projects/catalog-remix/app/components/Book.tsx

export default function Book() {
    return (
        <a href="/" className="m-2 rounded-xl p-6 border-4 border-gray-600 transition hover:-translate-y-1">
            <h2 className="font-bold text-2xl text-gray-600">How To: DevRel</h2>
            <p className="text-xs text-gray-400">by Sabin Adams</p>
            <p className="text-gray-500 mt-2 text-md">
                This book walks the reader through the ins and outs of working in the DevRel space.
            </p>
        </a>
    );
}
This function simply returns some JSX, which will render a dummy Book onto the page. The data in this component is static for now, however in the next section you will populate this component with your book data from the Sanity API.
Over in app/routes/index.tsx, import that new component and render it within a grid a couple of times to populate your screen with a set of dummy books:
// /Documents/projects/catalog-remix/app/routes/index.tsx

import Book from '../components/Book' // <-- Imported the `Book` component

export default function Index() {
  return (
    <div className="h-screen w-full p-4 font-mono">
      <div className="rounded-xl p-6 bg-gray-100 border-4 border-gray-600">
        <h2 className="font-bold text-4xl text-gray-600">Book Catalog</h2>
      </div>
      {/*  Renders 6 Books within a grid 👇🏻 */}
      <div className="grid grid-cols-3 p-12">
        <Book /><Book /><Book /><Book /><Book /><Book />
      </div>
    </div>
  );
}
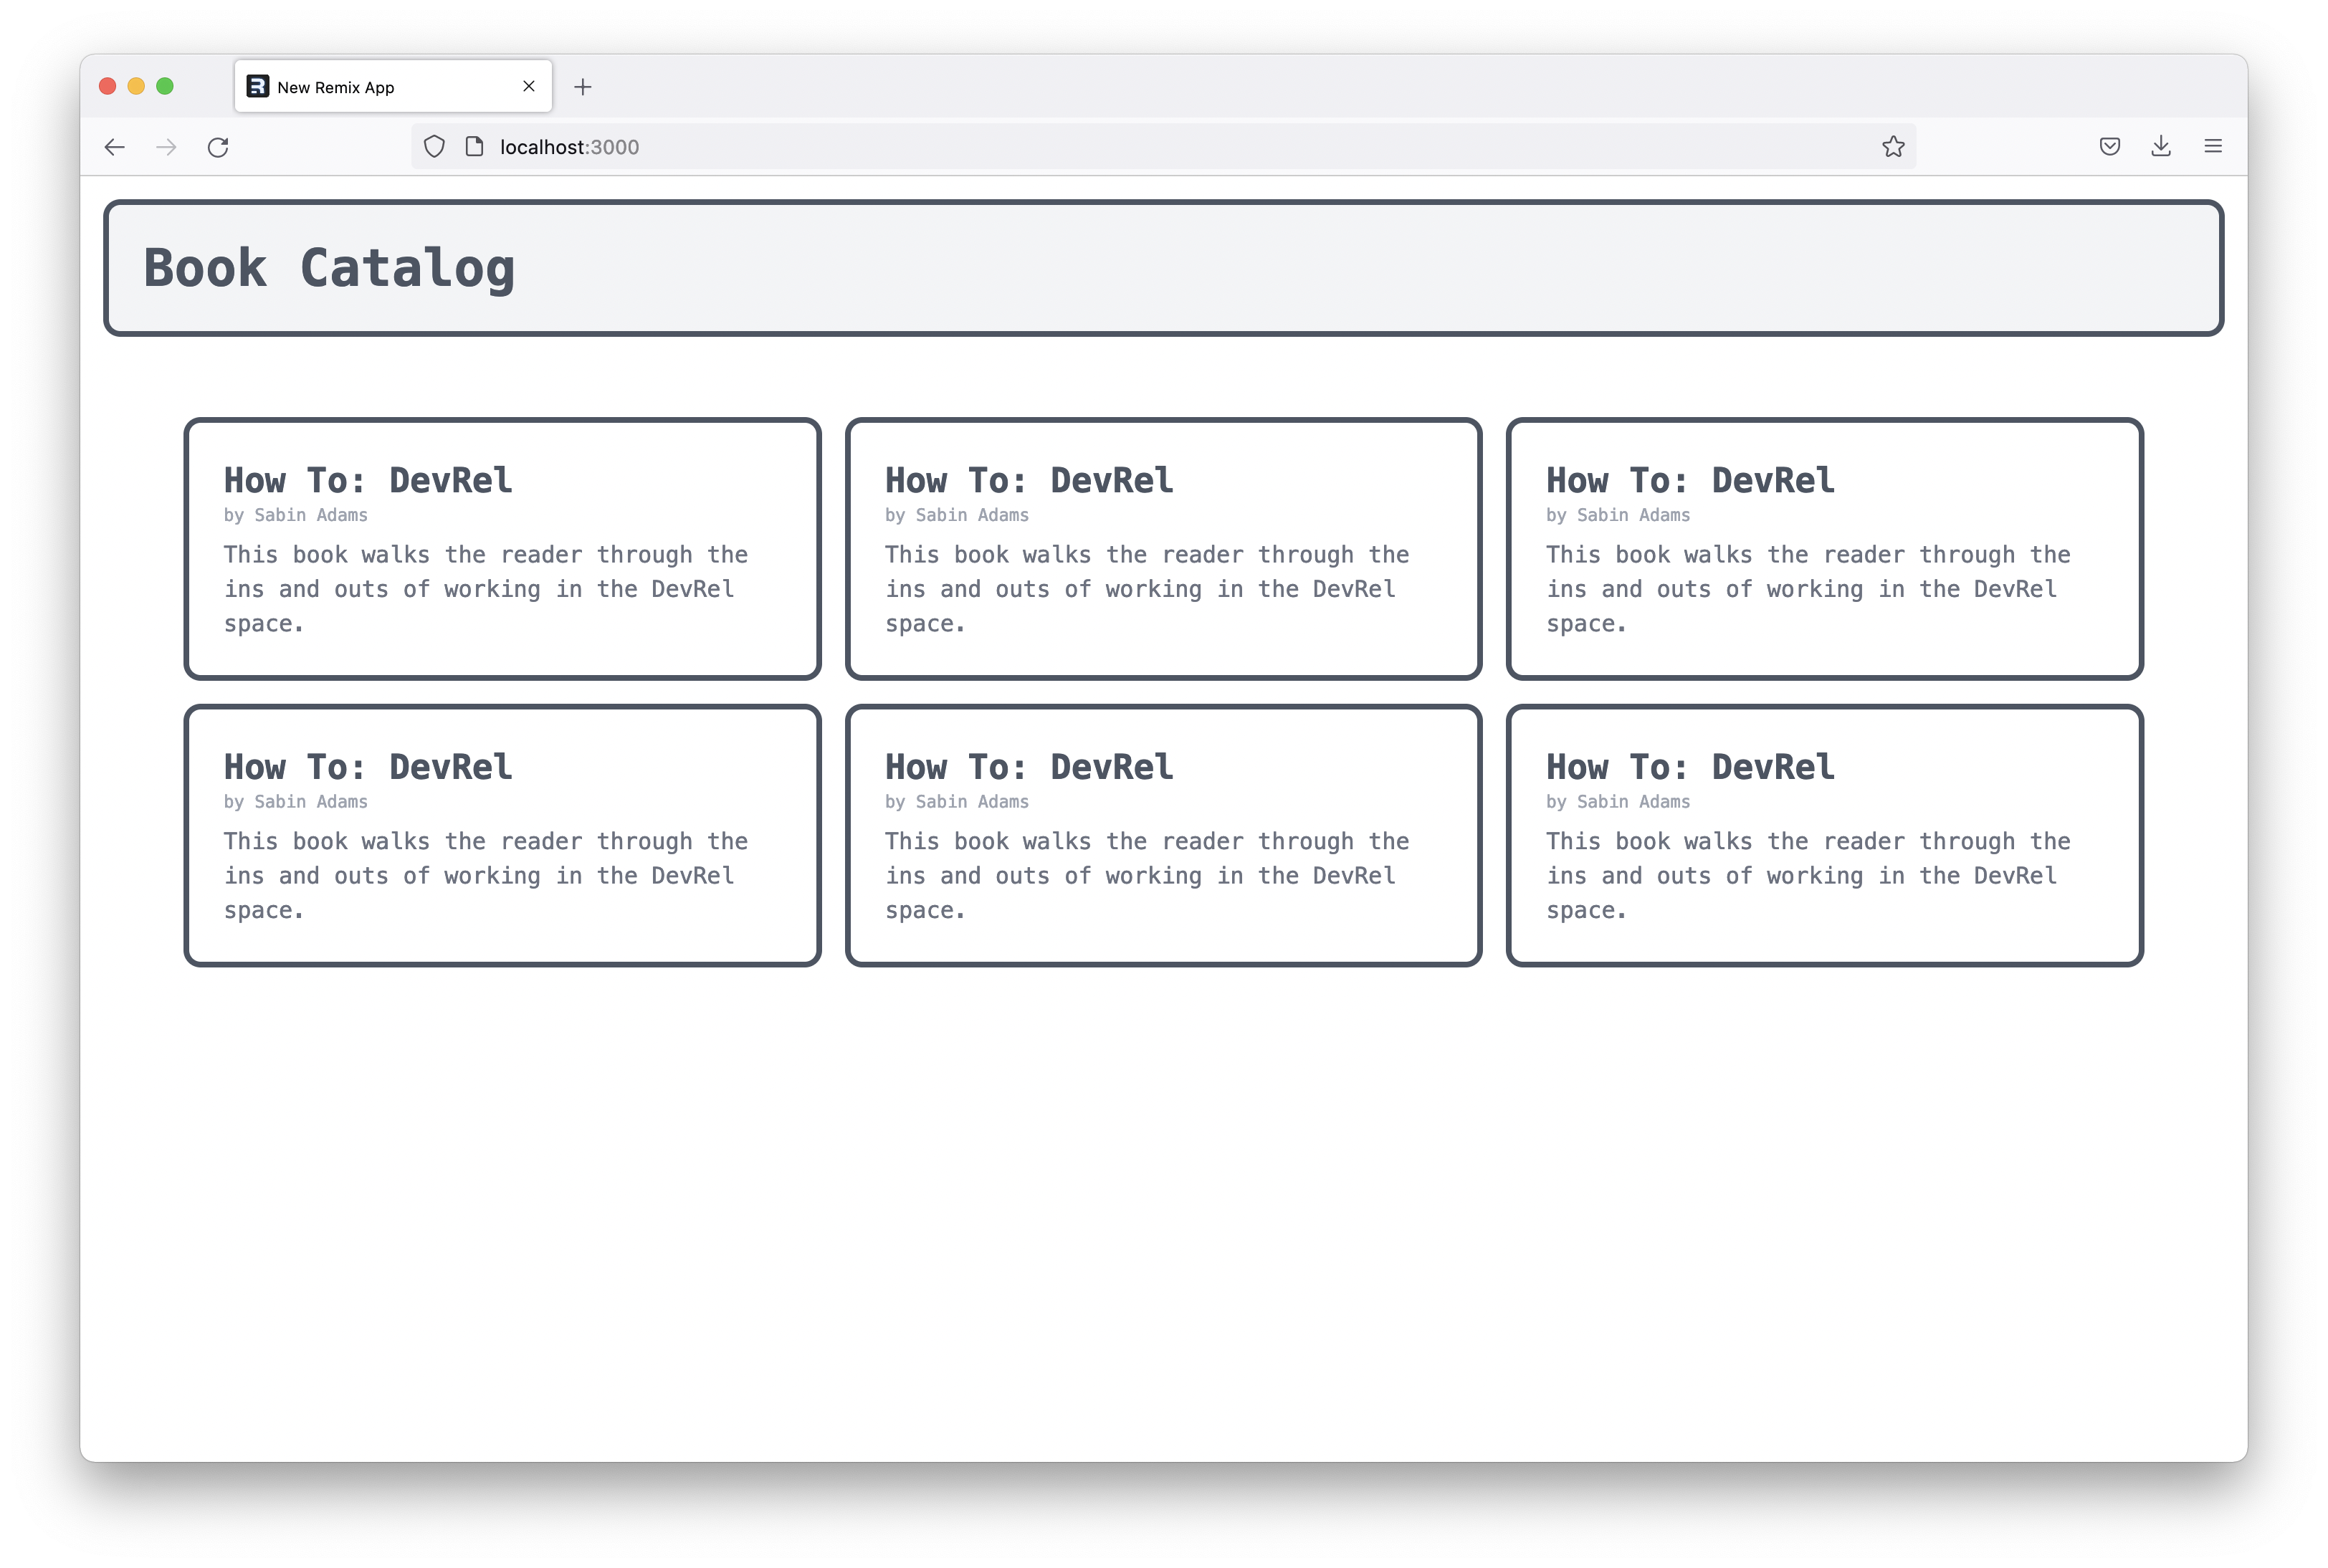
Back over in your browser, you should now see your set of books rendered in a stylized grid:
Get your data from Sanity.io
At this point you have Sanity set up to manage your content, and a Remix application ready to render some live data.
You will now use Sanity's GraphQL API to fetch your content and render it into the browser.
To do this, you will make use of a tool called GraphQL Codegen to generate TypeScript types based on the GraphQL schema Sanity provides. You will then use graphql-request to actually fetch the data.
Set up GraphQL Codegen
First, you will set up GraphQL Codegen to generate TypeScript types based off of your GraphQL schema. It will also generate types based on the queries you write that represent the data you actually query for.
To get started, install these packages in your Remix application:
# /Documents/projects/catalog-remix
npm i -D graphql @graphql-codegen/cli @graphql-codegen/typed-document-node @graphql-codegen/typescript @graphql-codegen/typescript-operations
These give you access to the GraphQL Codegen CLI and all of the plugins you need to generate the types representing your GraphQL schema and queries. In order to generate these types, you first need to configure GraphQL Codegen.
Create a new file at the root of your Remix project named codegen.yml with the following contents:
# /Documents/projects/catalog-remix/codegen.yml

generates:
  ./app/models/sanity-generated.ts:
    schema: <placeholder>
    documents: <placeholder>
    plugins:
      - typescript
      - typescript-operations
      - typed-document-node
This configuration lets GraphQL Codegen know to generate a file at app/models/sanity-generated.ts with all of the types you need.
There are three different configurations provided for this generated file:
- schema: The URL of your GraphQL API
- documents: Tells the CLI which files in your project have GraphQL queries
- plugins: Lets the CLI know which plugins to use to generate types
Currently, the schema and documents fields have dummy data in them. You will need to populate these.
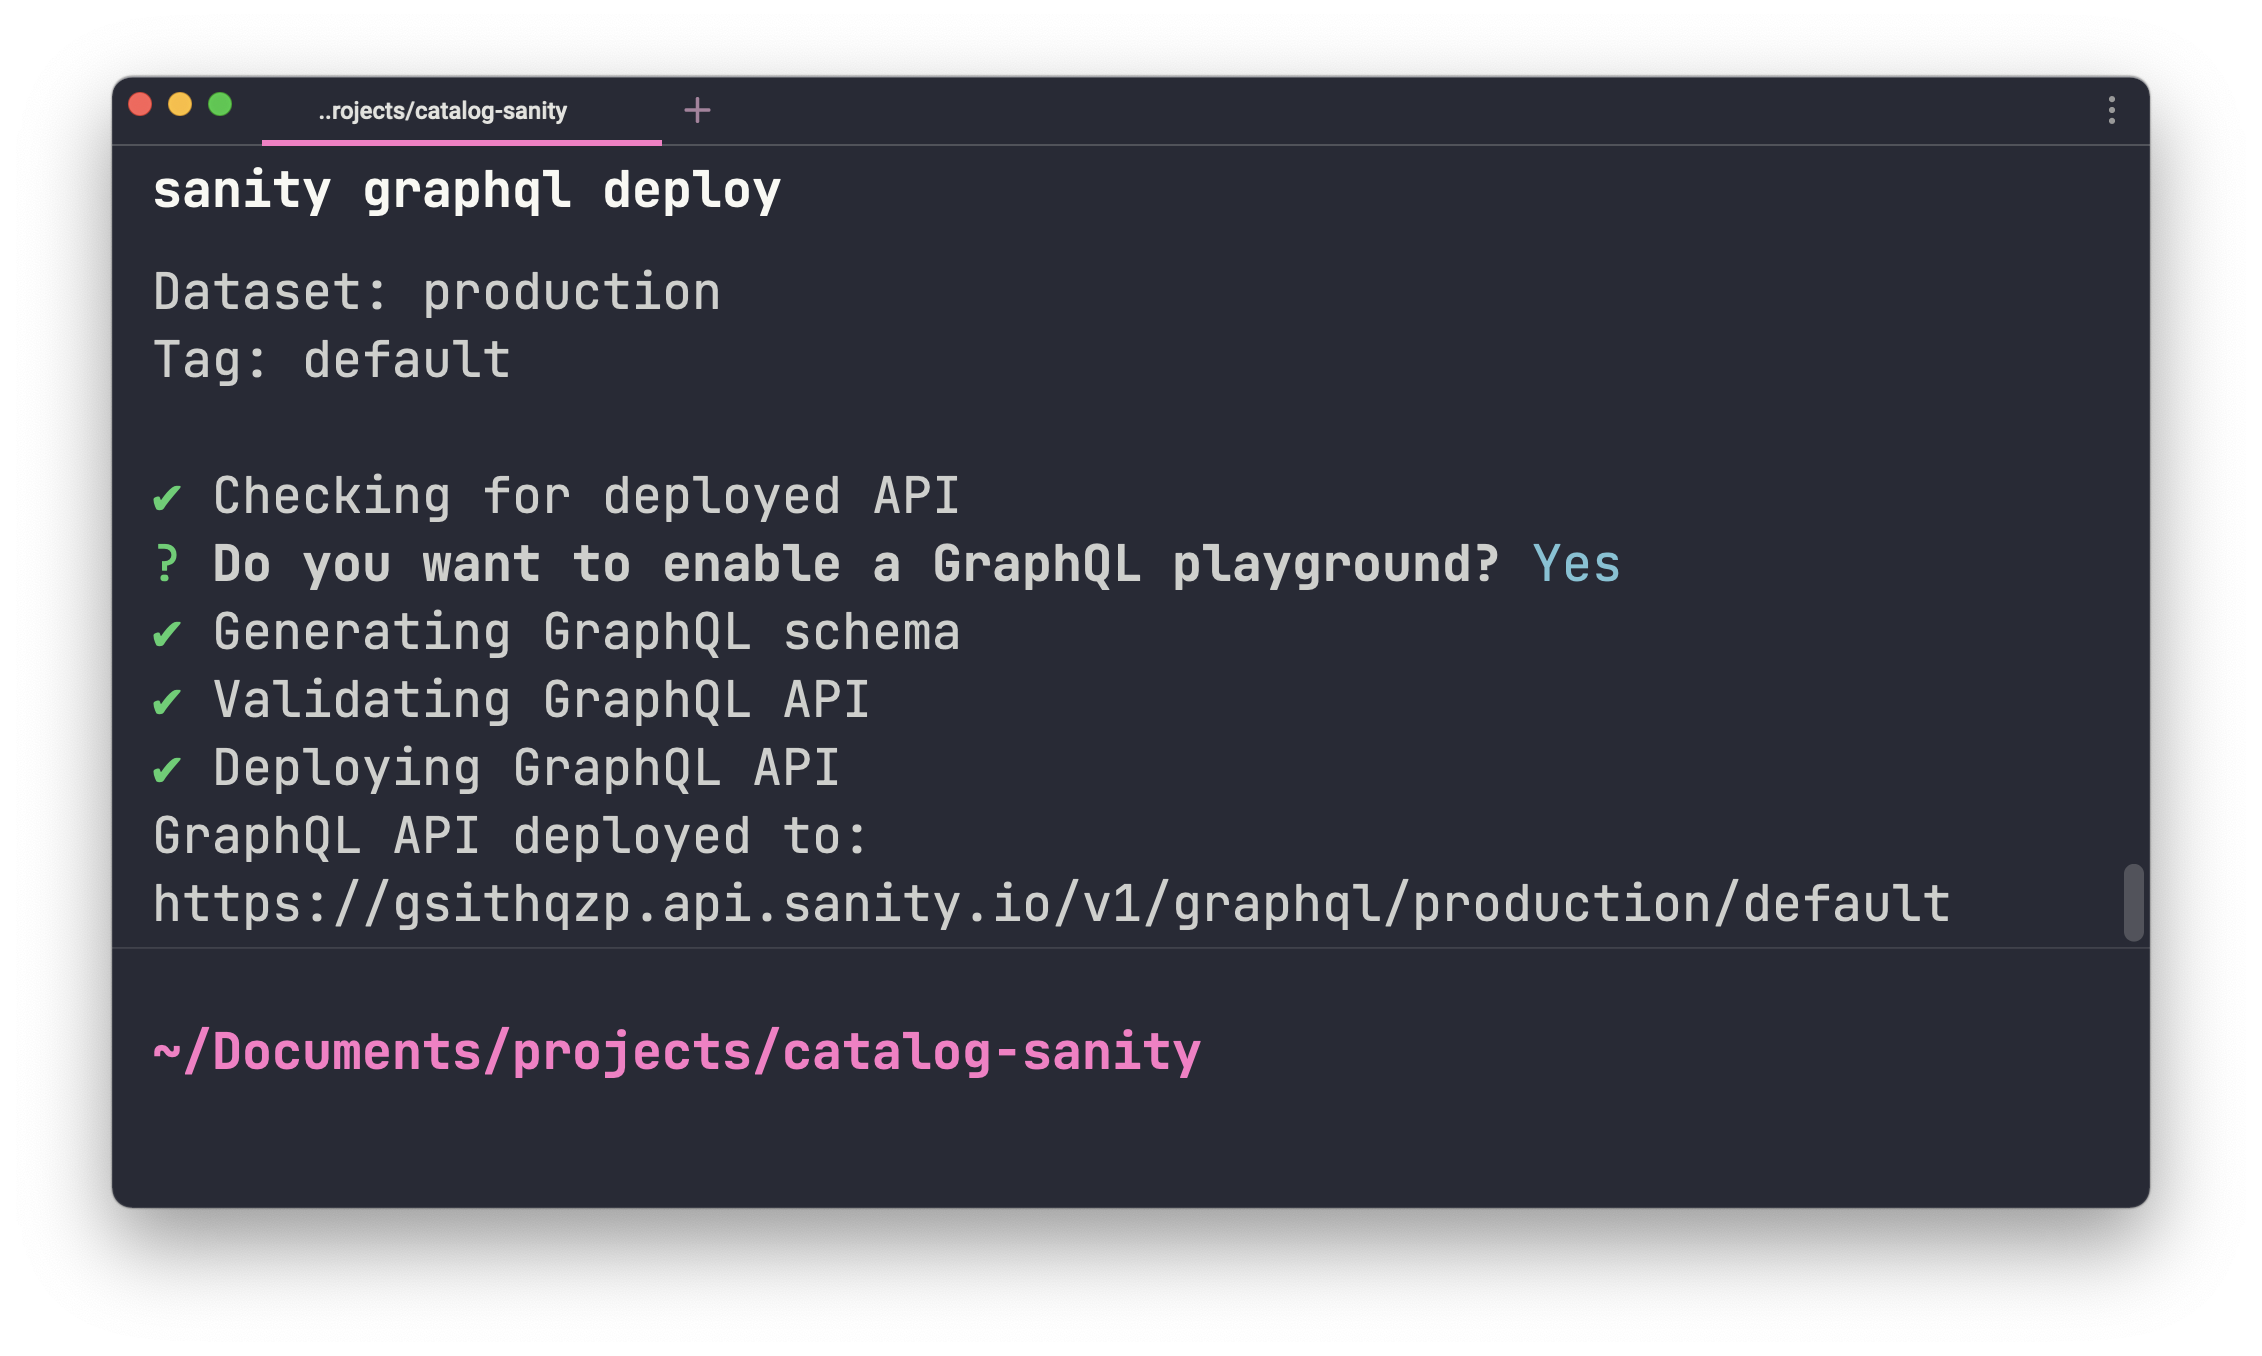
To populate schema, you first need to deploy your Sanity project's GraphQL API. To do so, navigate to the Sanity project's folder and run the following command:
# /Documents/projects/catalog-sanity
sanity graphql deploy
After running this command, the URL to your GraphQL API will be outputted into the terminal. Copy that URL:
Then, paste that value into the codegen.yml file's schema field:
# /Documents/projects/catalog-remix/codegen.yml

generates:
  ./app/models/sanity-generated.ts:
    schema: # paste the API URL here #
    documents: <placeholder>
    plugins:
      - typescript
      - typescript-operations
      - typed-document-node
The next piece you will need to fill in is the documents key. You will write all of your queries in a file at app/graphql. Create that directory and add a file named books.query.gql:
# /Documents/projects/catalog-remix
mkdir app/graphql
touch app/graphql/books.query.gql
Then paste the file path ./app/graphql/**/*.ts into the documents field in the codegen.yml file:
# /Documents/projects/catalog-remix/codegen.yml

generates:
  ./app/models/sanity-generated.ts:
    schema: <hidden>
    documents: # paste the file path here #
    plugins:
      - typescript
      - typescript-operations
      - typed-document-node
GraphQL Codegen is now configured to ready all queries from .ts files within the app/graphql folder, but you need a way to actually generate the types.
In package.json, add the following script to the scripts field:
// /Documents/projects/catalog-remix/package.json

// ...
"scripts": {
  // ...
  "codegen": "npx graphql-codegen"
}
// ...
At this point, you are ready to generate types based off of your queries and the GraphQL Schema! There is only one problem... you don't have any queries yet!
You will use graphql-request and its helpers to write your GraphQL queries and fetch the data from Sanity's GraphQL API.
Install the graphql-request library:
# /Documents/projects/catalog-remix
npm i graphql-request
Then, in app/graphql/books.query.ts, add the following GraphQL query to fetch your book data:
// /Documents/projects/catalog-remix/app/graphql/books.query.ts

import { gql } from "graphql-request";

export default gql`
  query GetBooks {
    allBook {
      _id
      title
      author
      description
    }
  }
`;
Note: If you'd like to see all of the data available from the GraphQL API, check out the GraphQL playground by going to your GraphQL API's URL in your web browser.
Now that you have a query written, run the following command to generate your types:
# /Documents/projects/catalog-remix
npm run codegen
You should see a new app/models directory with a file named sanity-generated.ts inside of it. This file contains your TypeScript types!
Query Sanity's GraphQL API
You now have TypeScript types to represent the data you expect to retrieve from the Sanity API. At this point, you can write the queries for your data.
Create a new directory named services within the app directory and create a file within that directory named sanity.service.ts:
# /Documents/projects/catalog-remix
mkdir app/services
touch app/services/sanity.service.ts
This is where you will write the function that will fetch the data.
Add the following code to create a function that fetches the API for your books and properly types the response:
// /Documents/projects/catalog-remix/app/services/sanity.service.ts

import { GraphQLClient } from "graphql-request";
import type { GetBooksQuery } from "../models/sanity-generated";
import BookQuery from "../graphql/books.query";

export async function getBooks() {
  const graphcms = new GraphQLClient(process.env.SANITY_API_URL || "");
  const { allBook } = await graphcms.request<GetBooksQuery>(BookQuery);
  return allBook;
}
The code above assumes you have an environment variable named SANITY_API_URL that contains the URL of the GraphQL API.
Create a file named .env at the root of your project:
# /Documents/projects/catalog-remix
touch .env
Then add the following contents to that file:
# /Documents/projects/catalog-remix/.env

SANITY_API_URL=<your_api_url>
# Example: SANITY_API_URL=https://gsithqzp.api.sanity.io/v1/graphql/production/default
Now that your getBooks function is ready and your environment has the correct API URL available you are ready to run your query.
Within Remix, you have the ability to create a "loader" function that, when deployed, is treated as a serverless function and is deployed separately from the client-side code.
In app/routes/index.ts, create a loader function that simply fetches your books and returns them.
// /Documents/projects/catalog-remix/app/routes/index.ts

import Book from '../components/Book'
import type { LoaderFunction } from '@remix-run/node';
import { getBooks } from '../services/sanity.service'


export const loader: LoaderFunction = async () => {
  const books = await getBooks()
  return { books }
}
// ...
Then, import the useLoaderData hook Remix provides and use it to capture the results of your loader function. Be sure to type the variable using the useLoaderData function's generic:
// /Documents/projects/catalog-remix/app/routes/index.ts

// ...

export default function Index() {
  const { books } = useLoaderData<{
    books: GetBooksQuery['allBook'][0][]
  }>()

  return (/* JSX */);
}
You are now querying your data and accessing that data from your application. The data from your API In the next section, you will fix up your Book component so that it will render the actual book data and render one for each book in the API response.
Render your Book data
Head back over to app/components/Book.tsx and import the GetBooksQuery type. Use that type to define a book prop on the Book component:
// /Documents/projects/catalog-remix/app/components/Book.tsx

import type { GetBooksQuery } from "../models/sanity-generated";

export default function Book({ book }: { book: GetBooksQuery['allBook'][0] }) {
  // Component code
}
The code above sets up a book property on the component whose type matches the type of a single book from your API response.
You can now use that property to render your book data into the component. Update the JSX in that component to use the book's data:
// /Documents/projects/catalog-remix/app/components/Book.tsx

import type { GetBooksQuery } from "../models/sanity-generated";

export default function Book({ book }: { book: GetBooksQuery['allBook'][0] }) {
    return (
        <a href="/" className="m-2 rounded-xl p-6 border-4 border-gray-600 transition hover:-translate-y-1">
            <h2 className="font-bold text-2xl text-gray-600">{ book.title }</h2>
            <p className="text-xs text-gray-400">{ book.author }</p>
            <p className="text-gray-500 mt-2 text-md">{ book.description }</p>
        </a>
    );
}
Finally, head back to app/routes/index.ts and render one Book component for each book in your books variable:
// /Documents/projects/catalog-remix/app/routes/index.ts

// ...

export default function Index() {
  const { books } = useLoaderData<{ books: GetBooksQuery['allBook'][0][] }>()

  return (
    <div className="h-screen w-full p-4 font-mono">
      {/* ... */}
      <div className="grid grid-cols-3 p-12">
        {/* Render the books here 👇🏻 */}
        {books.map(book => <Book book={book} key={book._id} />)}
      </div>
    </div>
  );
}
Back over in your browser, you should now see a list of your actual data rendered out onto the page!
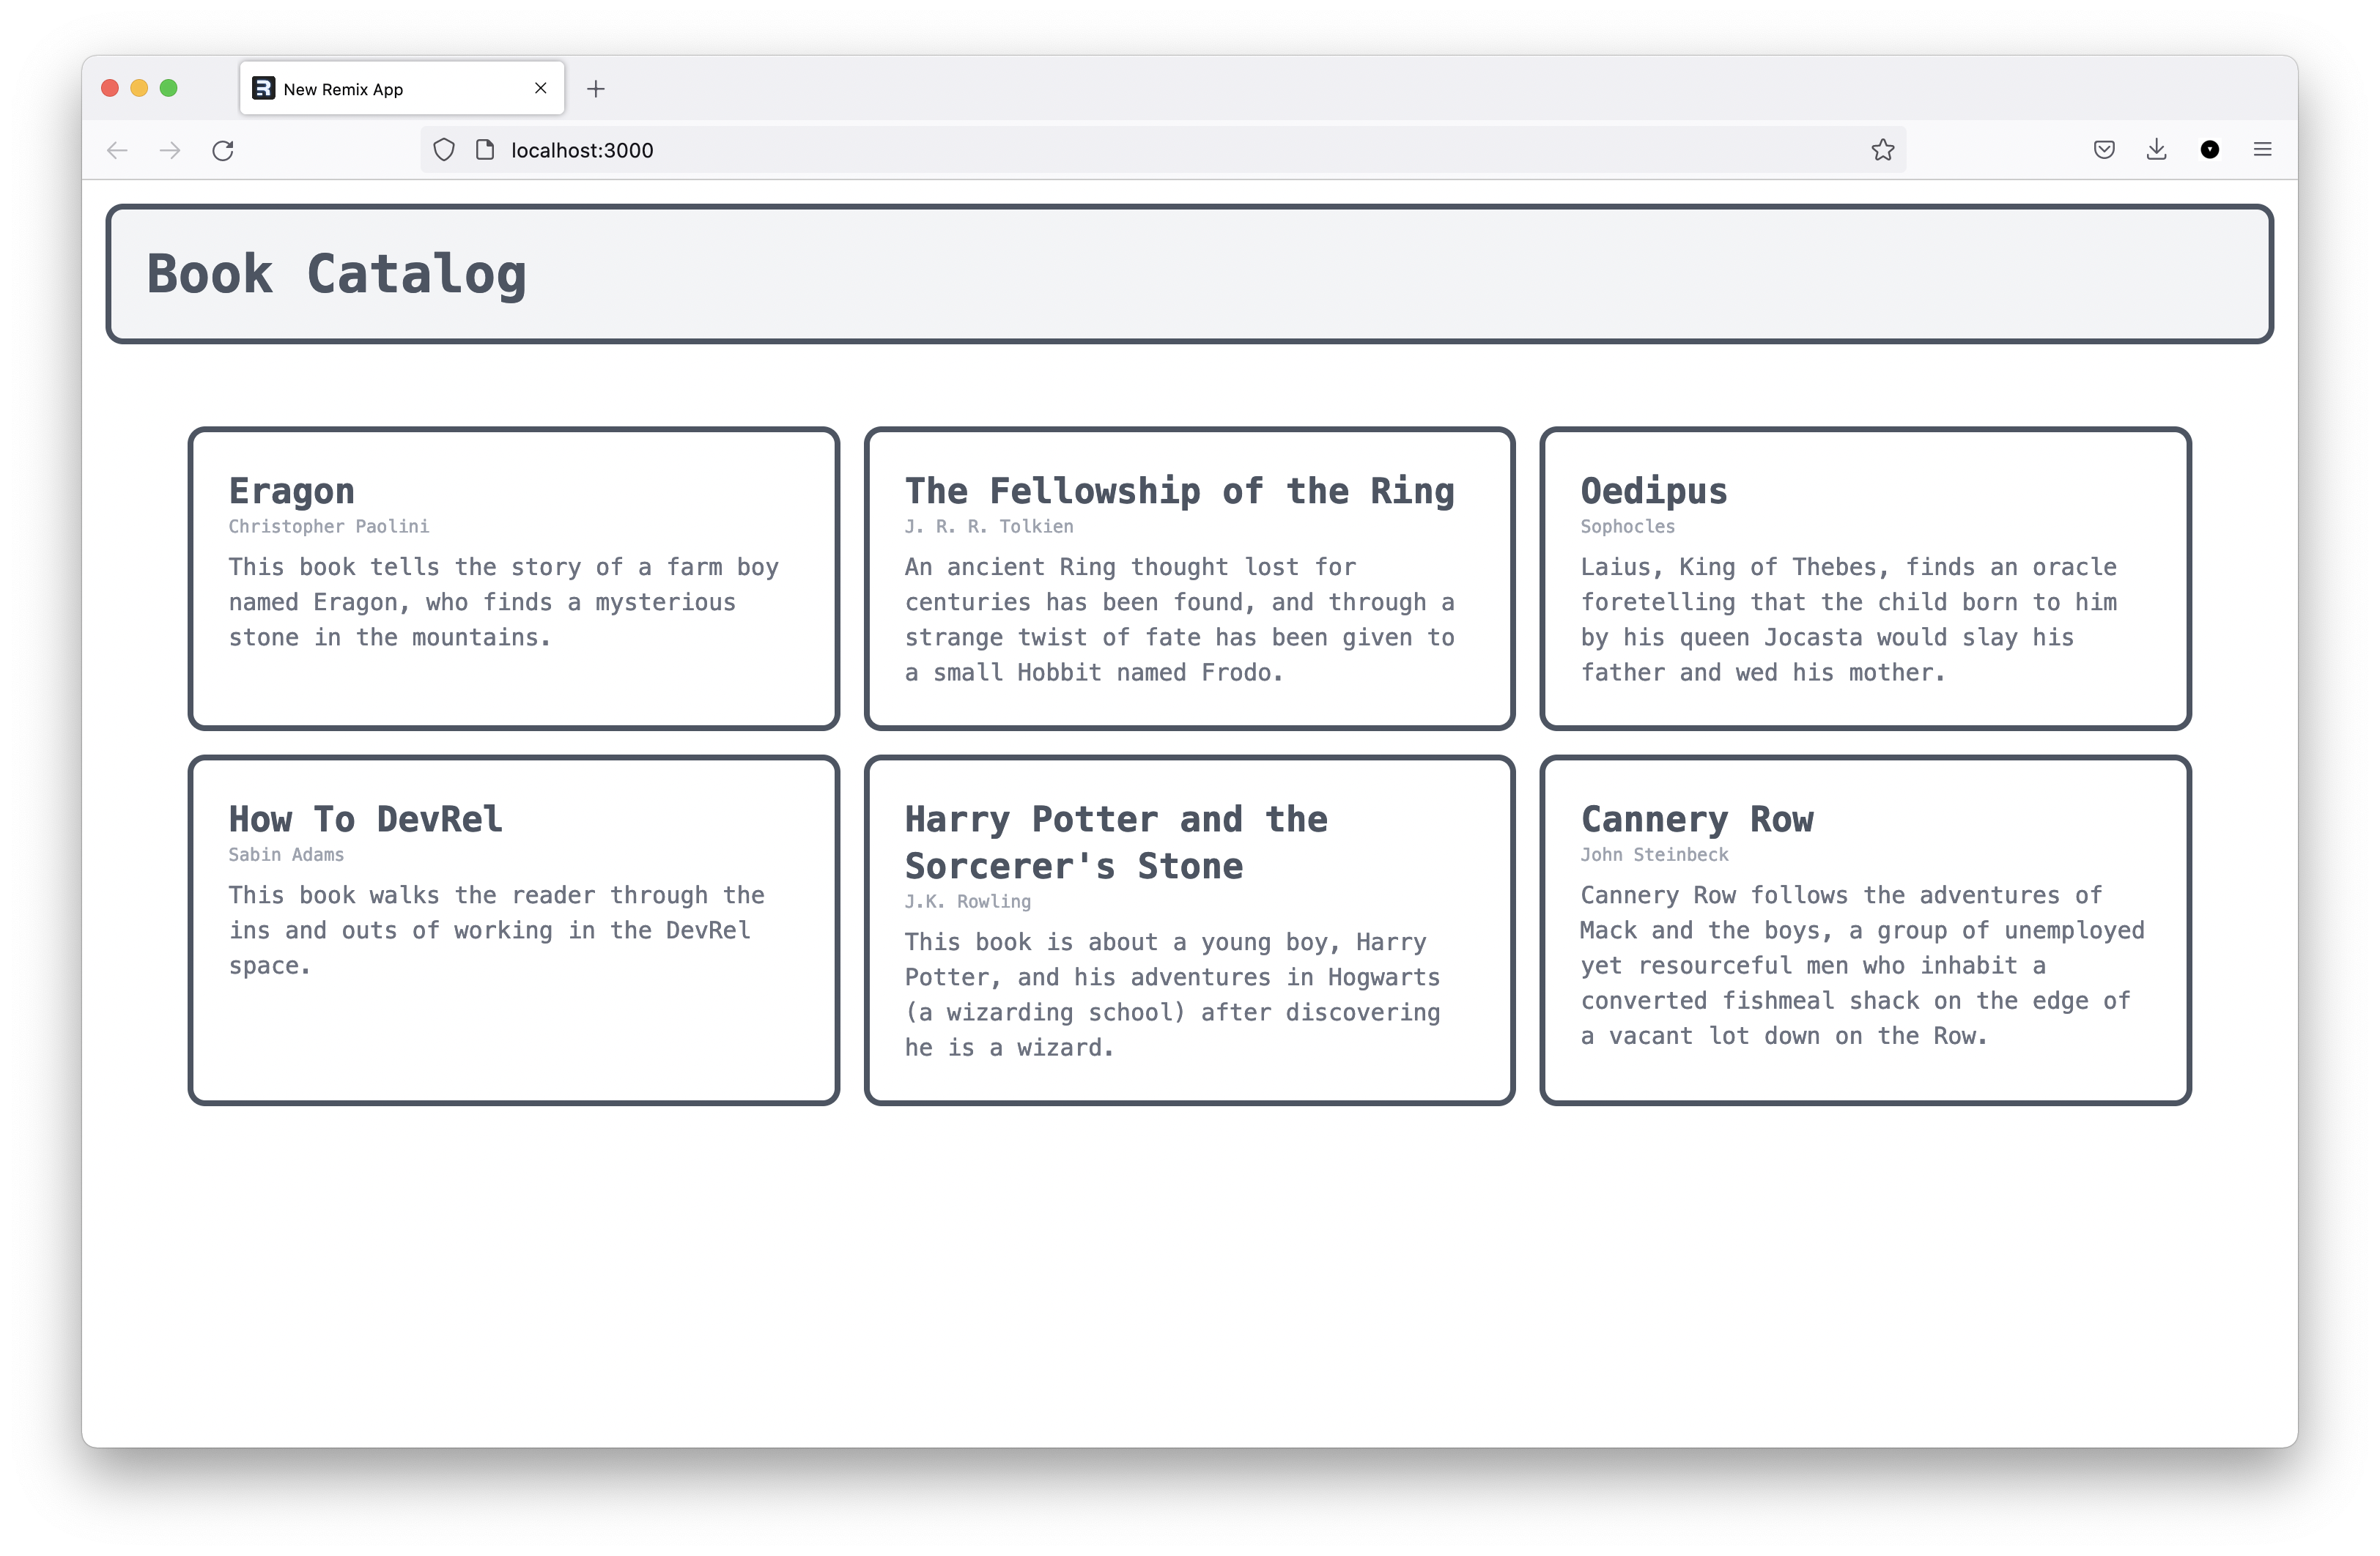
At this point your application is complete! Sanity is managing all of the data for your book catalog, which you are rendering via your Remix application 🎉
This is something to share with the world! In the next section, you will wrap things up by deploying your application.
Deploy your applications
In order to deploy this application, you will need to host both projects on GitHub. You will also deploy the Sanity project so you can access your Sanity Studio at any time via the web browser.
Push both projects to GitHub
Note: If you do not have a GitHub account, you can create one for free here.
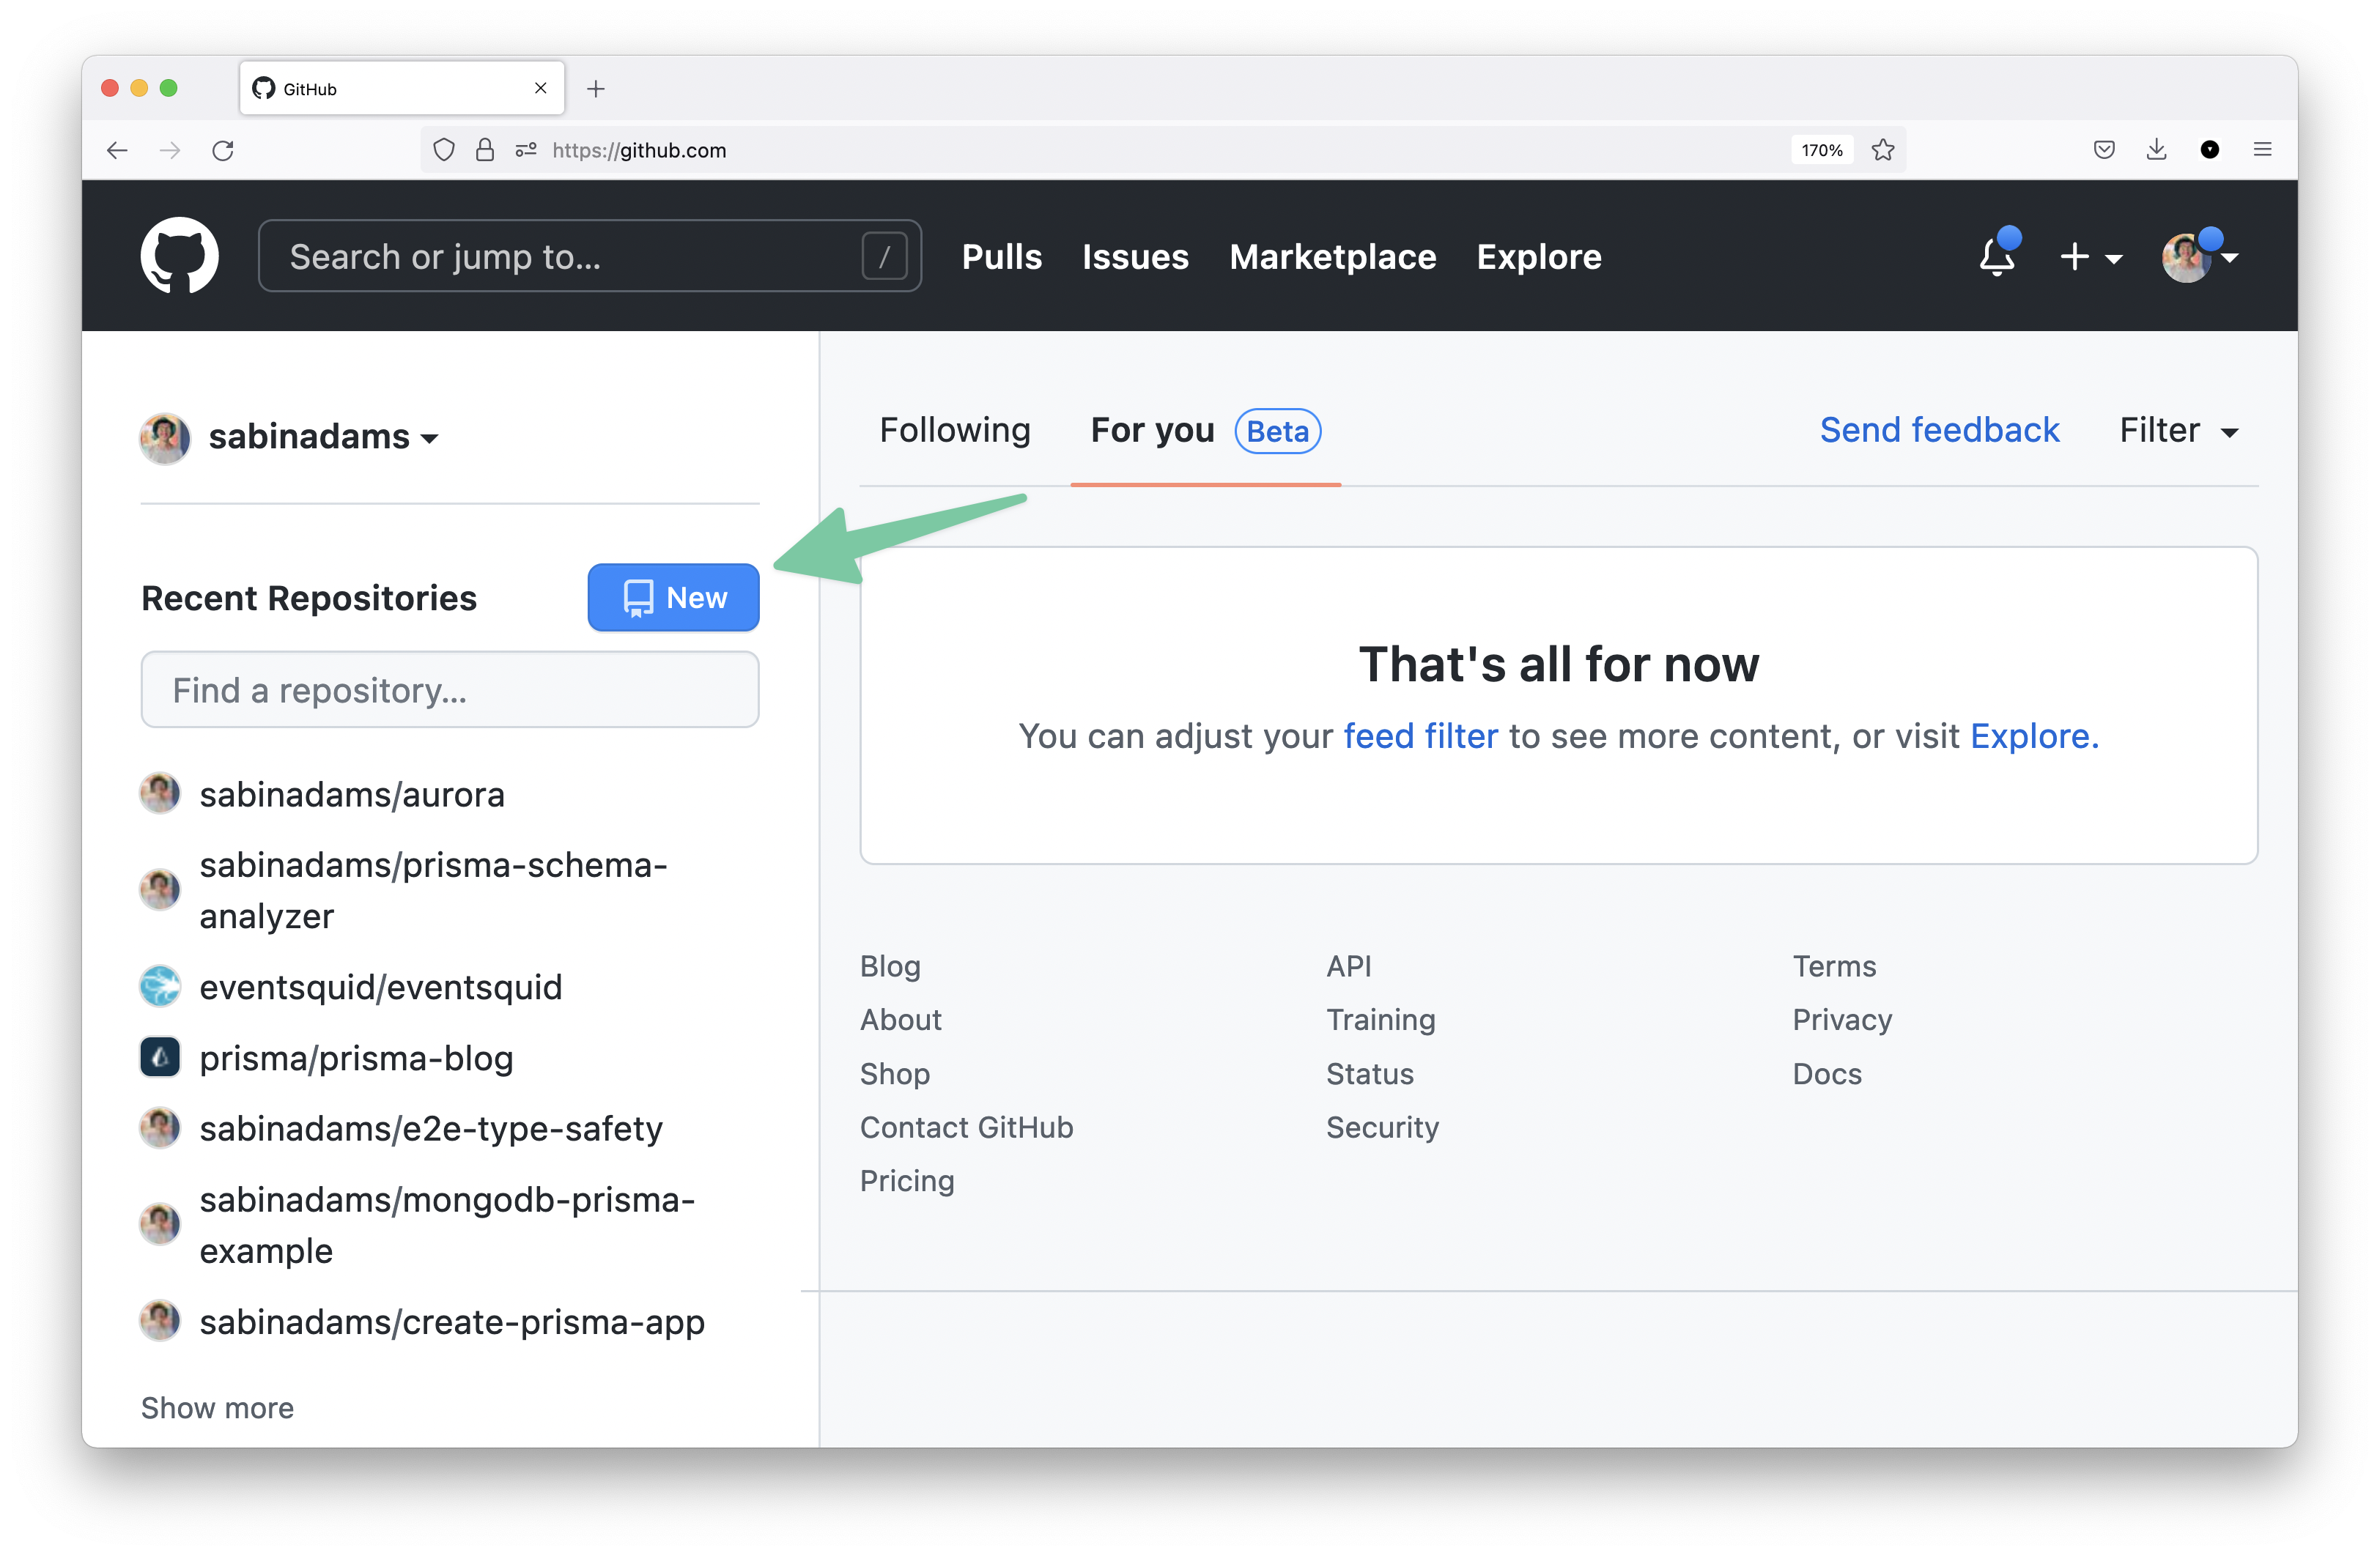
To host your Remix applicaiton on GitHub, you first need to create a new GitHub repository that will hold your code. Head over to the GitHub dashboard and hit the New button to create a new repository:
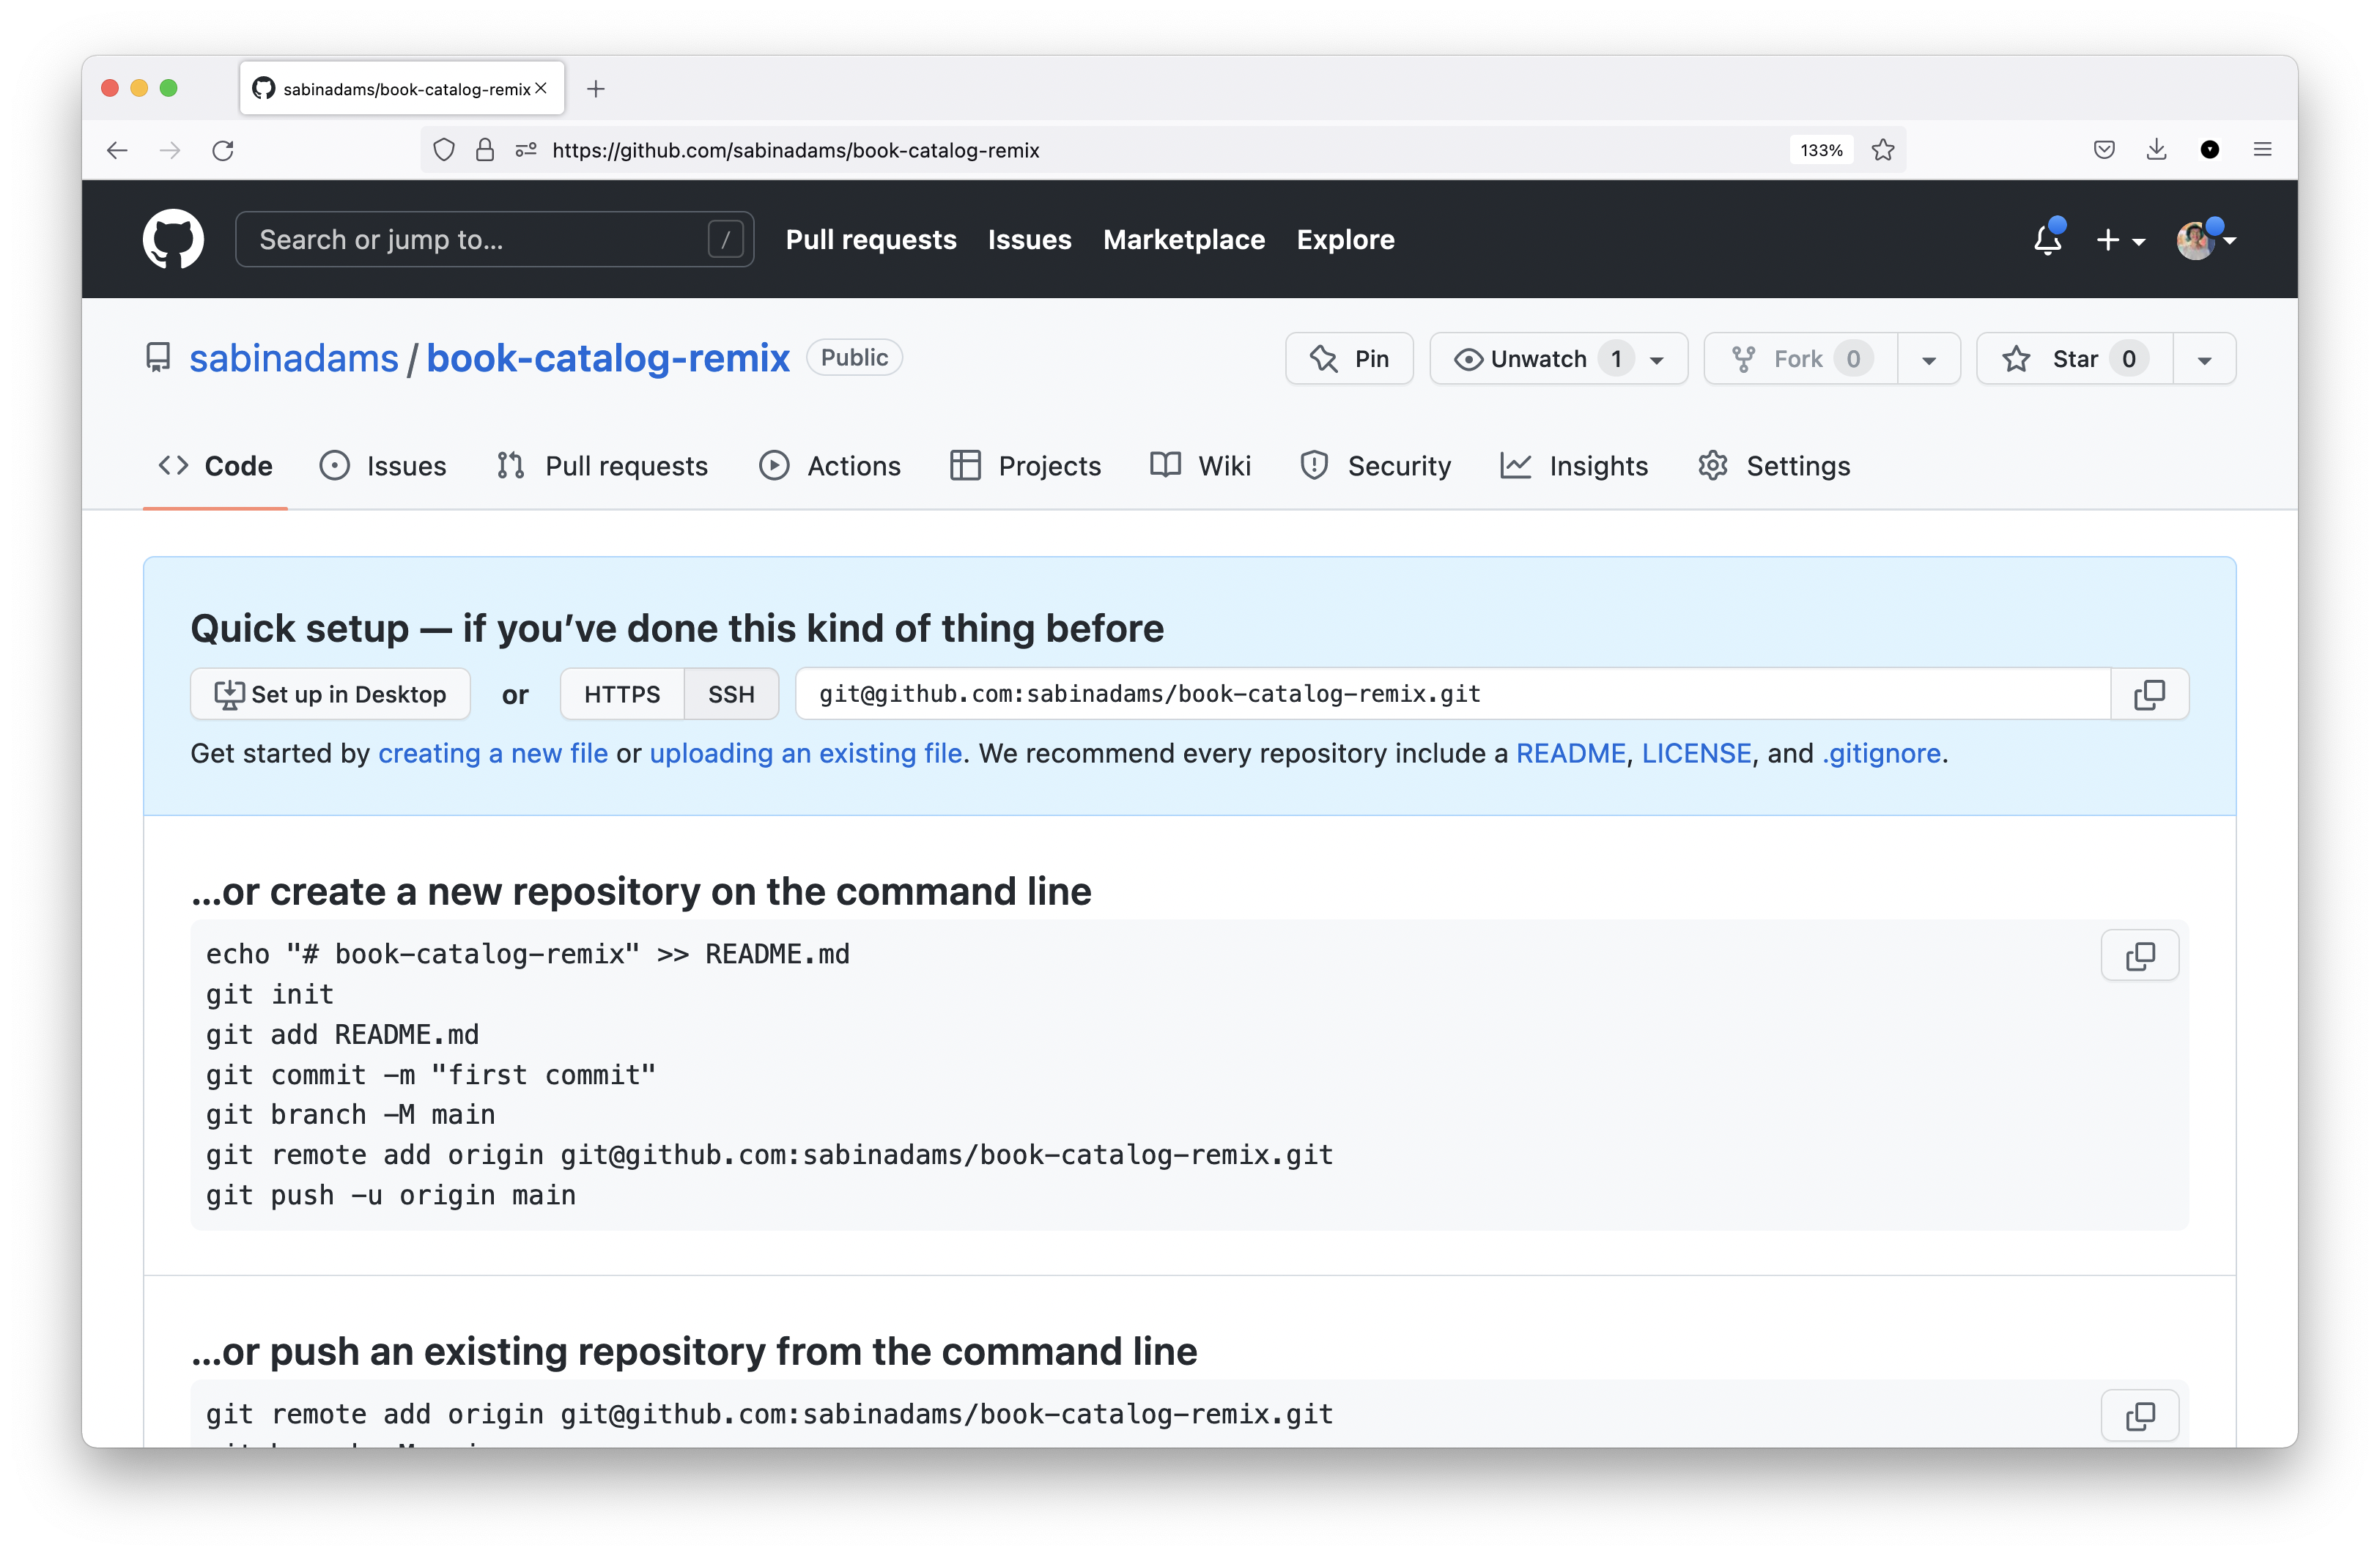
You will be asked for a few details about the repository. Give the repository a name and hit Create repository. You should then be redirected to a page that looks similar to this one:
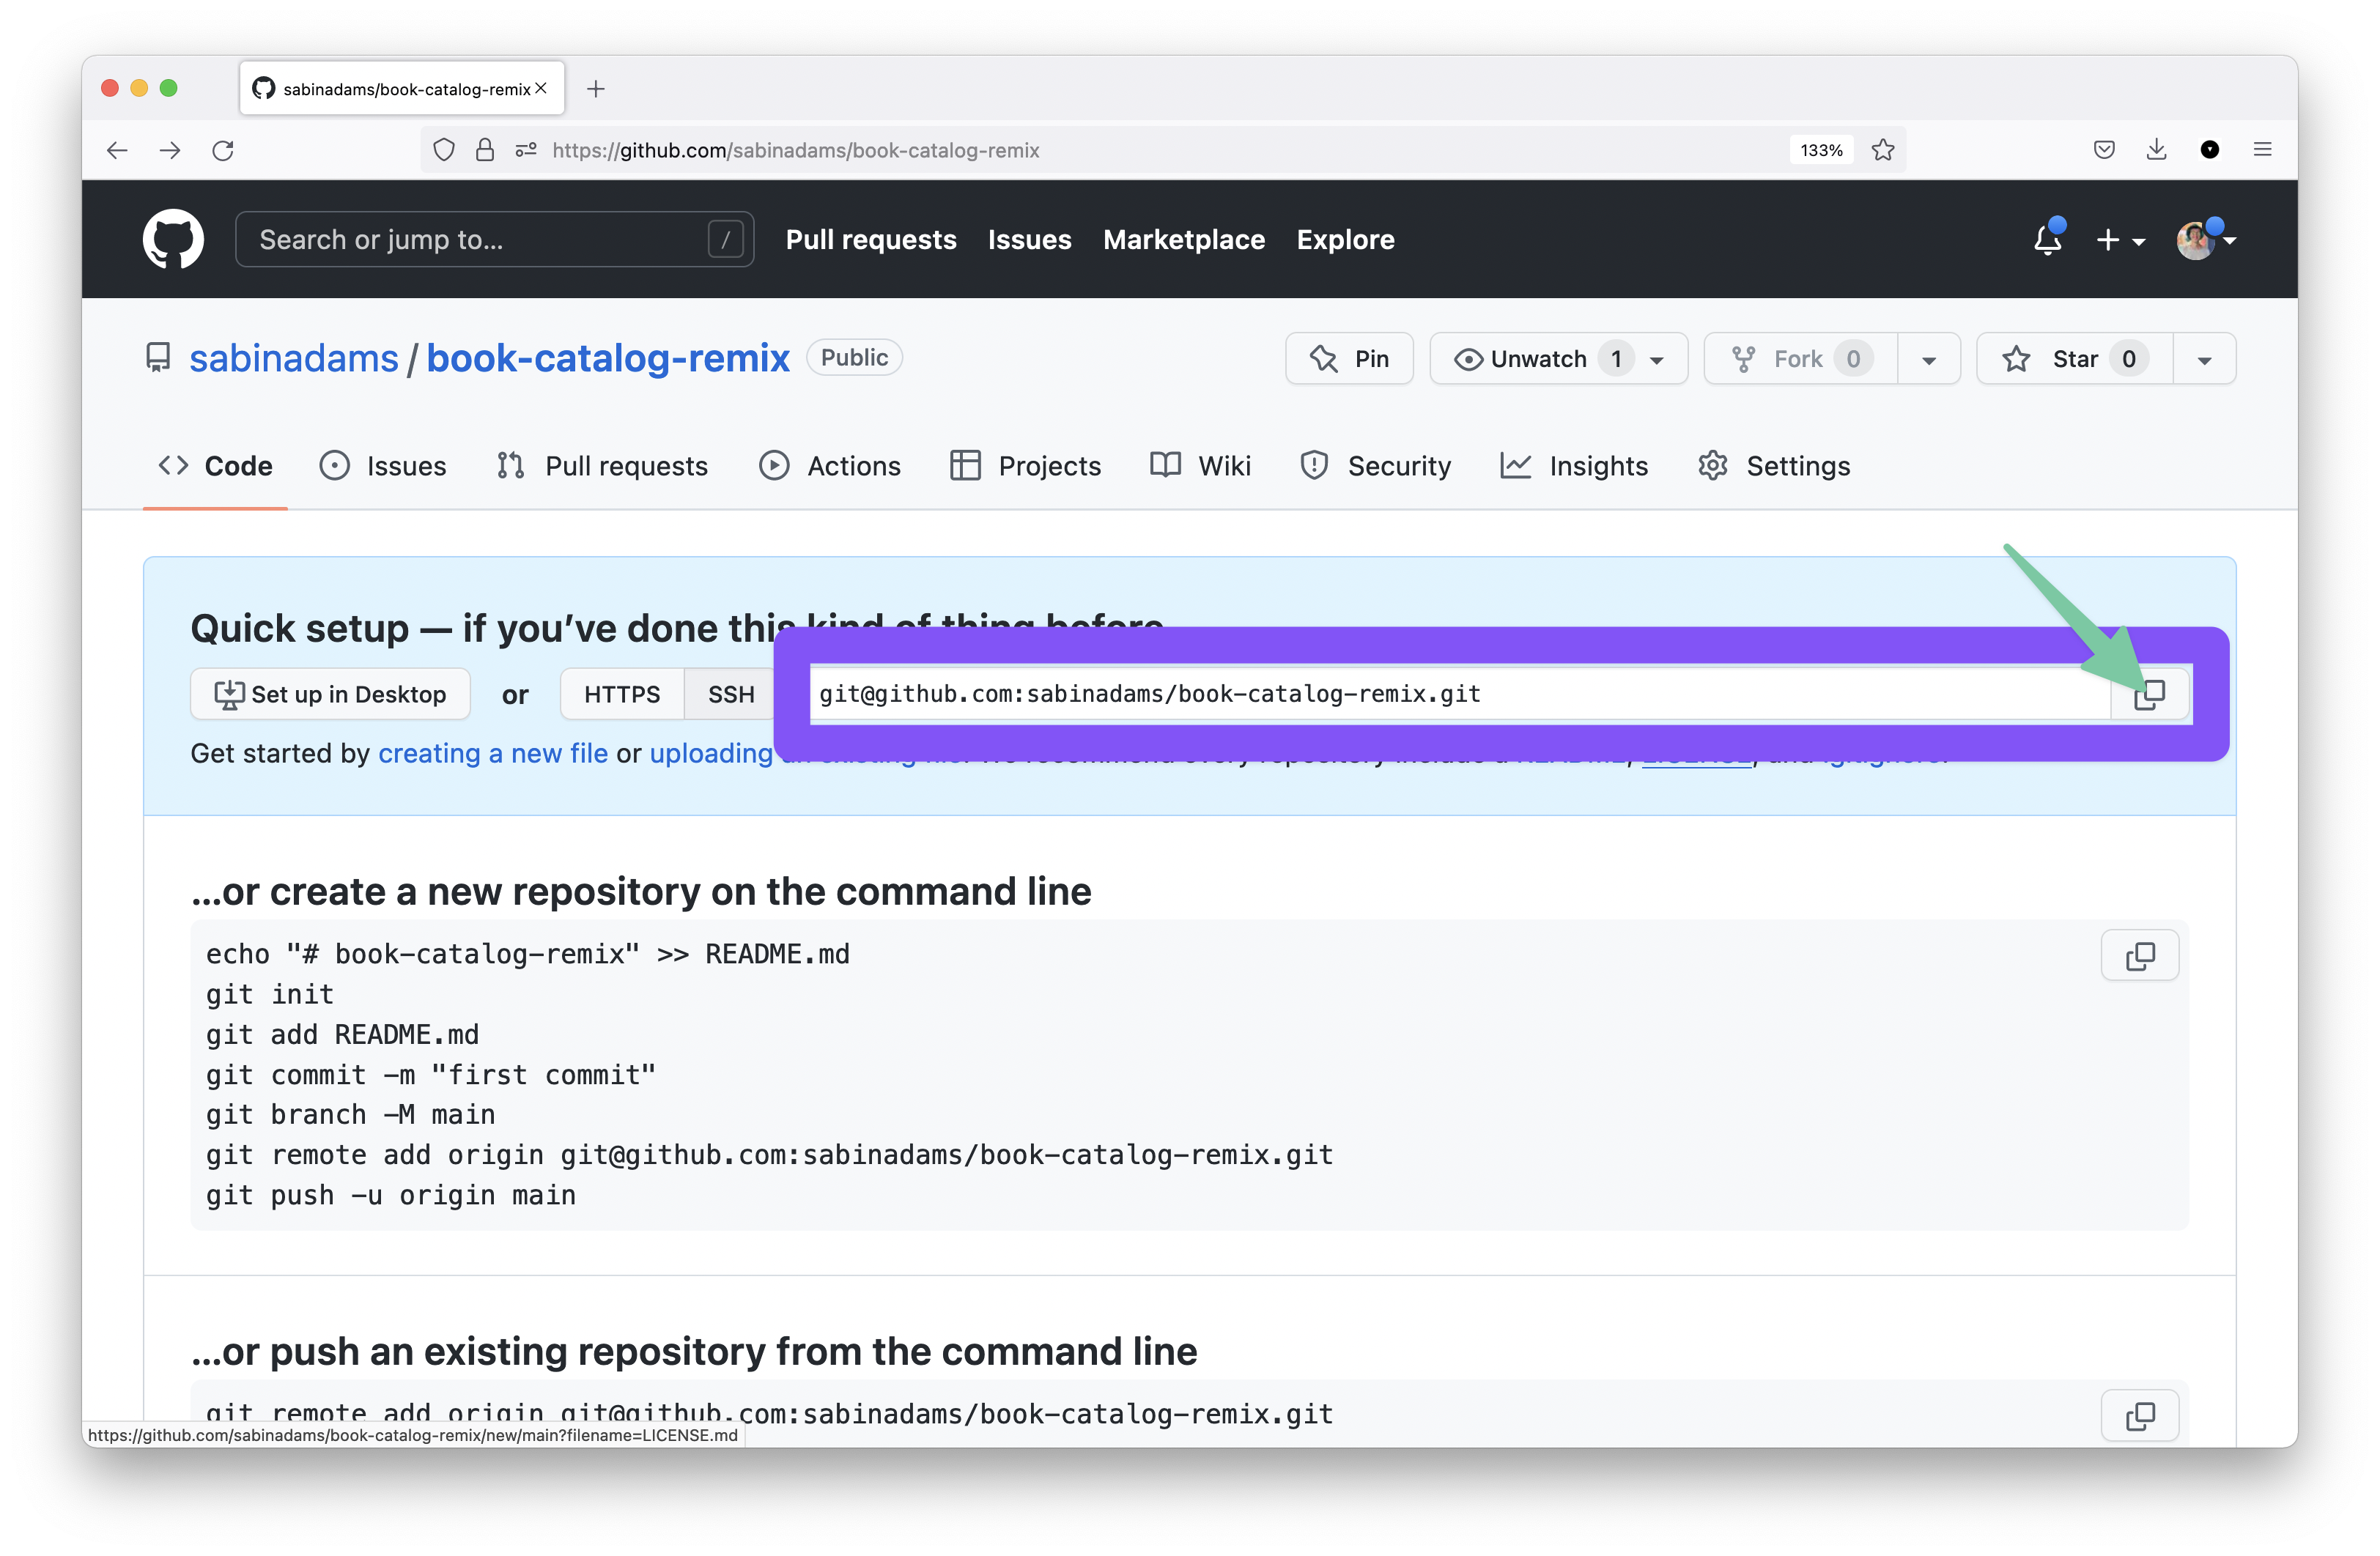
Grab the SSH URL for the repository by hitting the copy button signified in the image below:
Finally, in your terminal head over to the Remix application and run the following set of commands:
# /Documents/projects/catalog-remix
git init
git remote add origin <YOUR SSH URL>
git branch -m main
git add .
git commit -m "Initial Commit"
git push --set-upstream origin main
If you head back over to your GitHub repository page and refresh, you should now see your project's contents:

Next, within your Sanity project's code base create a new file at the root named .gitignore:
# /Documents/projects/catalog-sanity
touch .gitignore
Add the following to the contents of that file:
node_modules
This will ensure you do not push the node_modules folder to GitHub.
Note: Your Remix application came with this already set up.
Then, repeat all of the steps you followed to push your Remix application to a new GitHub repository on this project.
Once you have finished adding your Sanity project to its own GitHub repository, you will be ready to deploy your application and the Sanity Studio!
Deploy the Remix application
You will use Vercel to deploy and host your applications.
Note: You can create a free account if you do not already have one here.
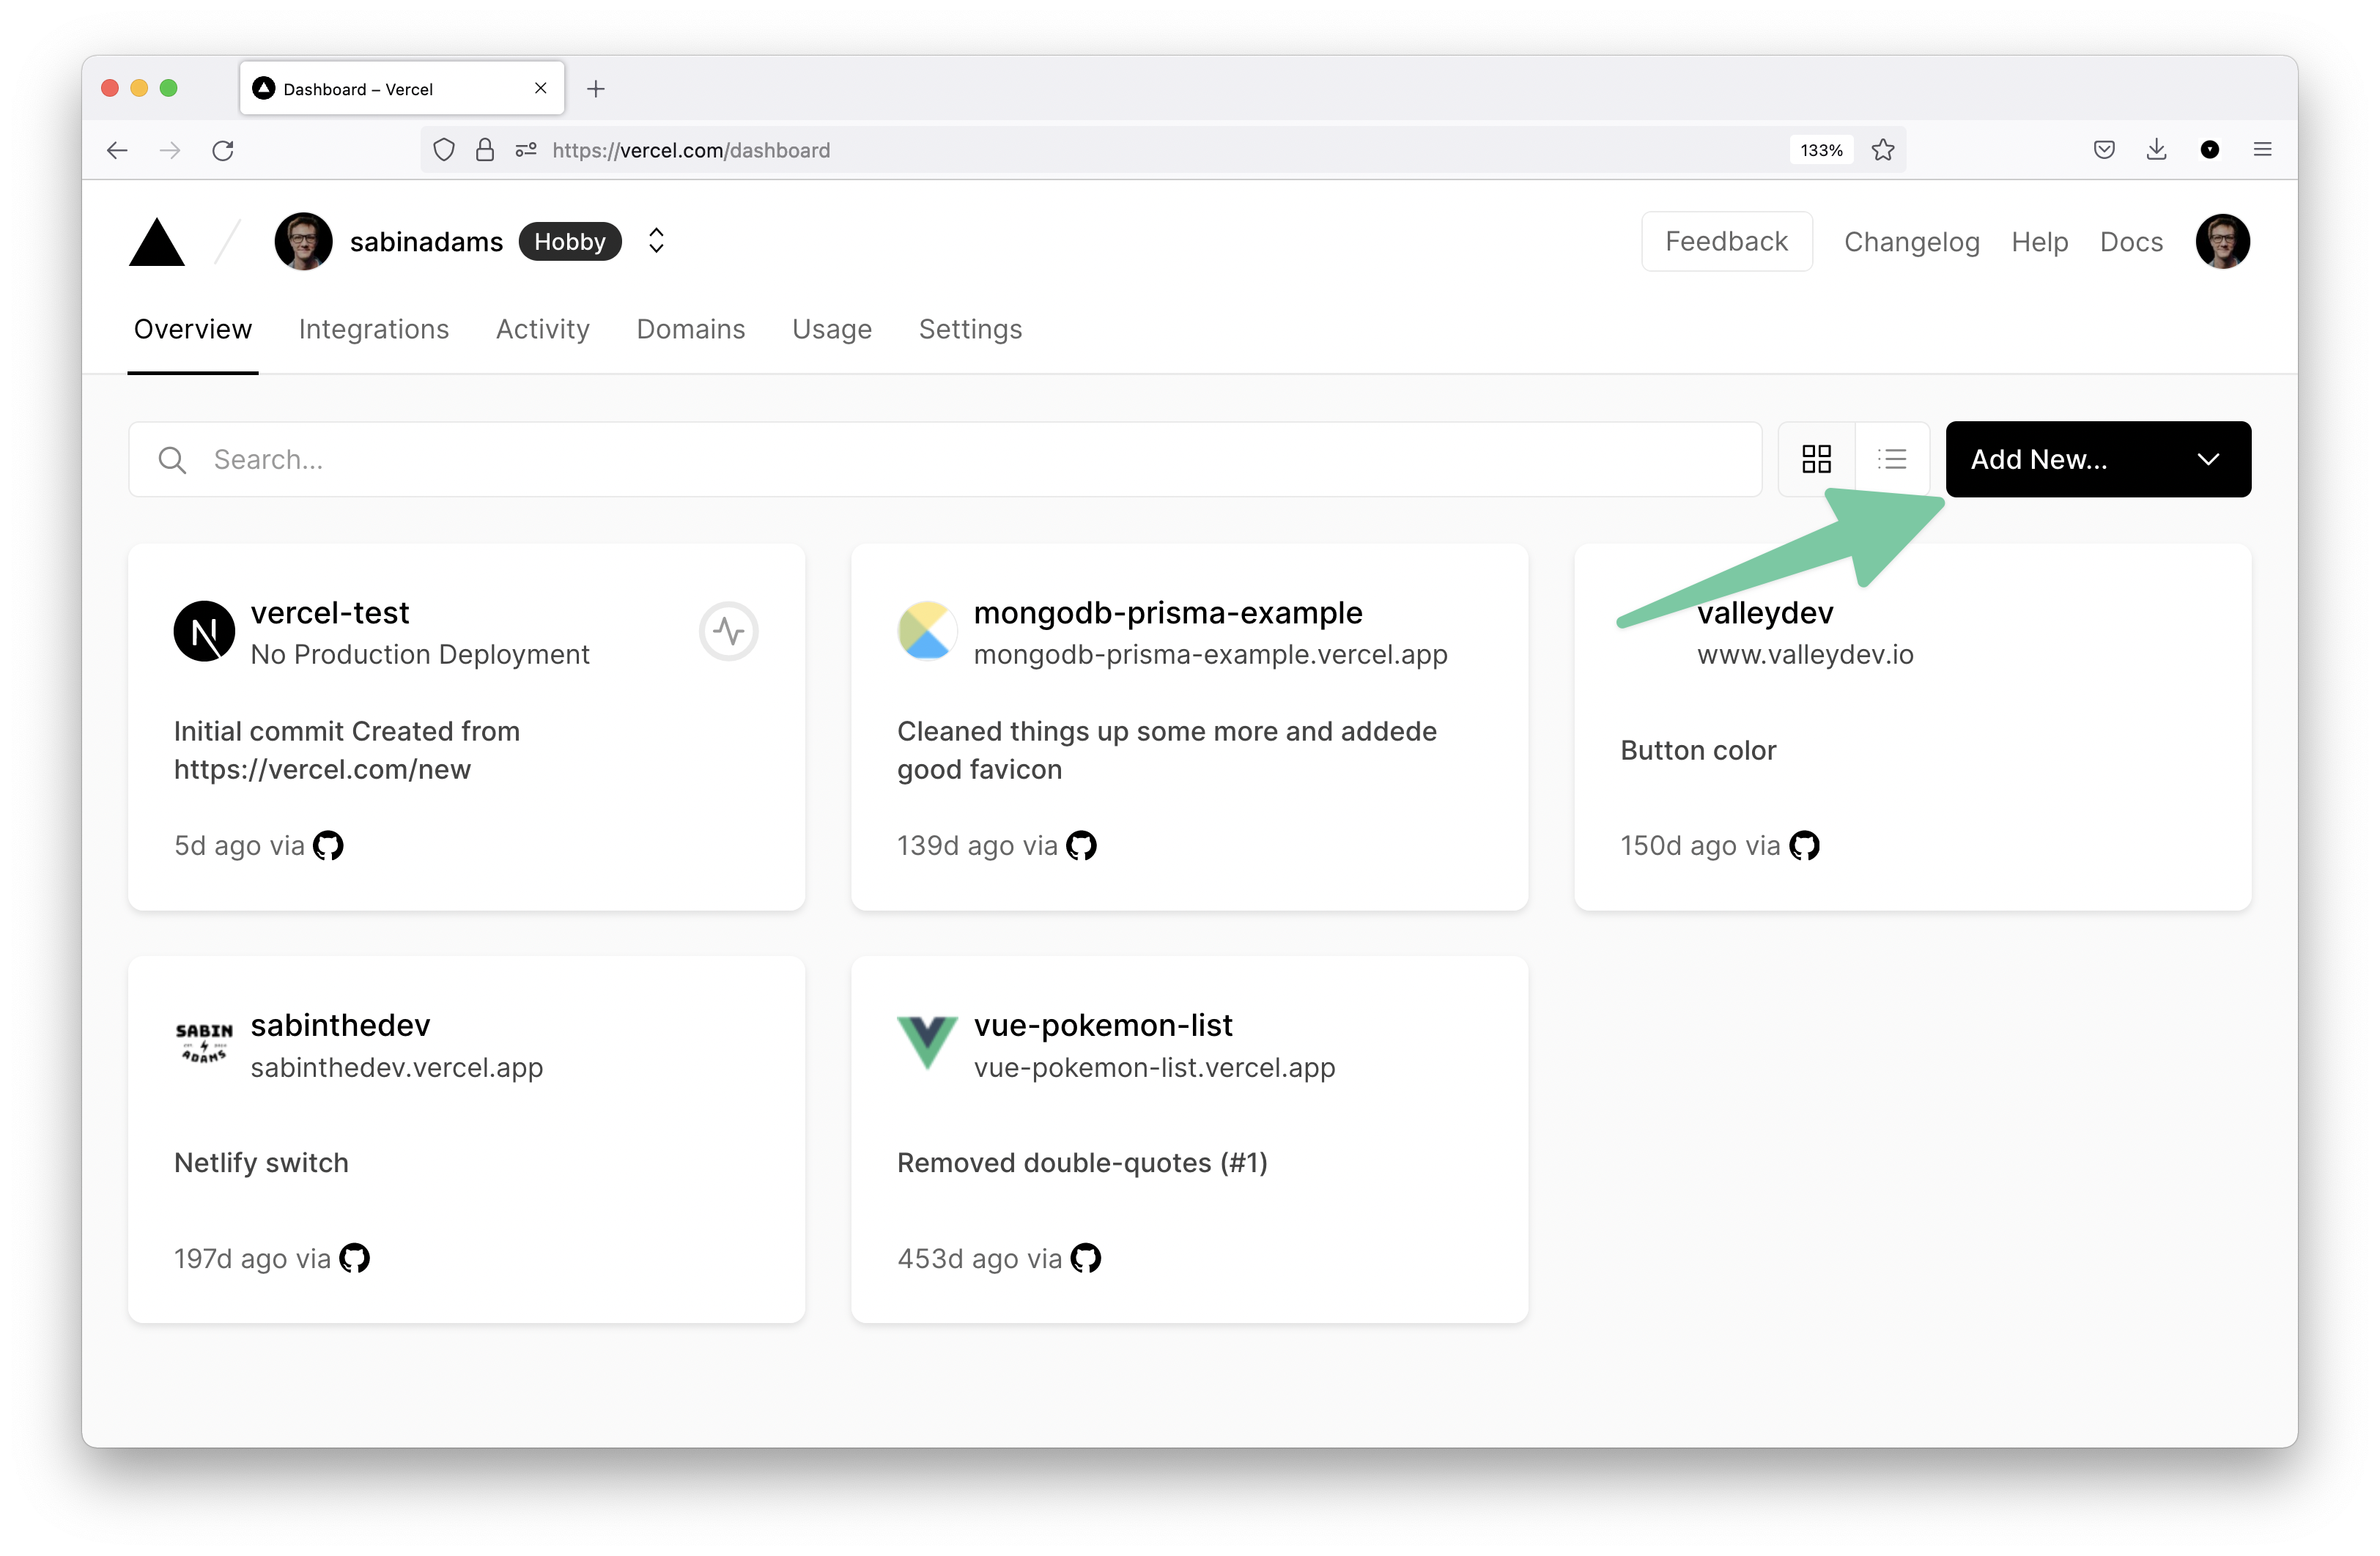
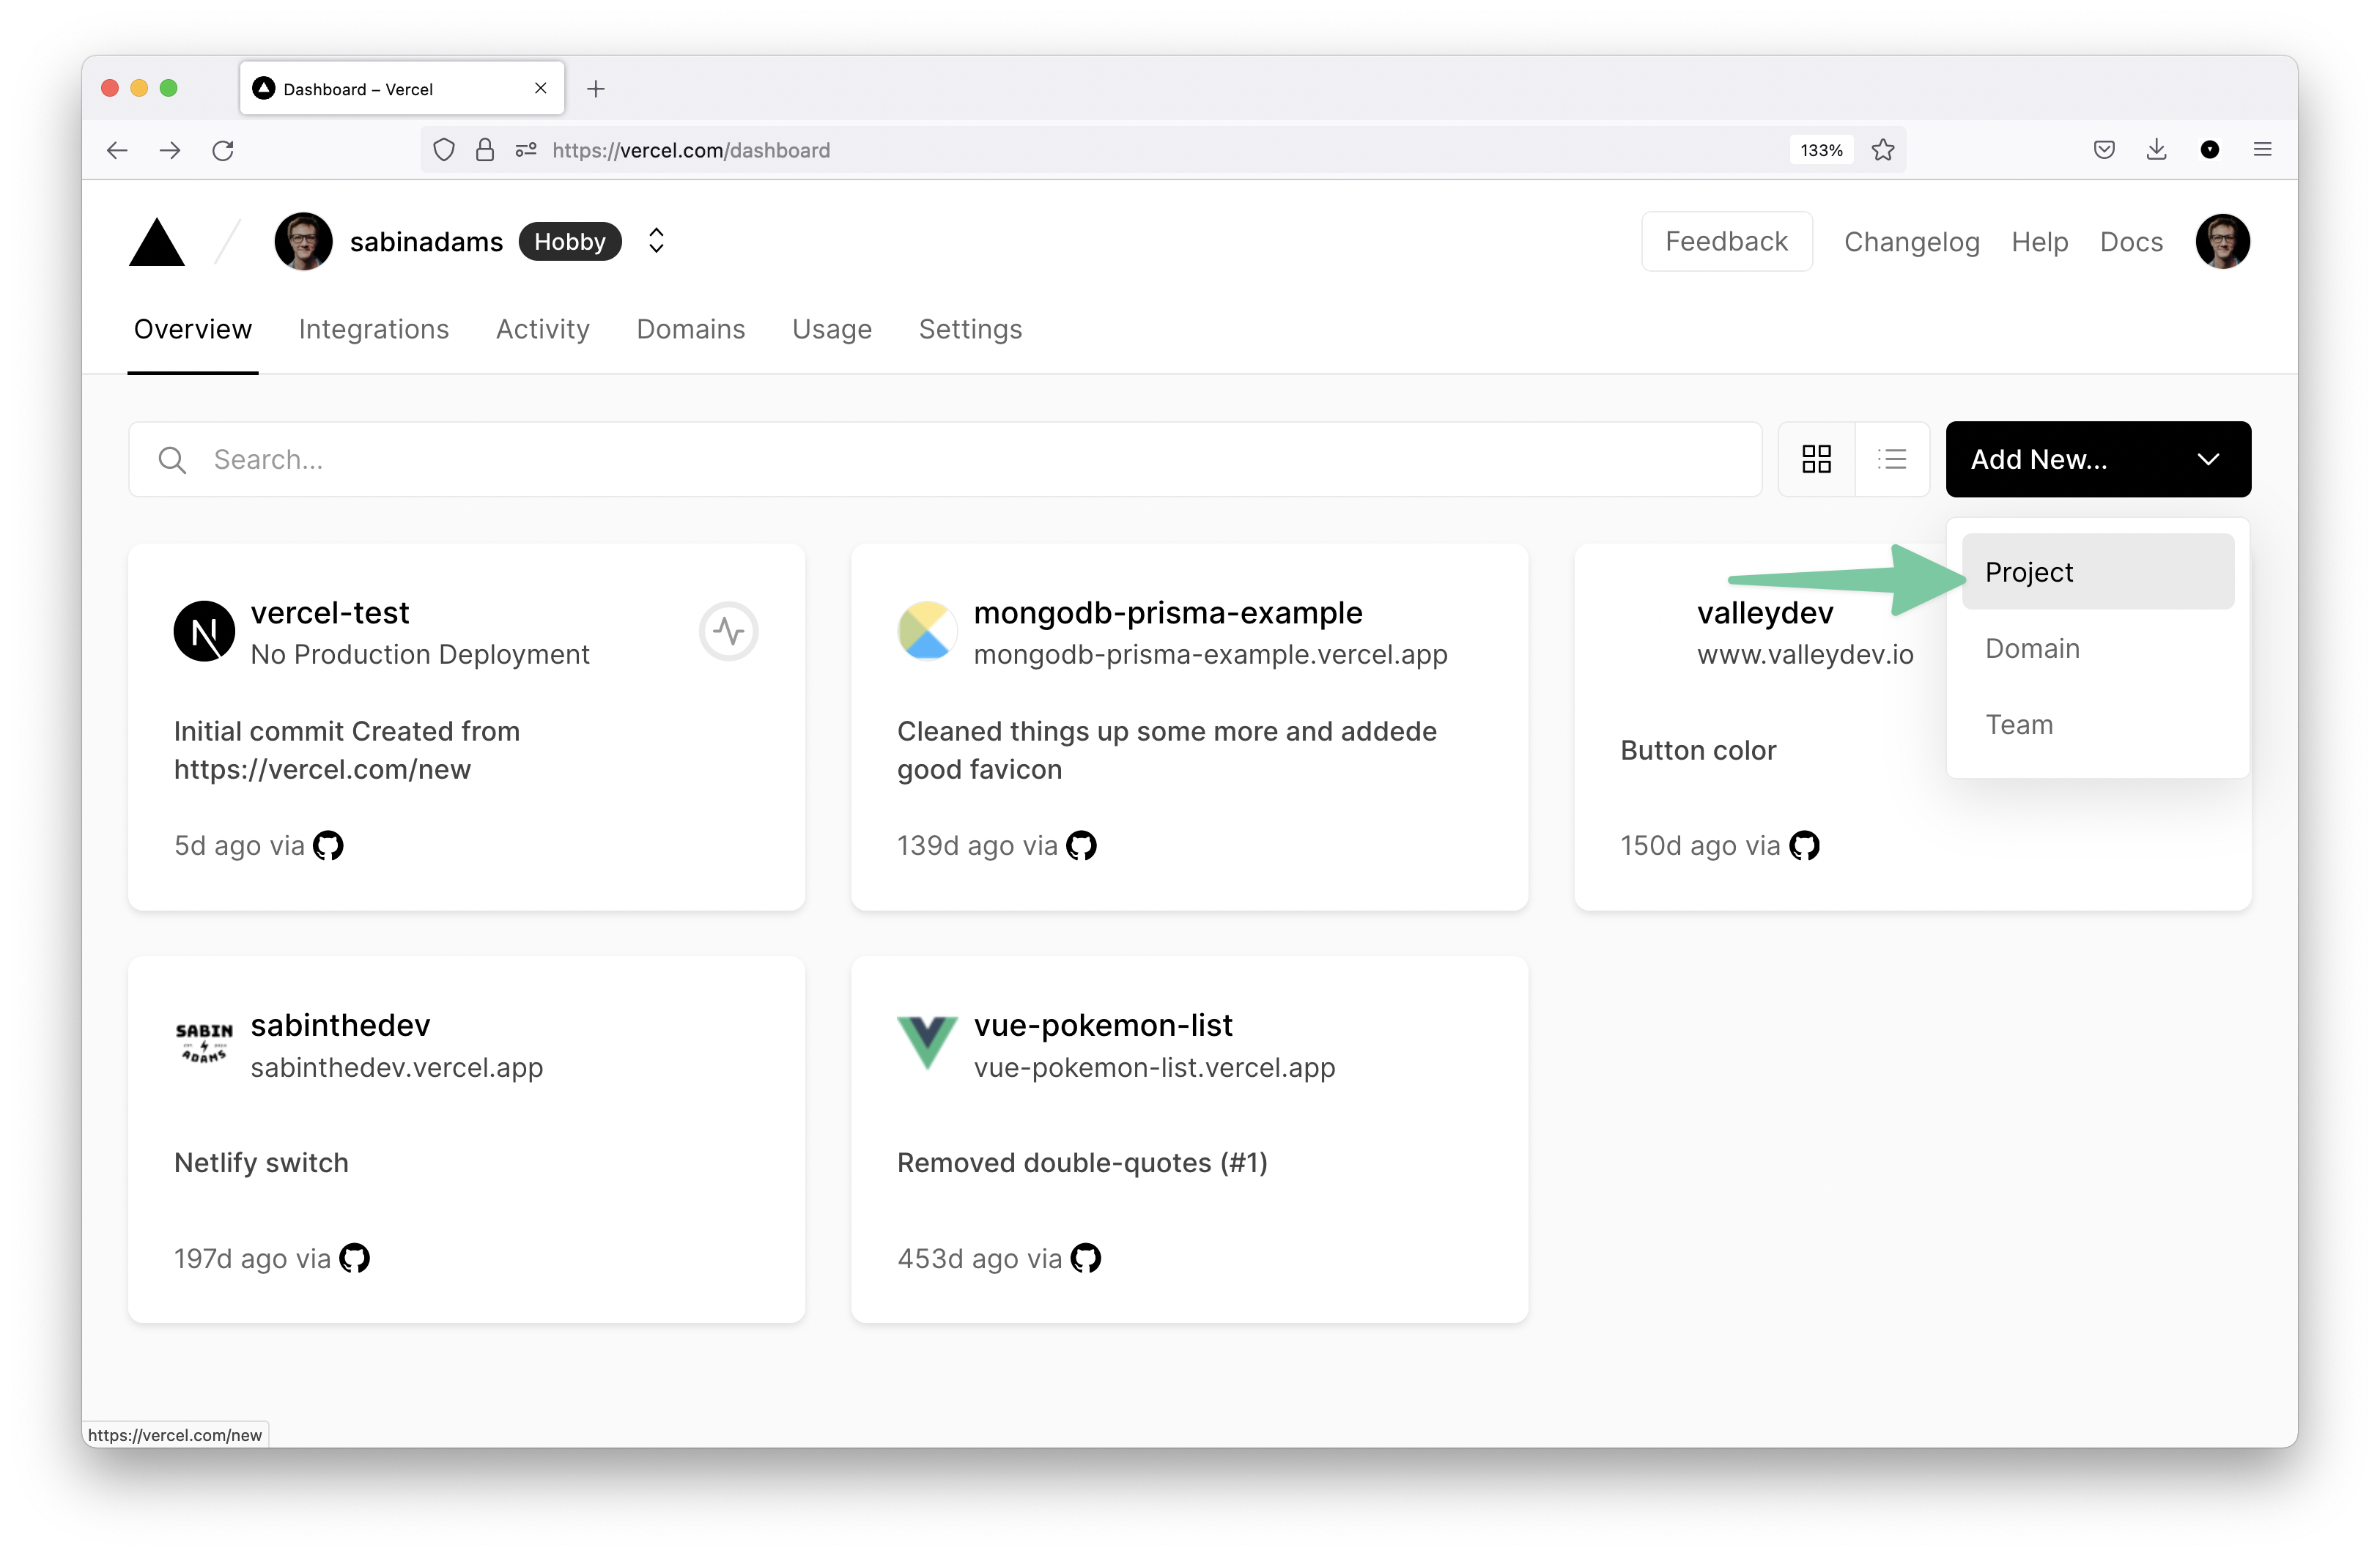
Once you are in the dashboard, hit the Add New... button to create a new project in Vercel:
Select the Project option that drops down when you hit that button:
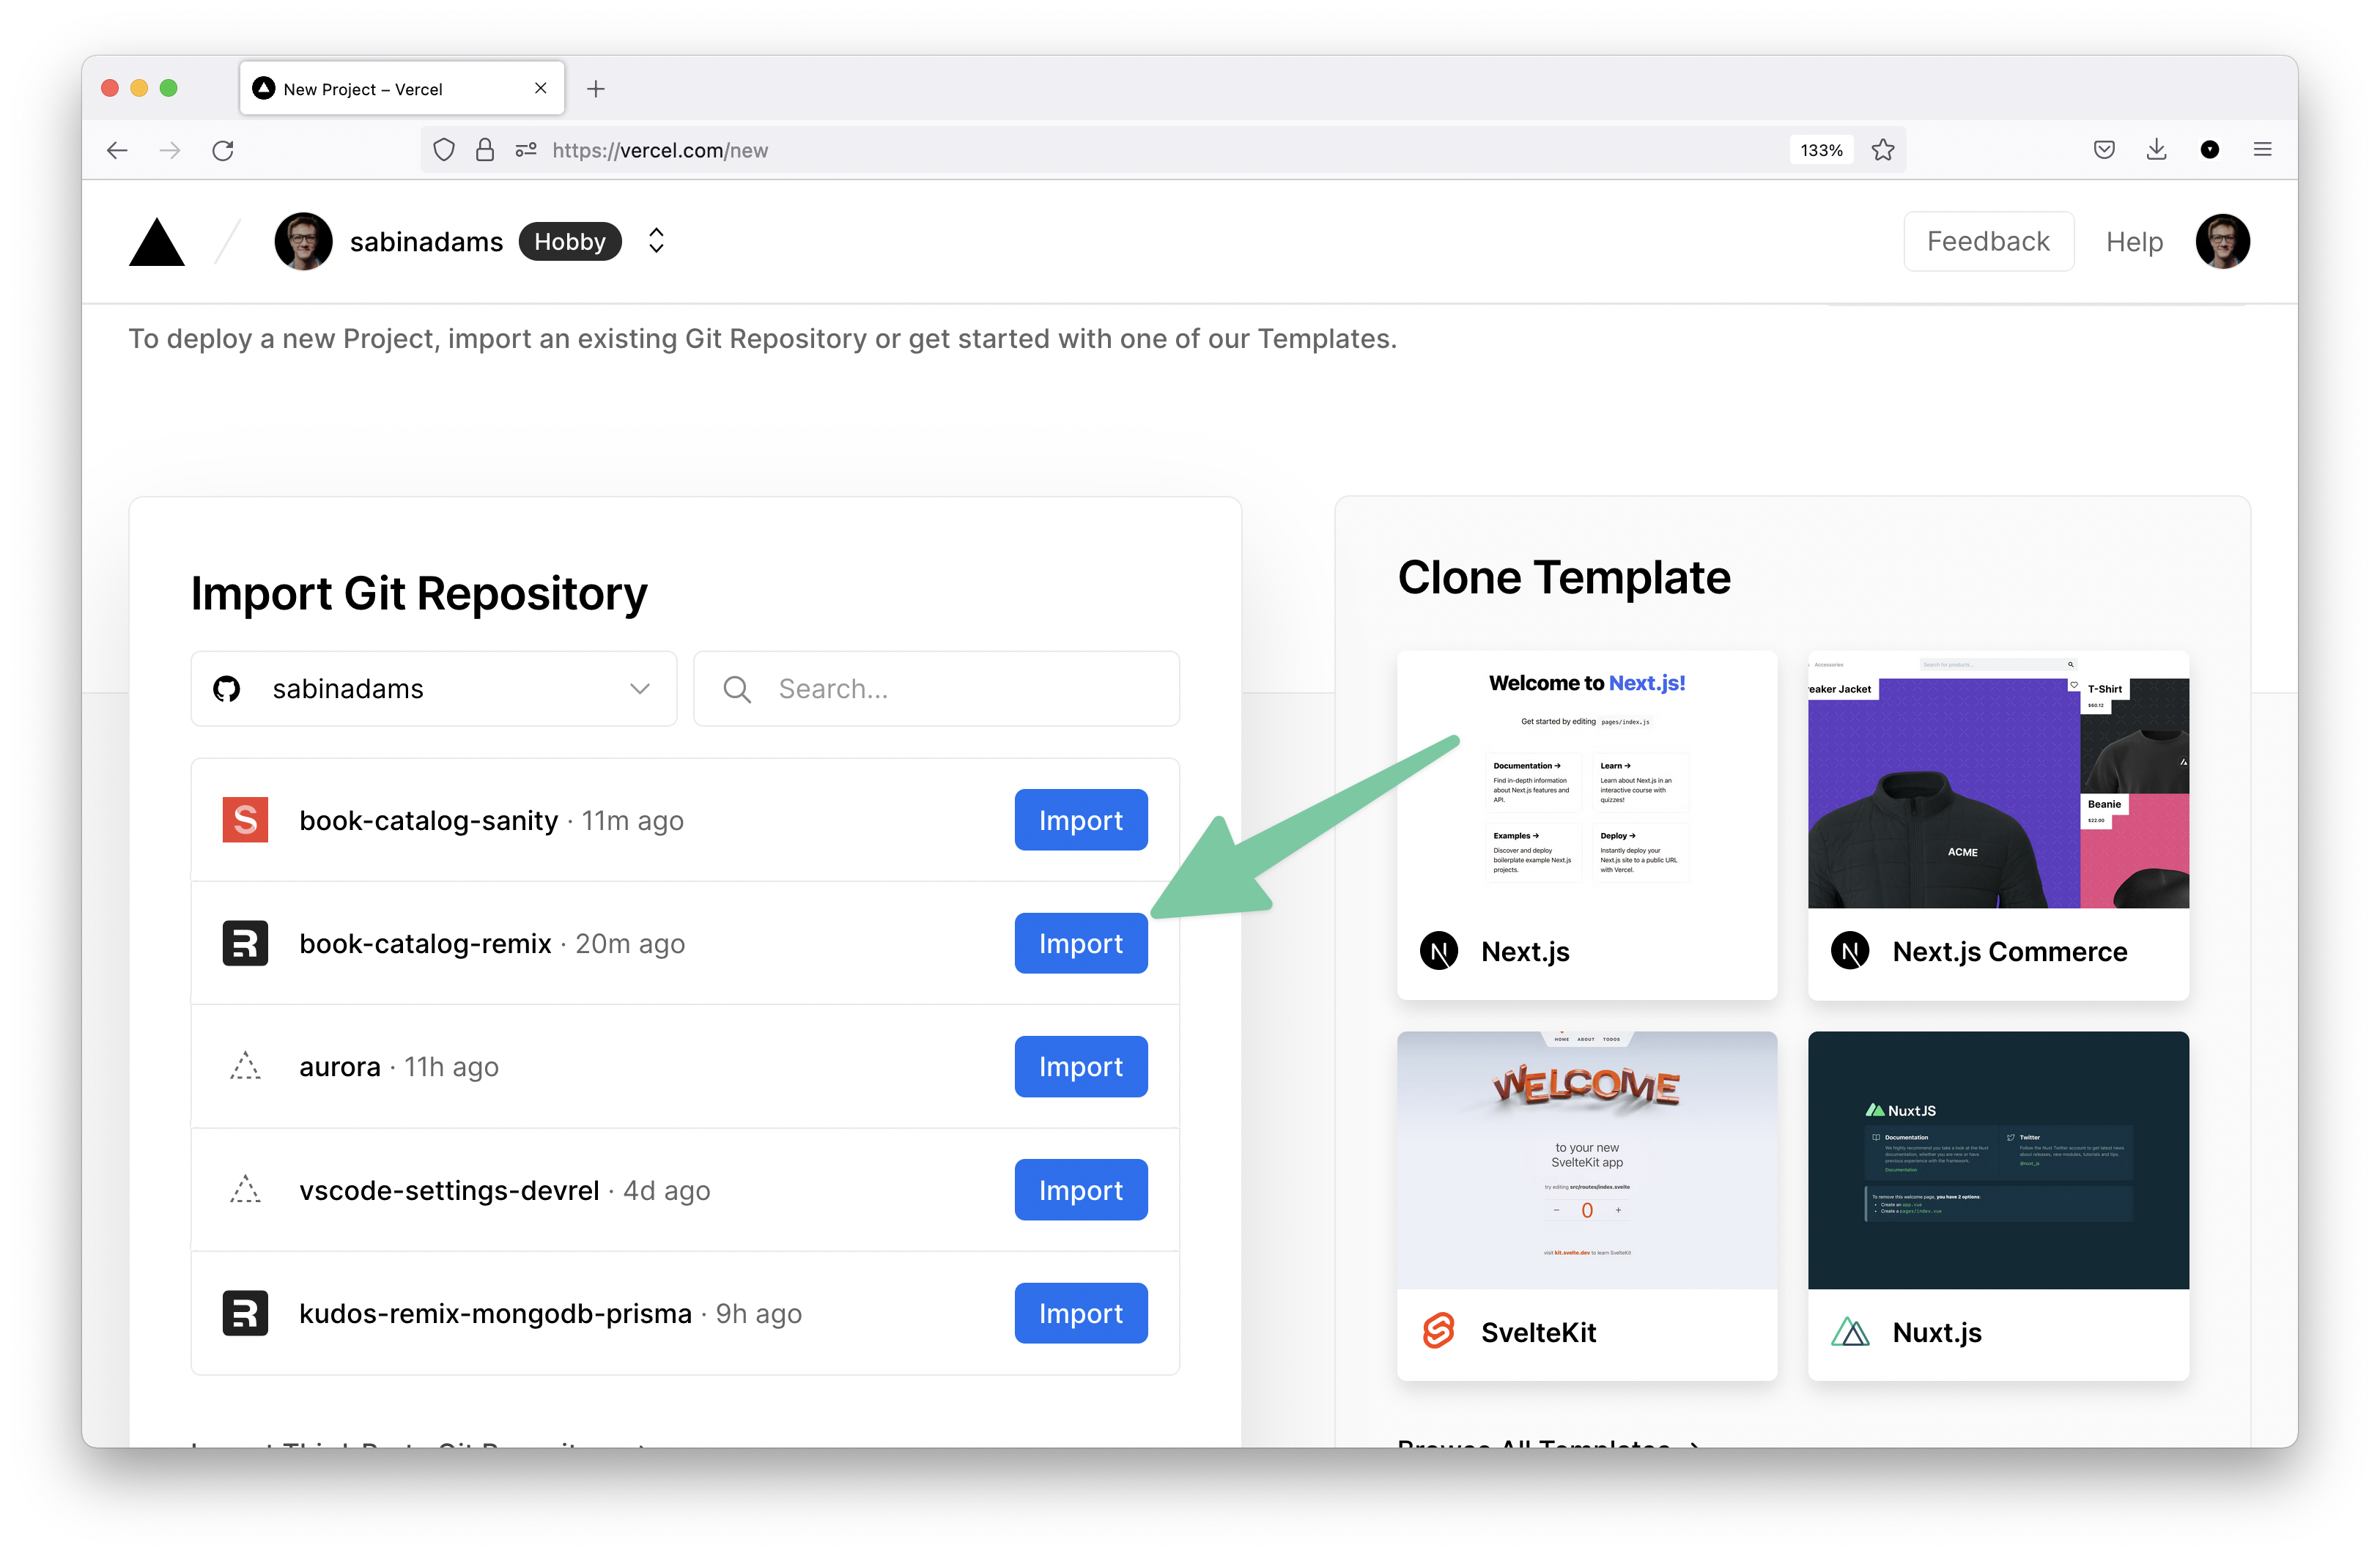
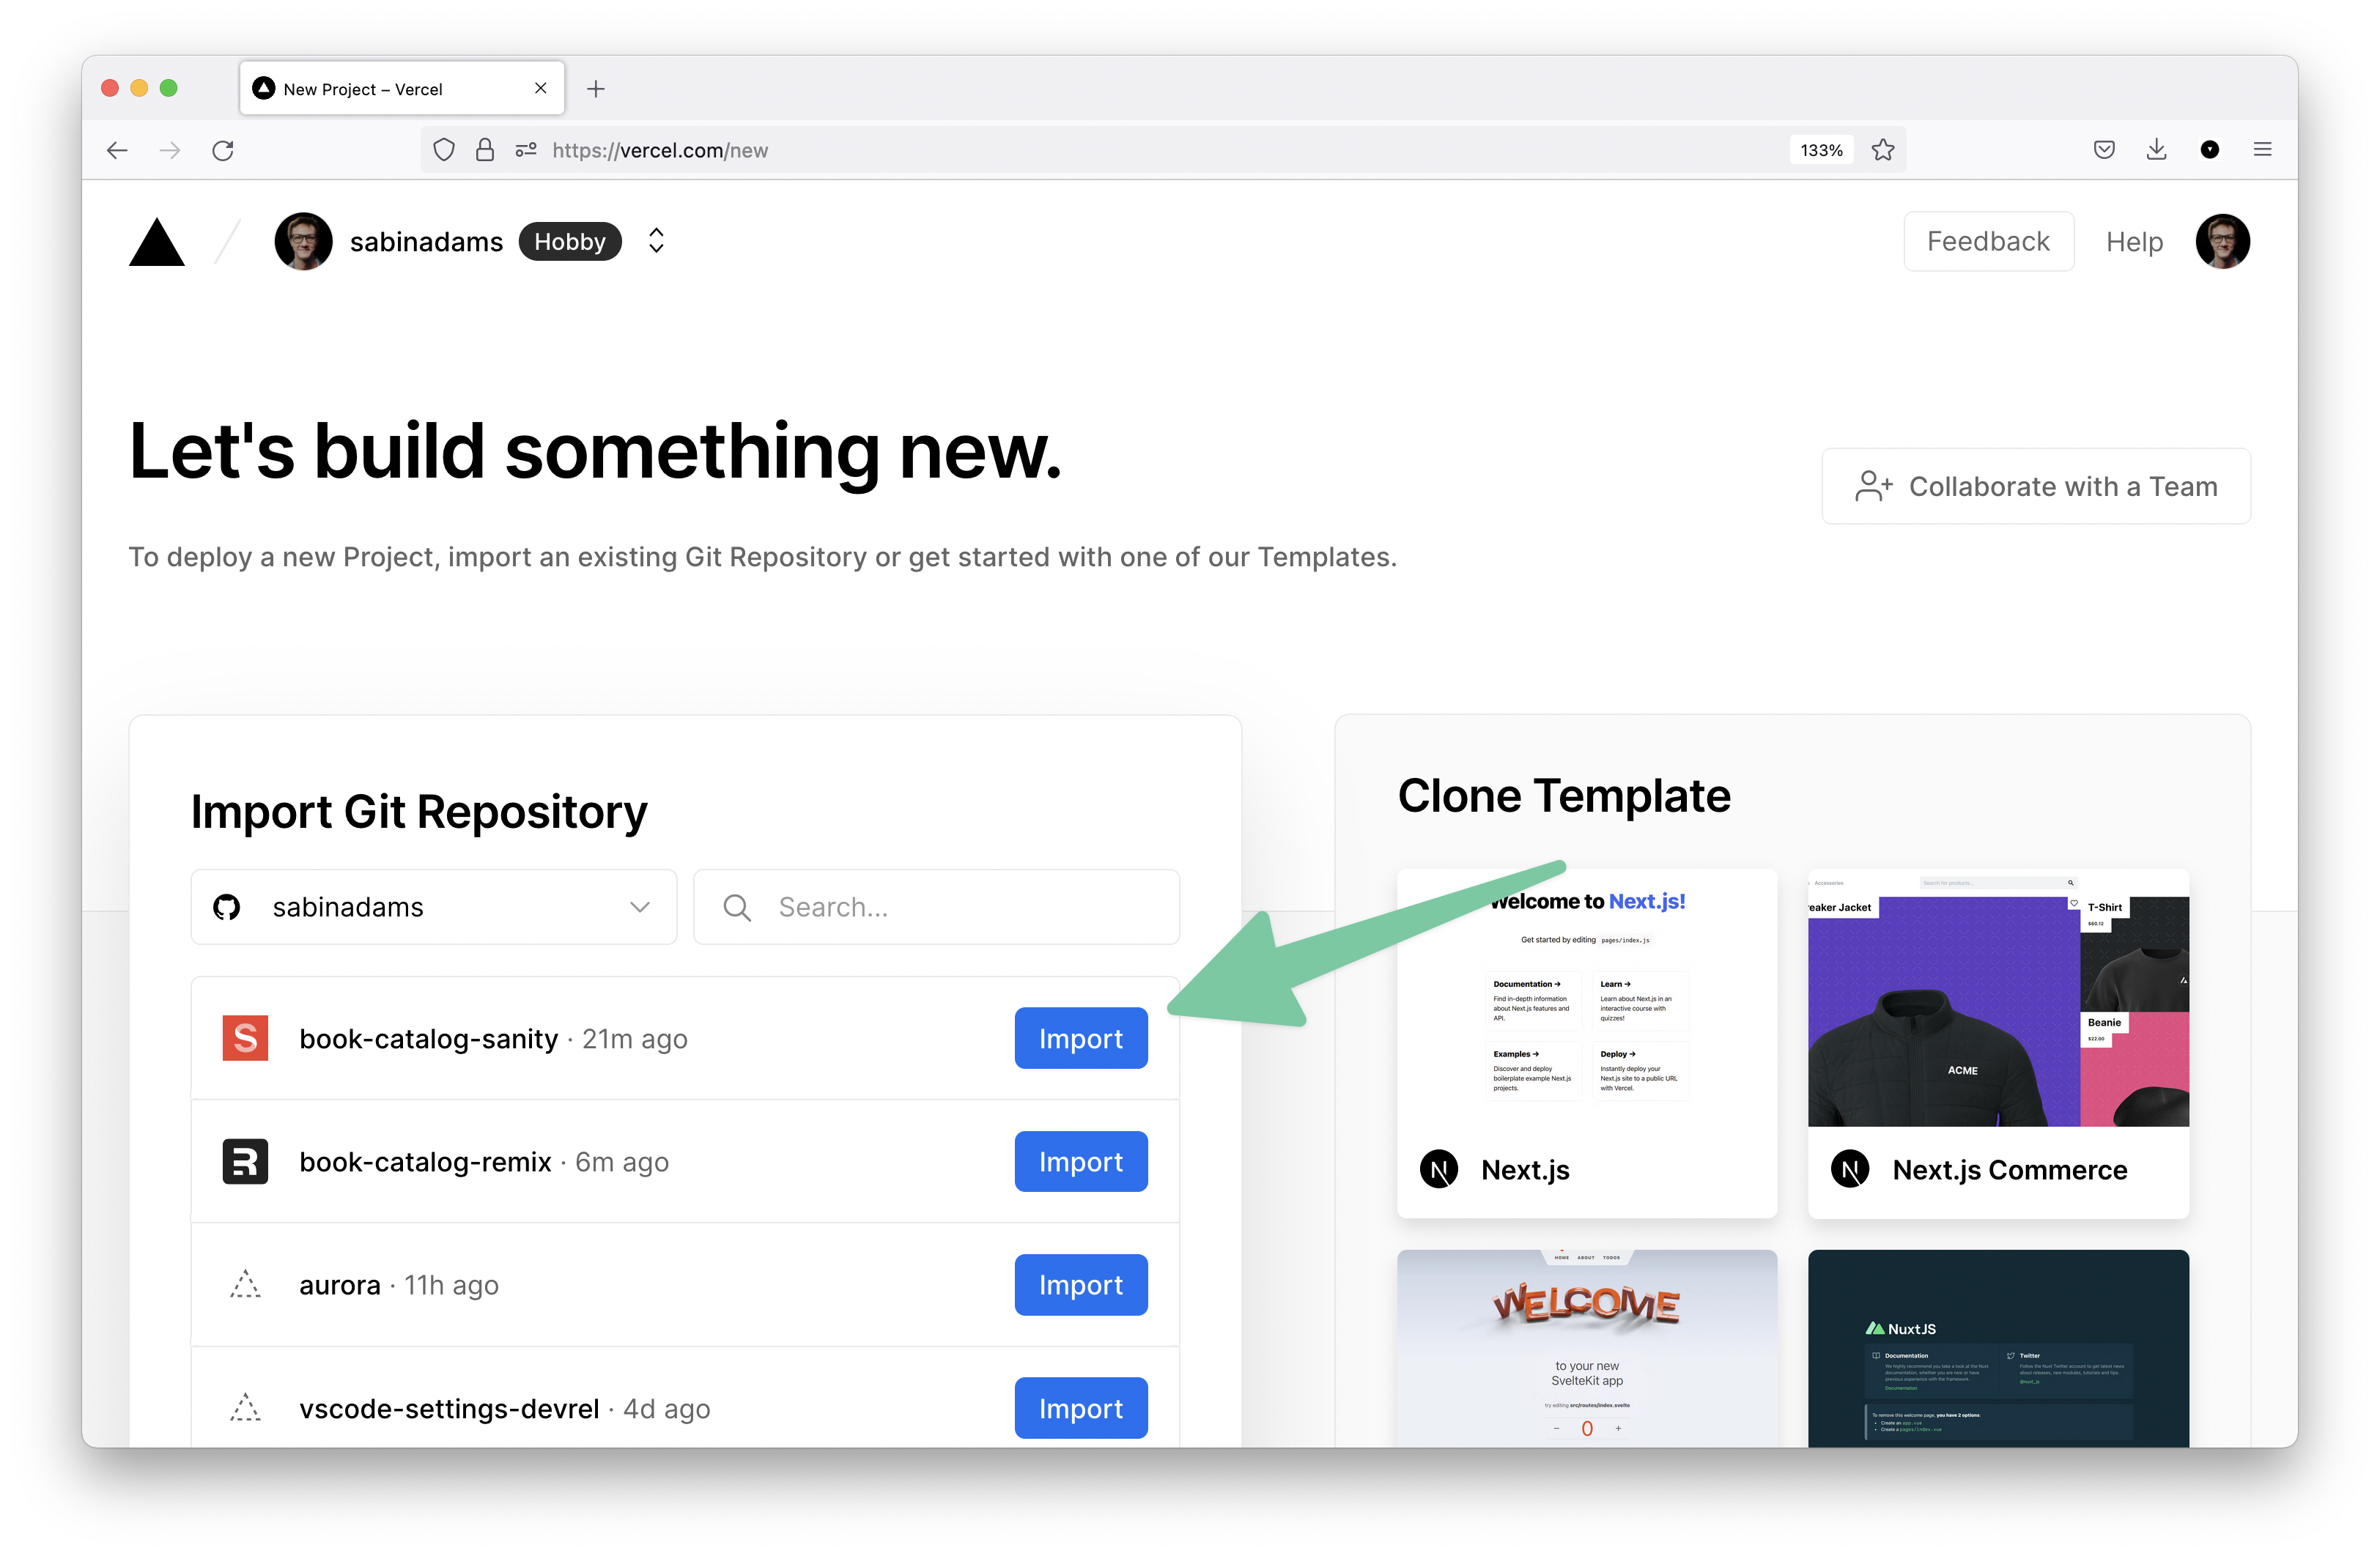
You will land on a page where you can choose a GitHub repository to deploy.
Note: You may have to connect your GitHub account. The steps to accomplish this will be on the page if you haven't connected an account already.
Select your Remix application's GitHub repository from the list of available repositories:
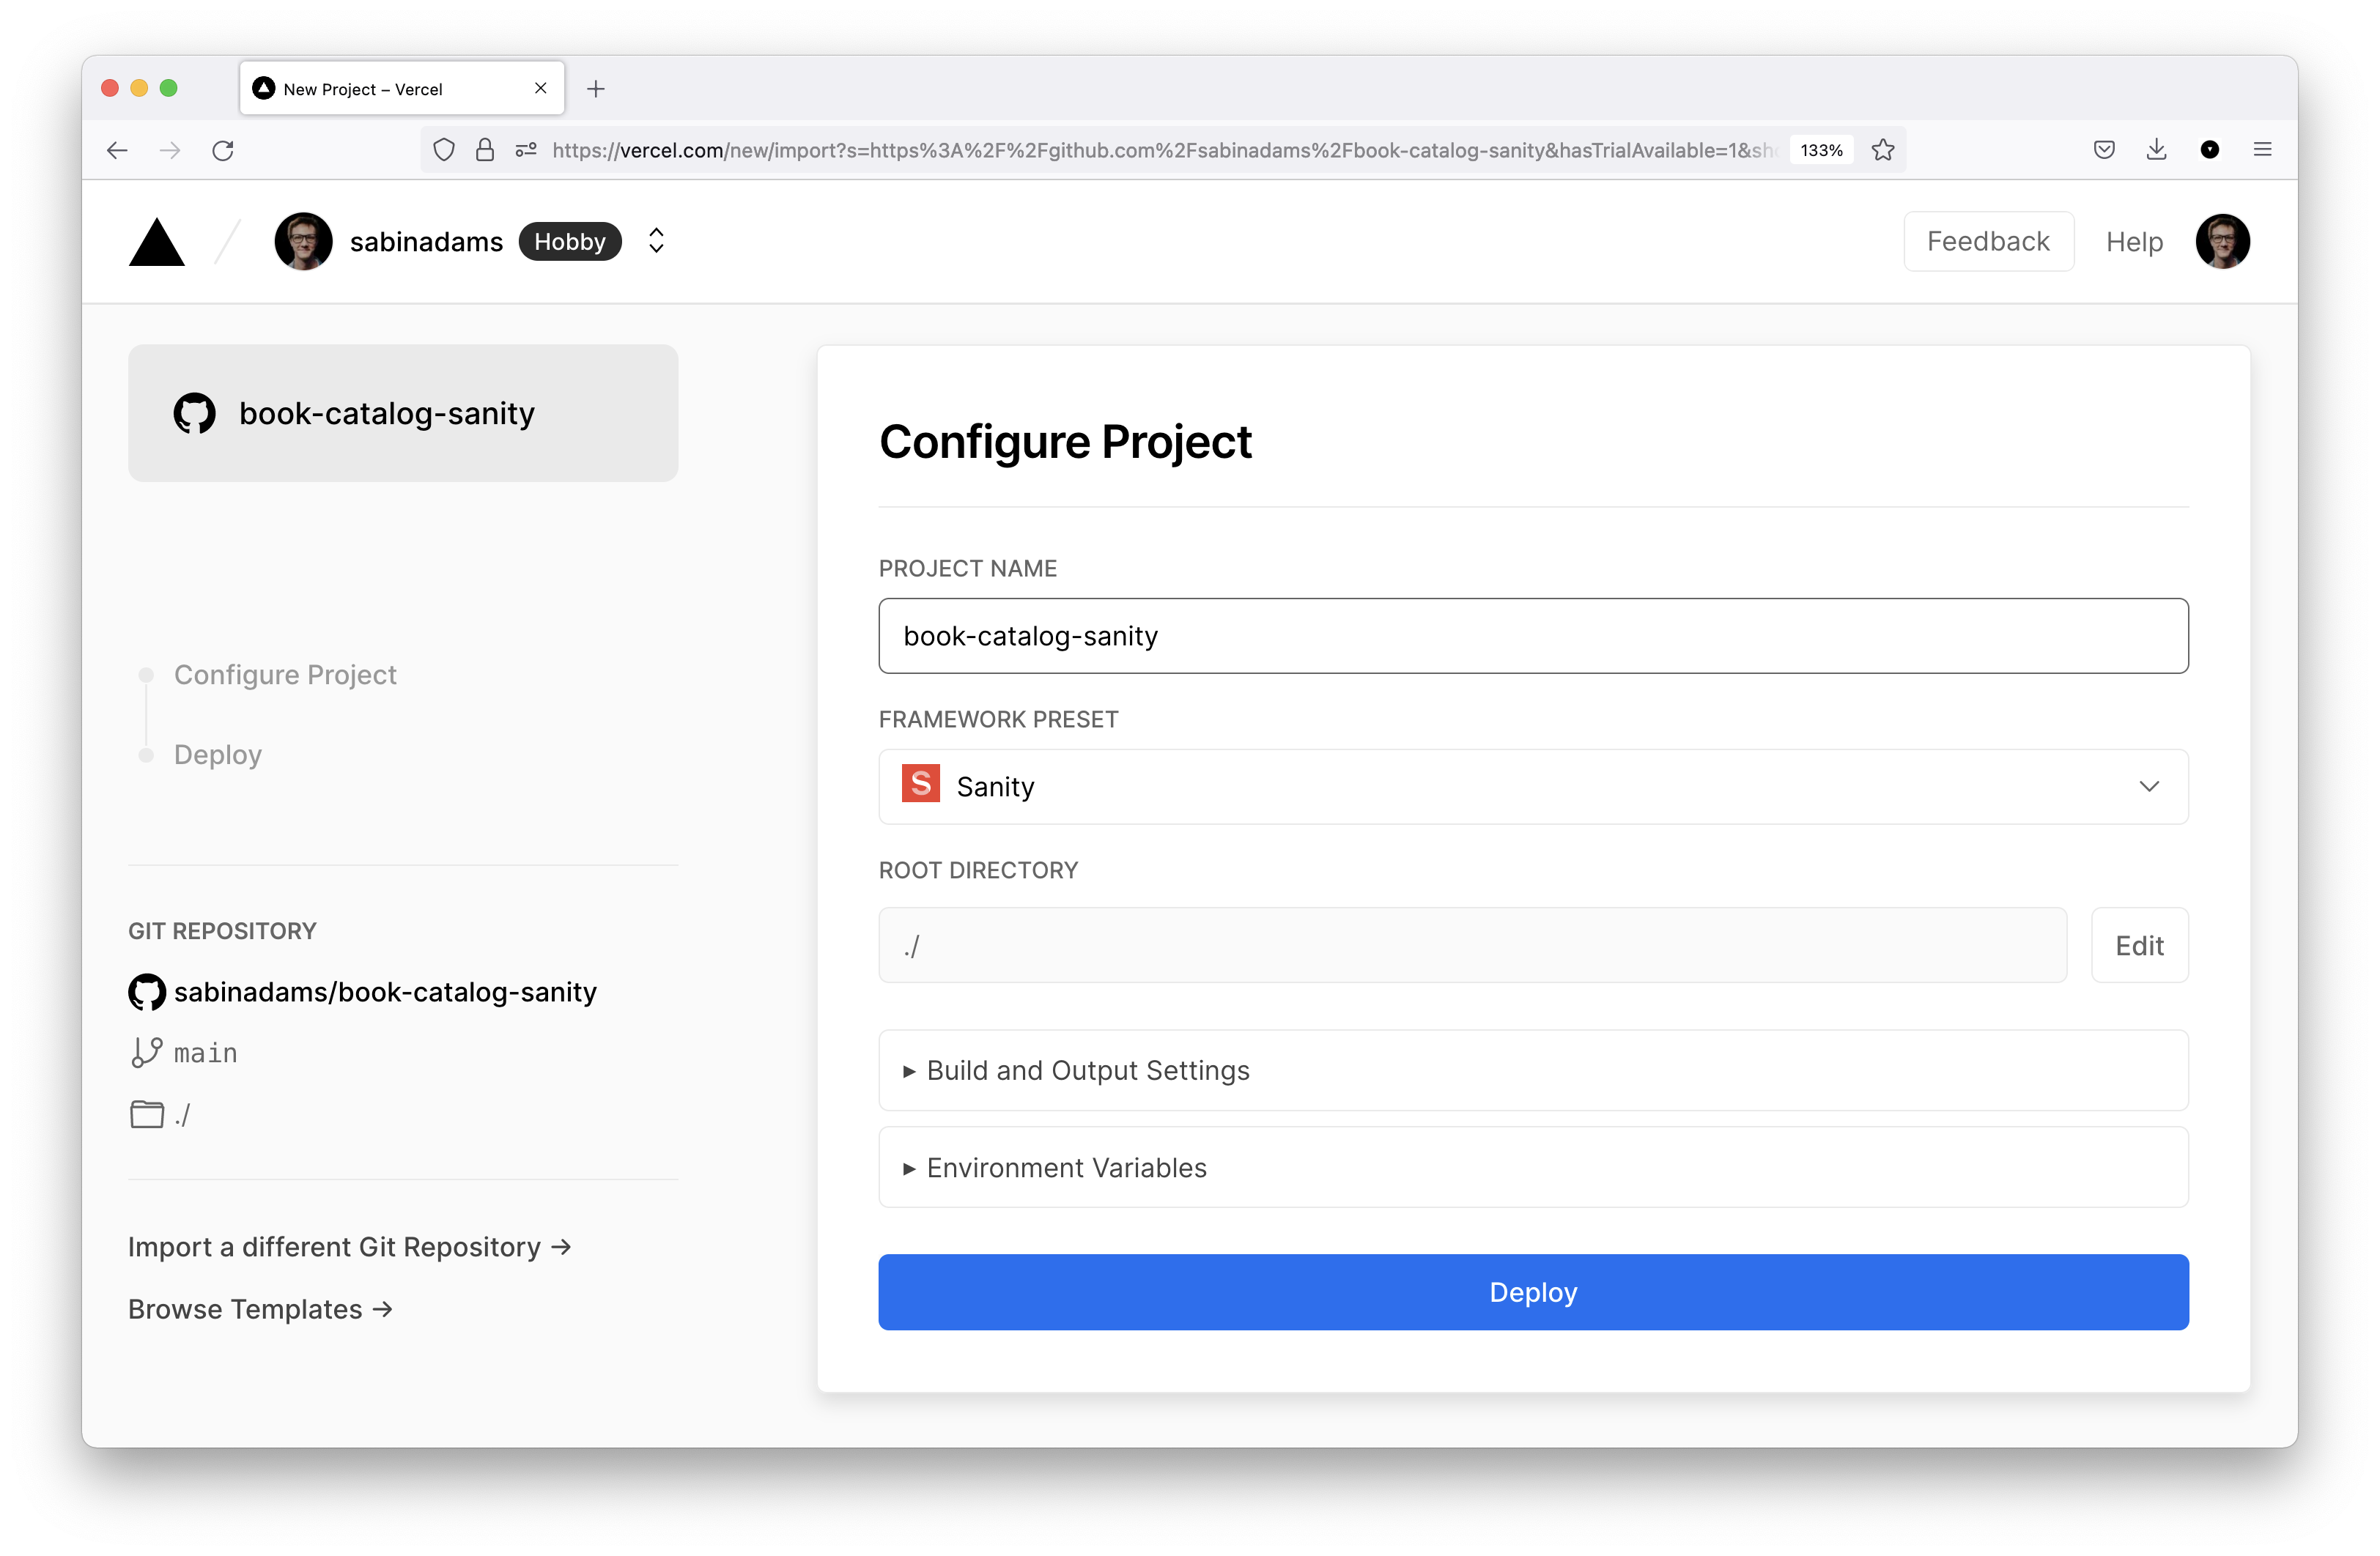
This will bring you to a page where you can configure the deployment.
On this page, expand the Environment Variables section and add a SANITY_API_URL environment variable, using the Sanity GraphQL API URL as the value:
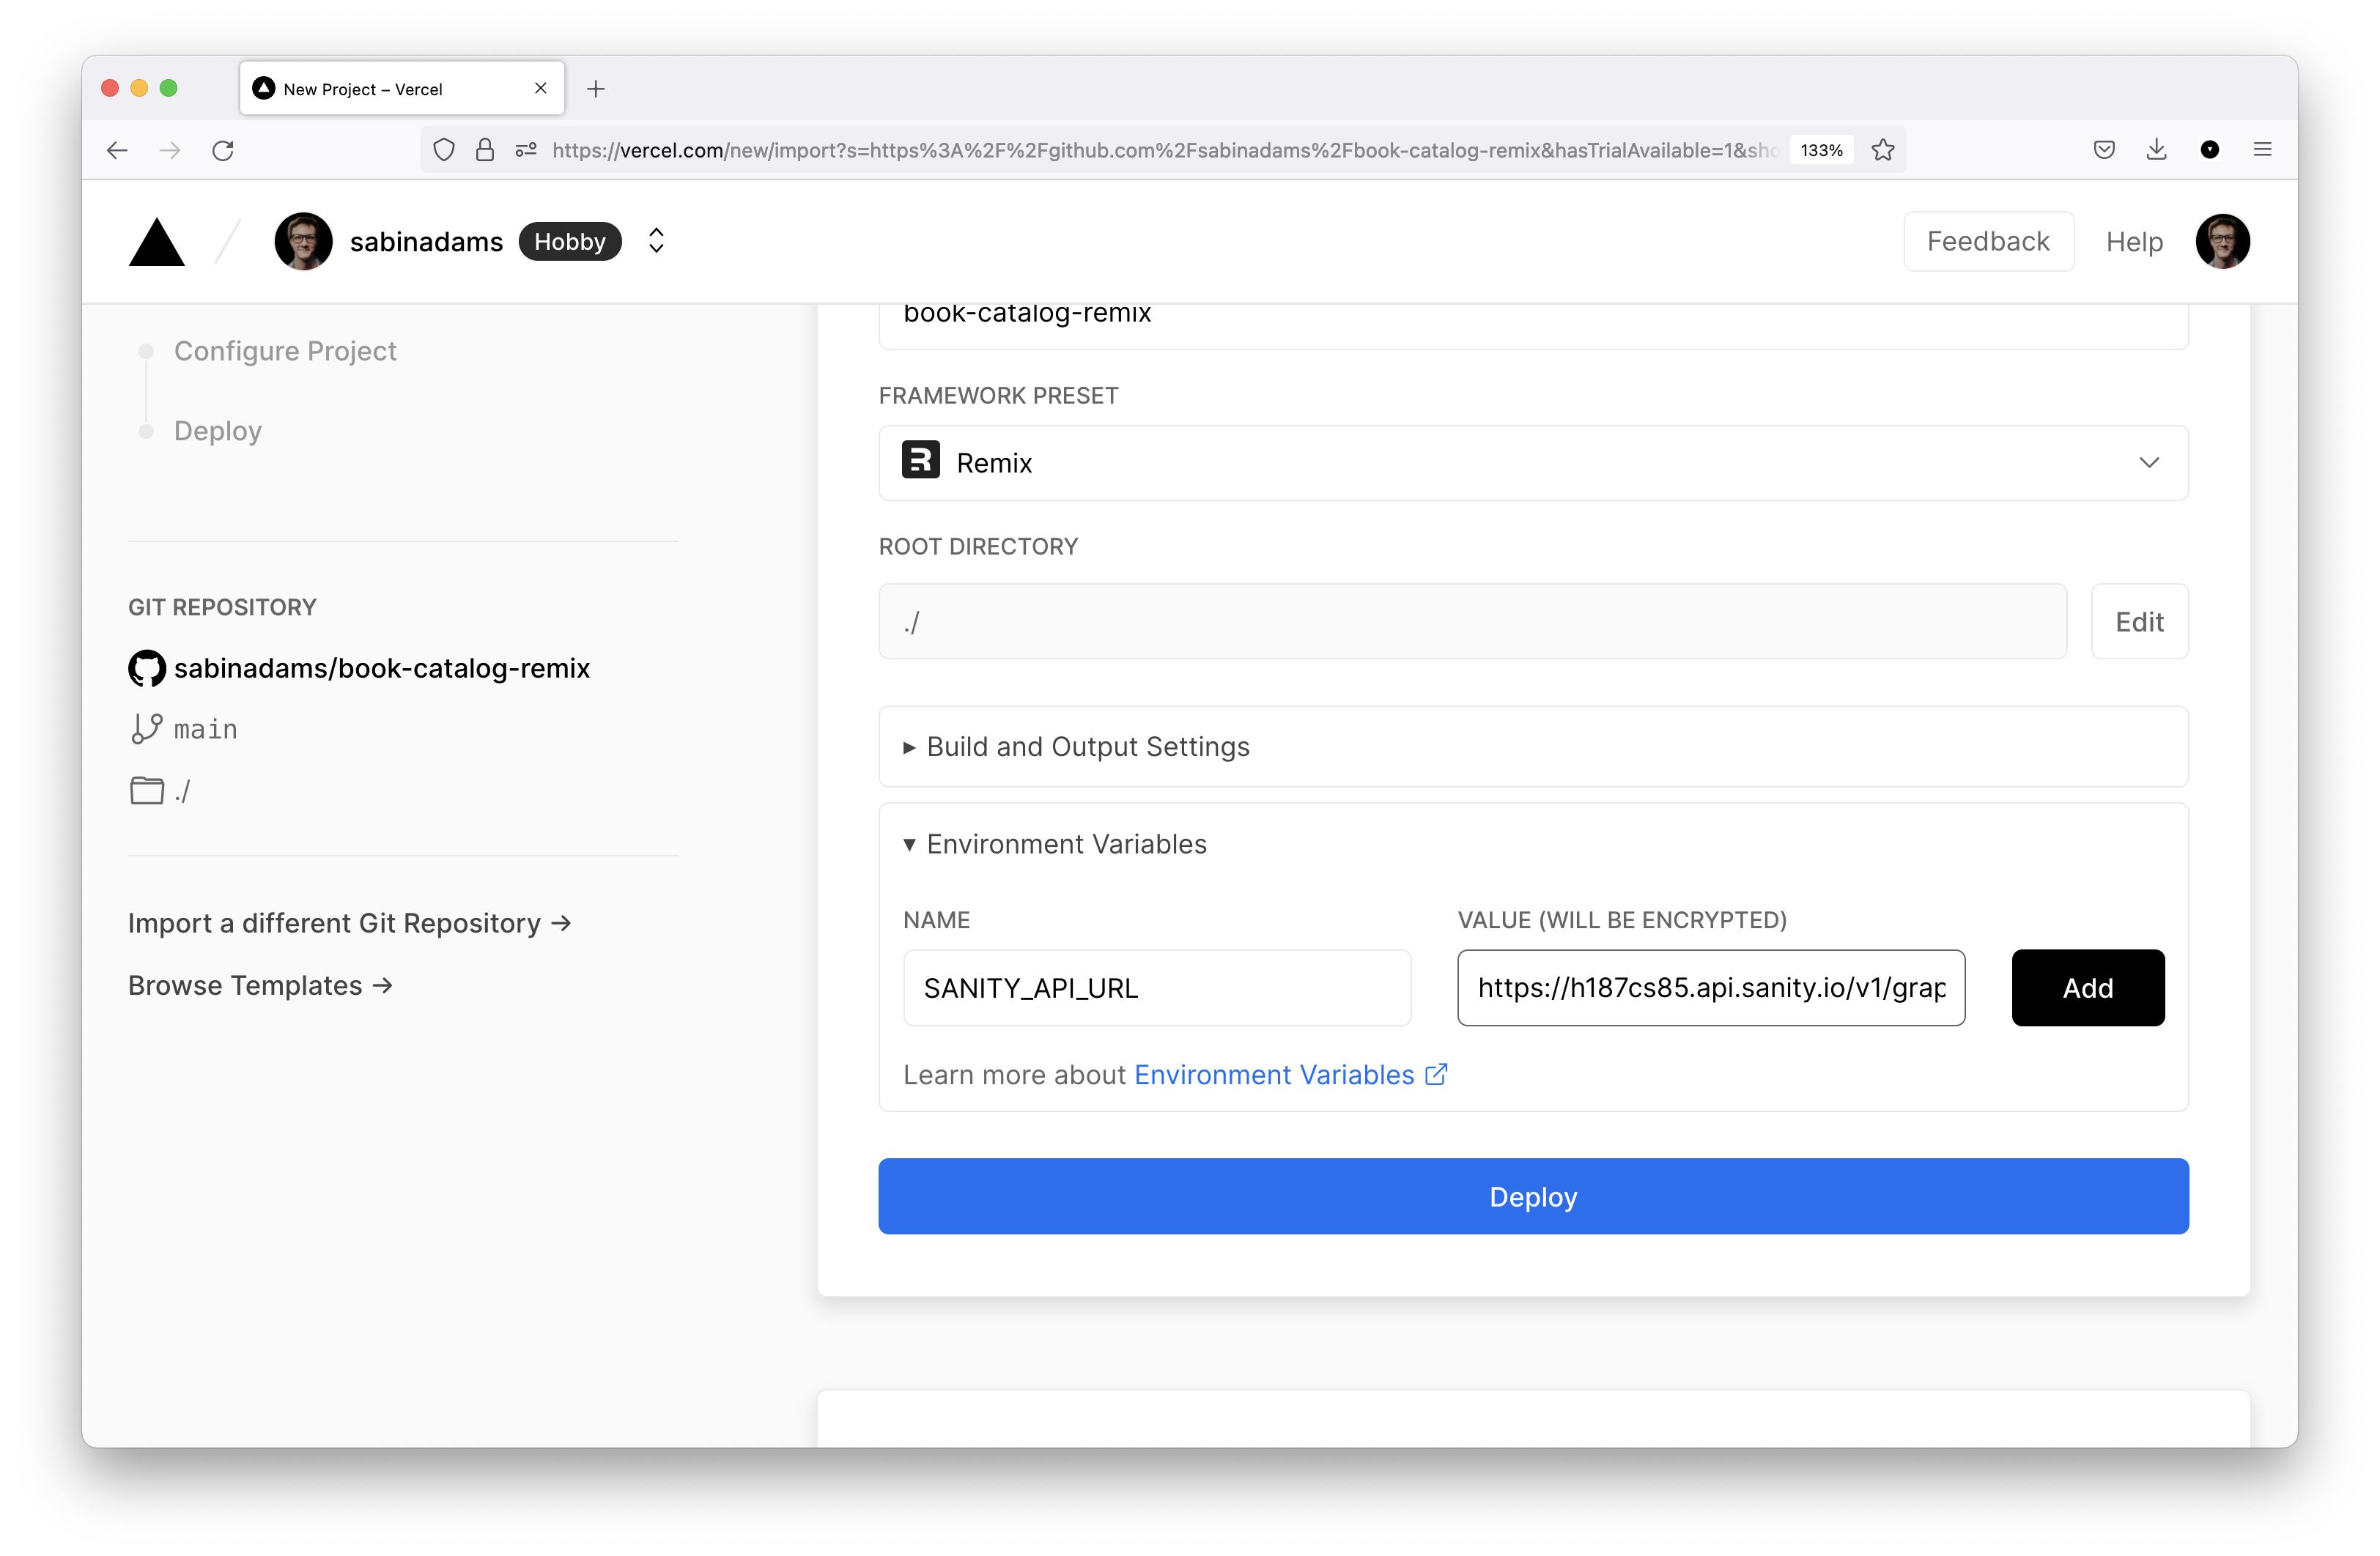
Be sure to click Add after filling in the variable's details.
Note: If you are unsure about what to input for the environment variable's value, check the value you used in your
.envfile.
Finally, you can hit Deploy to deploy your application. This will kick off the Remix project's build process and deploy the application to a live URL!
When that finishes up, you will be sent to a page that looks like this:
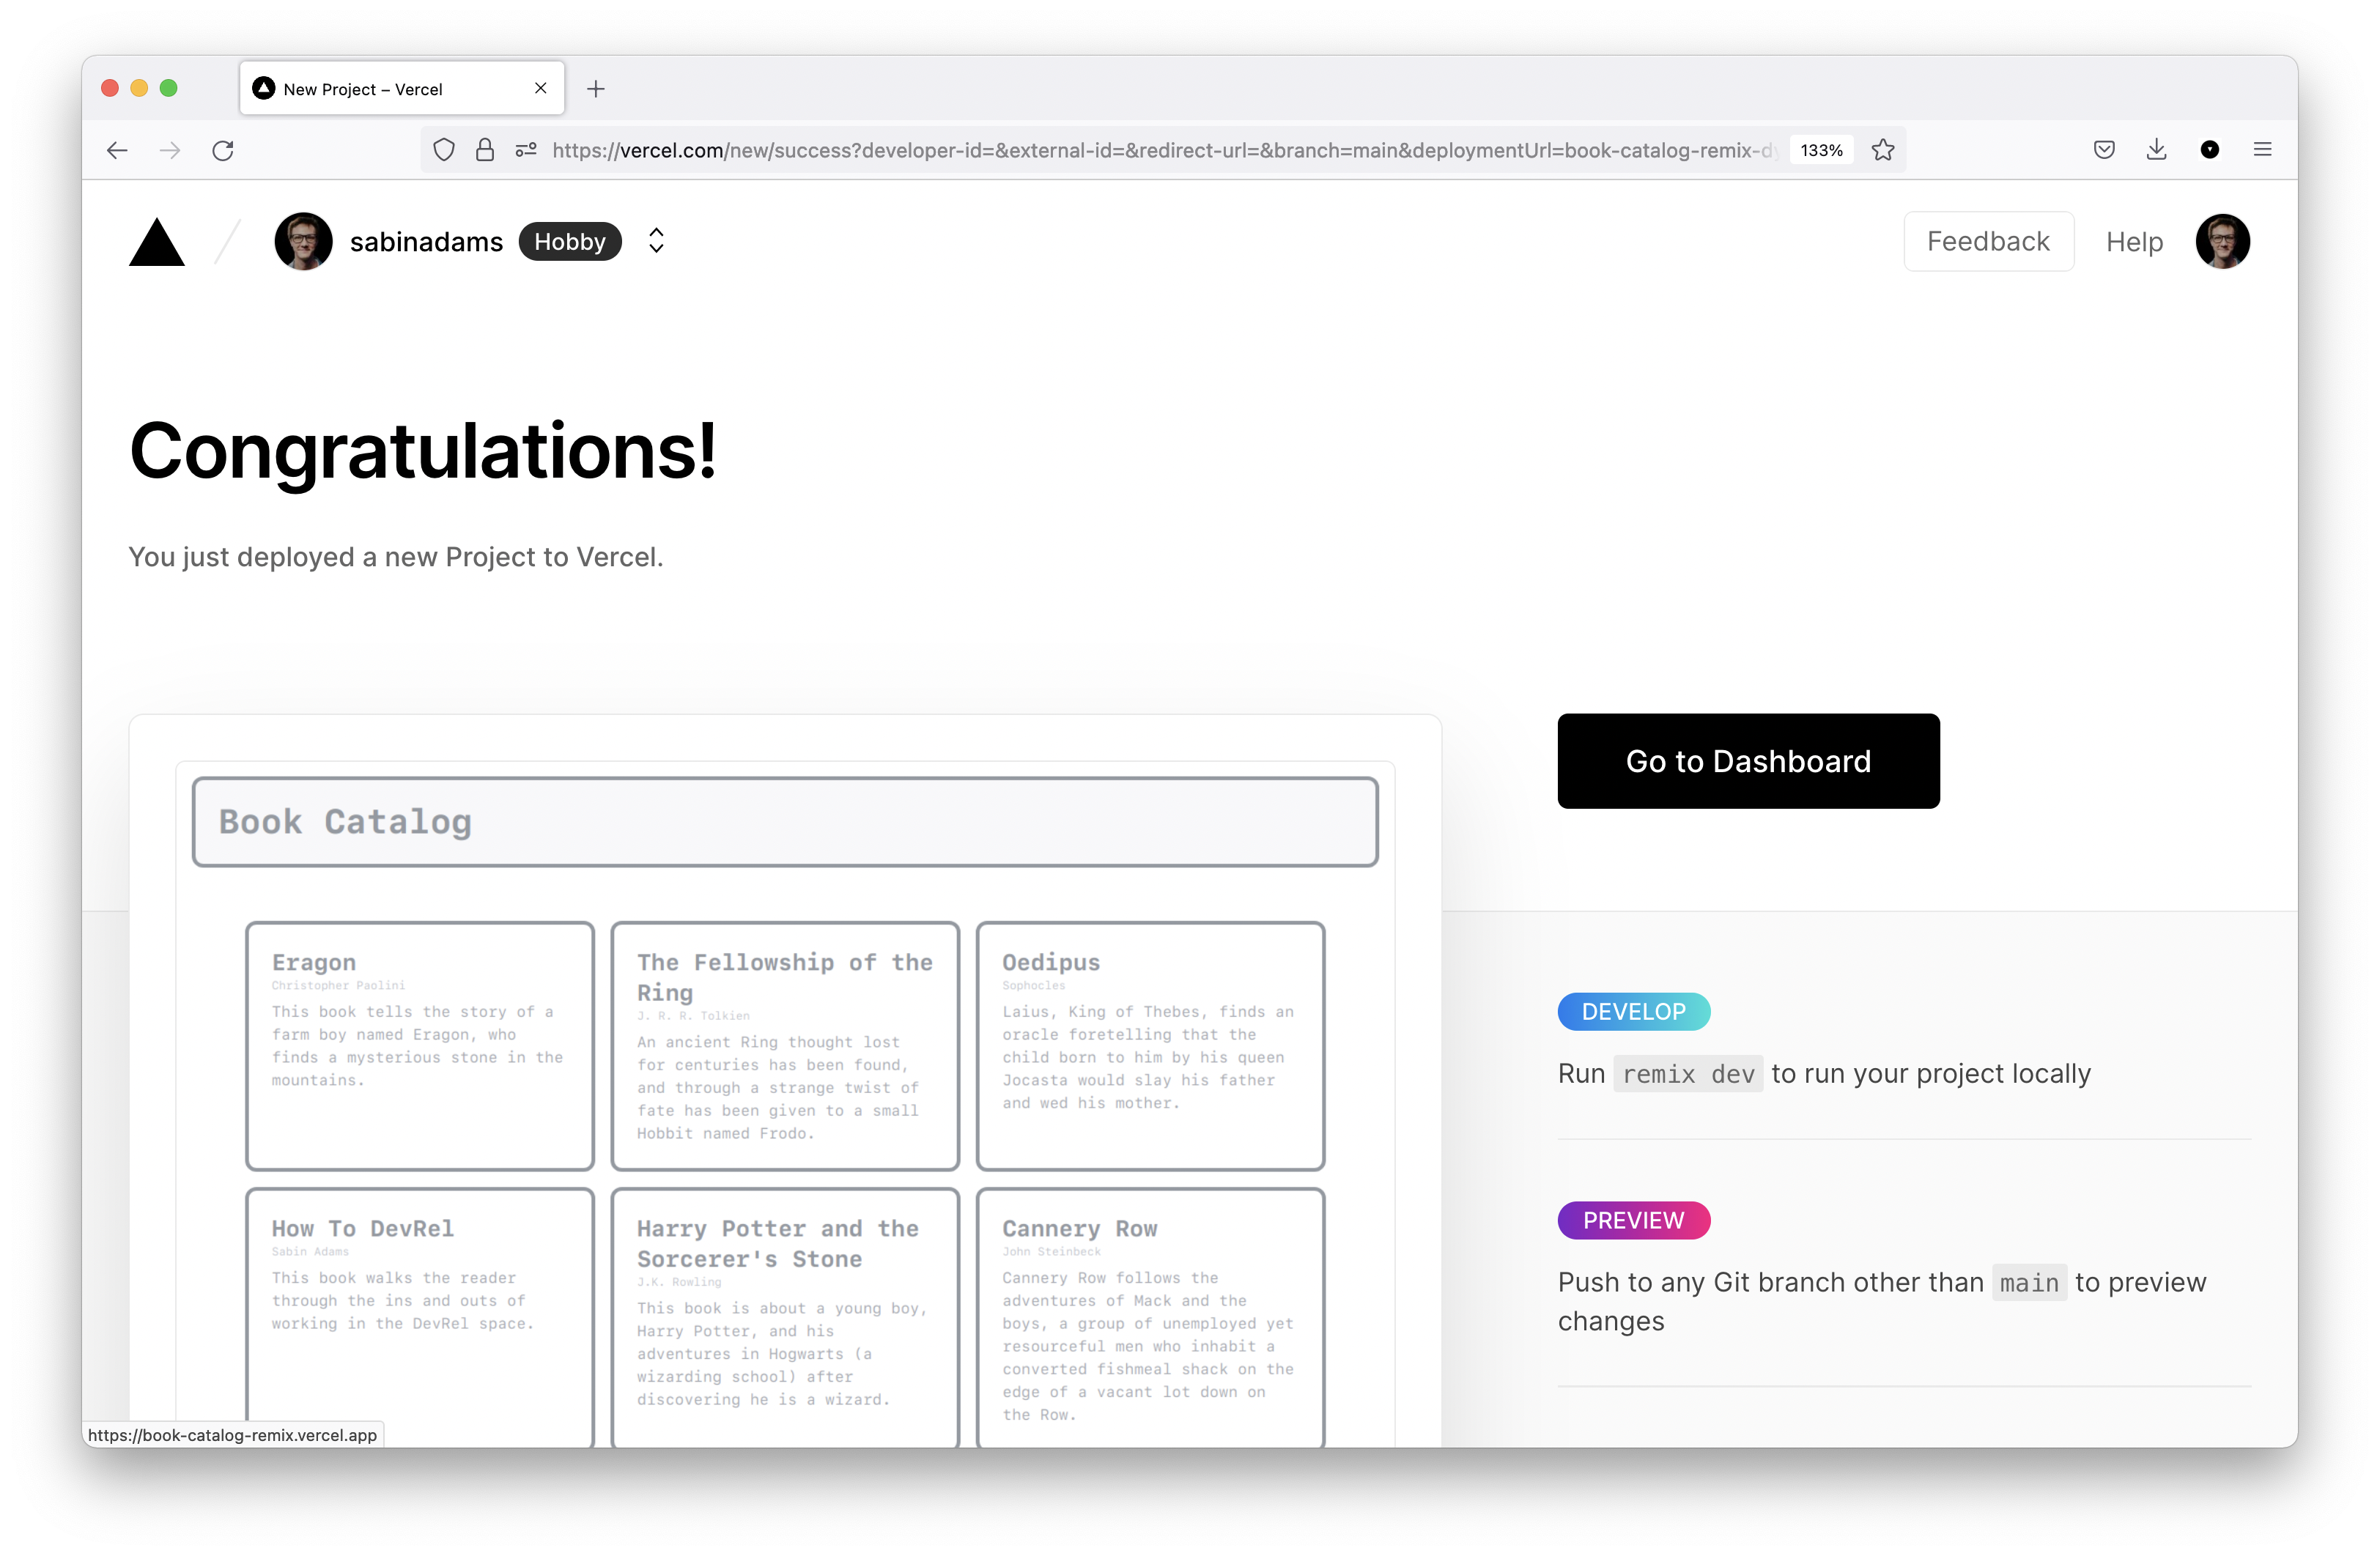
If you click the image preview of your site, a new tab will open to your newly deployed website!

Deploy the Sanity project
The steps to deploy your Sanity application are all exactly the same, except you do not have to add an environment variable.
Head back over to the Vercel dashboard and click the Add New... button again, selecting the Project option from the dropdown.
You will again be redirected to a page where you can select with GitHub repository you want to deploy. Choose the repository that holds your Sanity project:
On the next page, simply hit the Deploy button to deploy the Sanity Studio:
Once the deployment completes, open up the live site to see what it looks like:
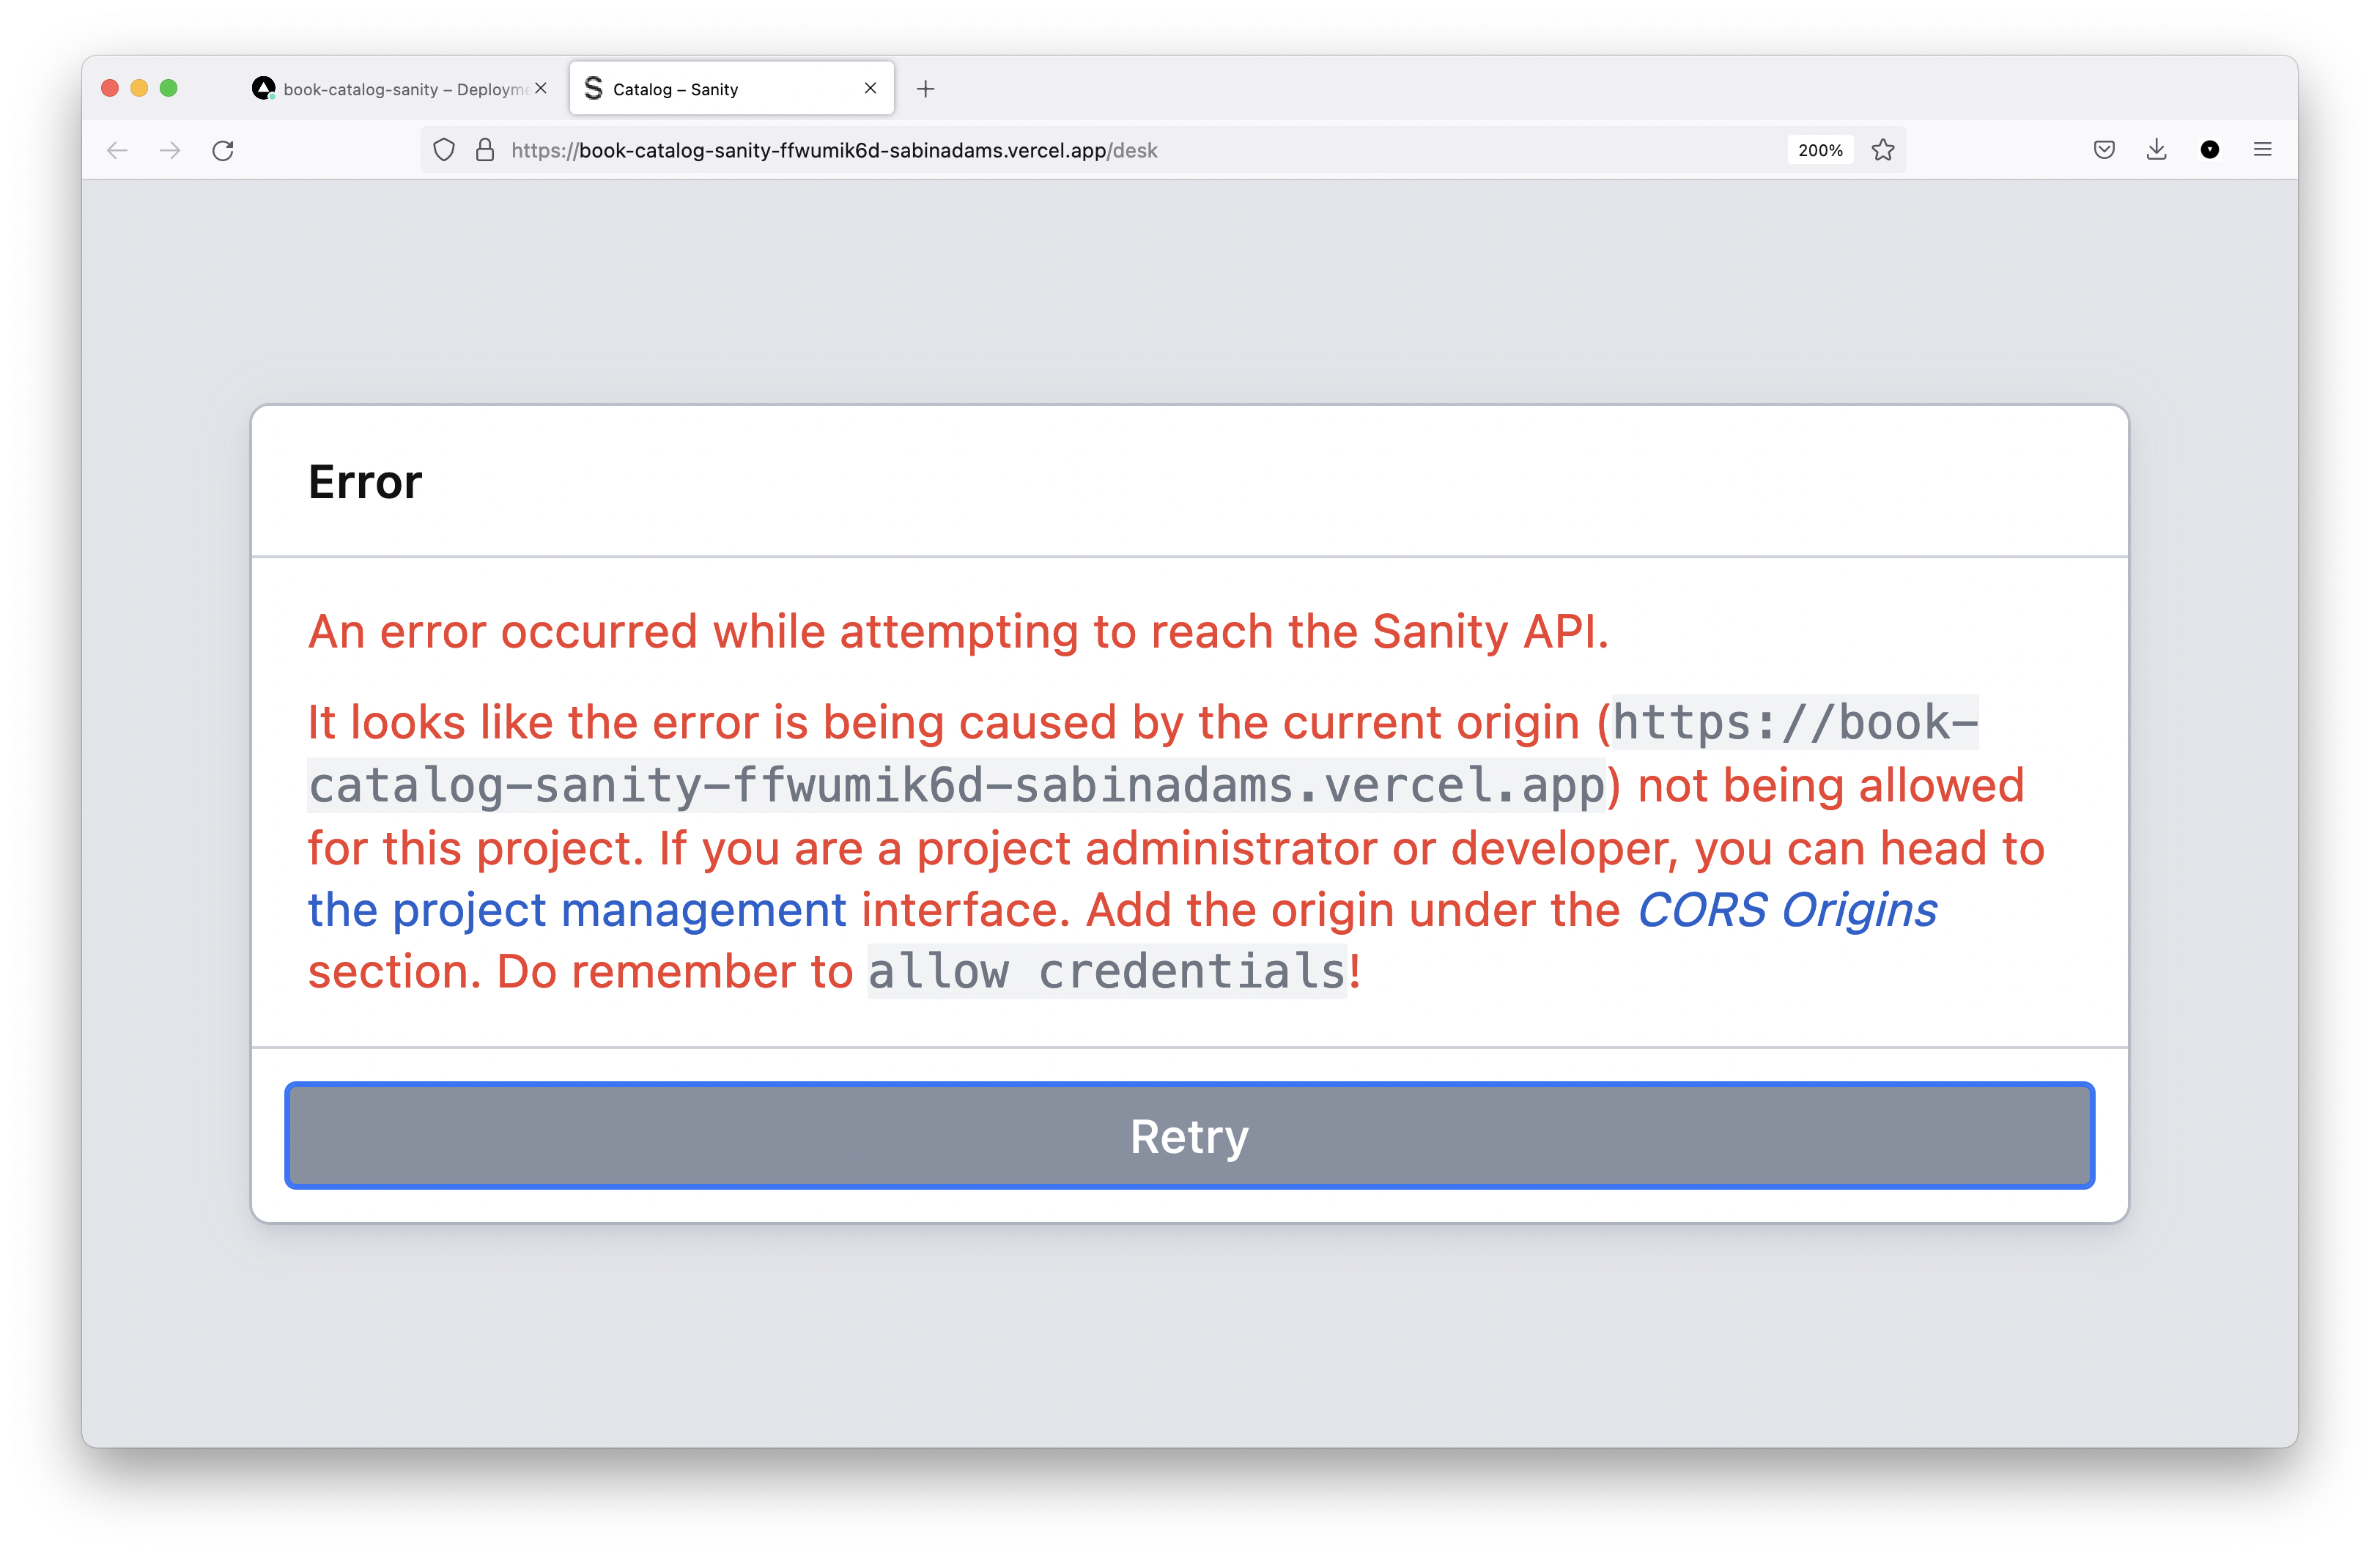
Oops... this doesn't look right! This problem occurred because Sanity is currently only accessible through localhost.
Head over to your local Sanity project's directory via a terminal and run the following command, replacing <YOUR_APP_URL> with the URL of your deployed studio:
# /Documents/projects/catalog-sanity
sanity cors add <YOUR_APP_URL> --credentials
# Example: sanity cors add https://book-catalog-sanity-ffwumik6d-sabinadams.vercel.app/desk --credentials
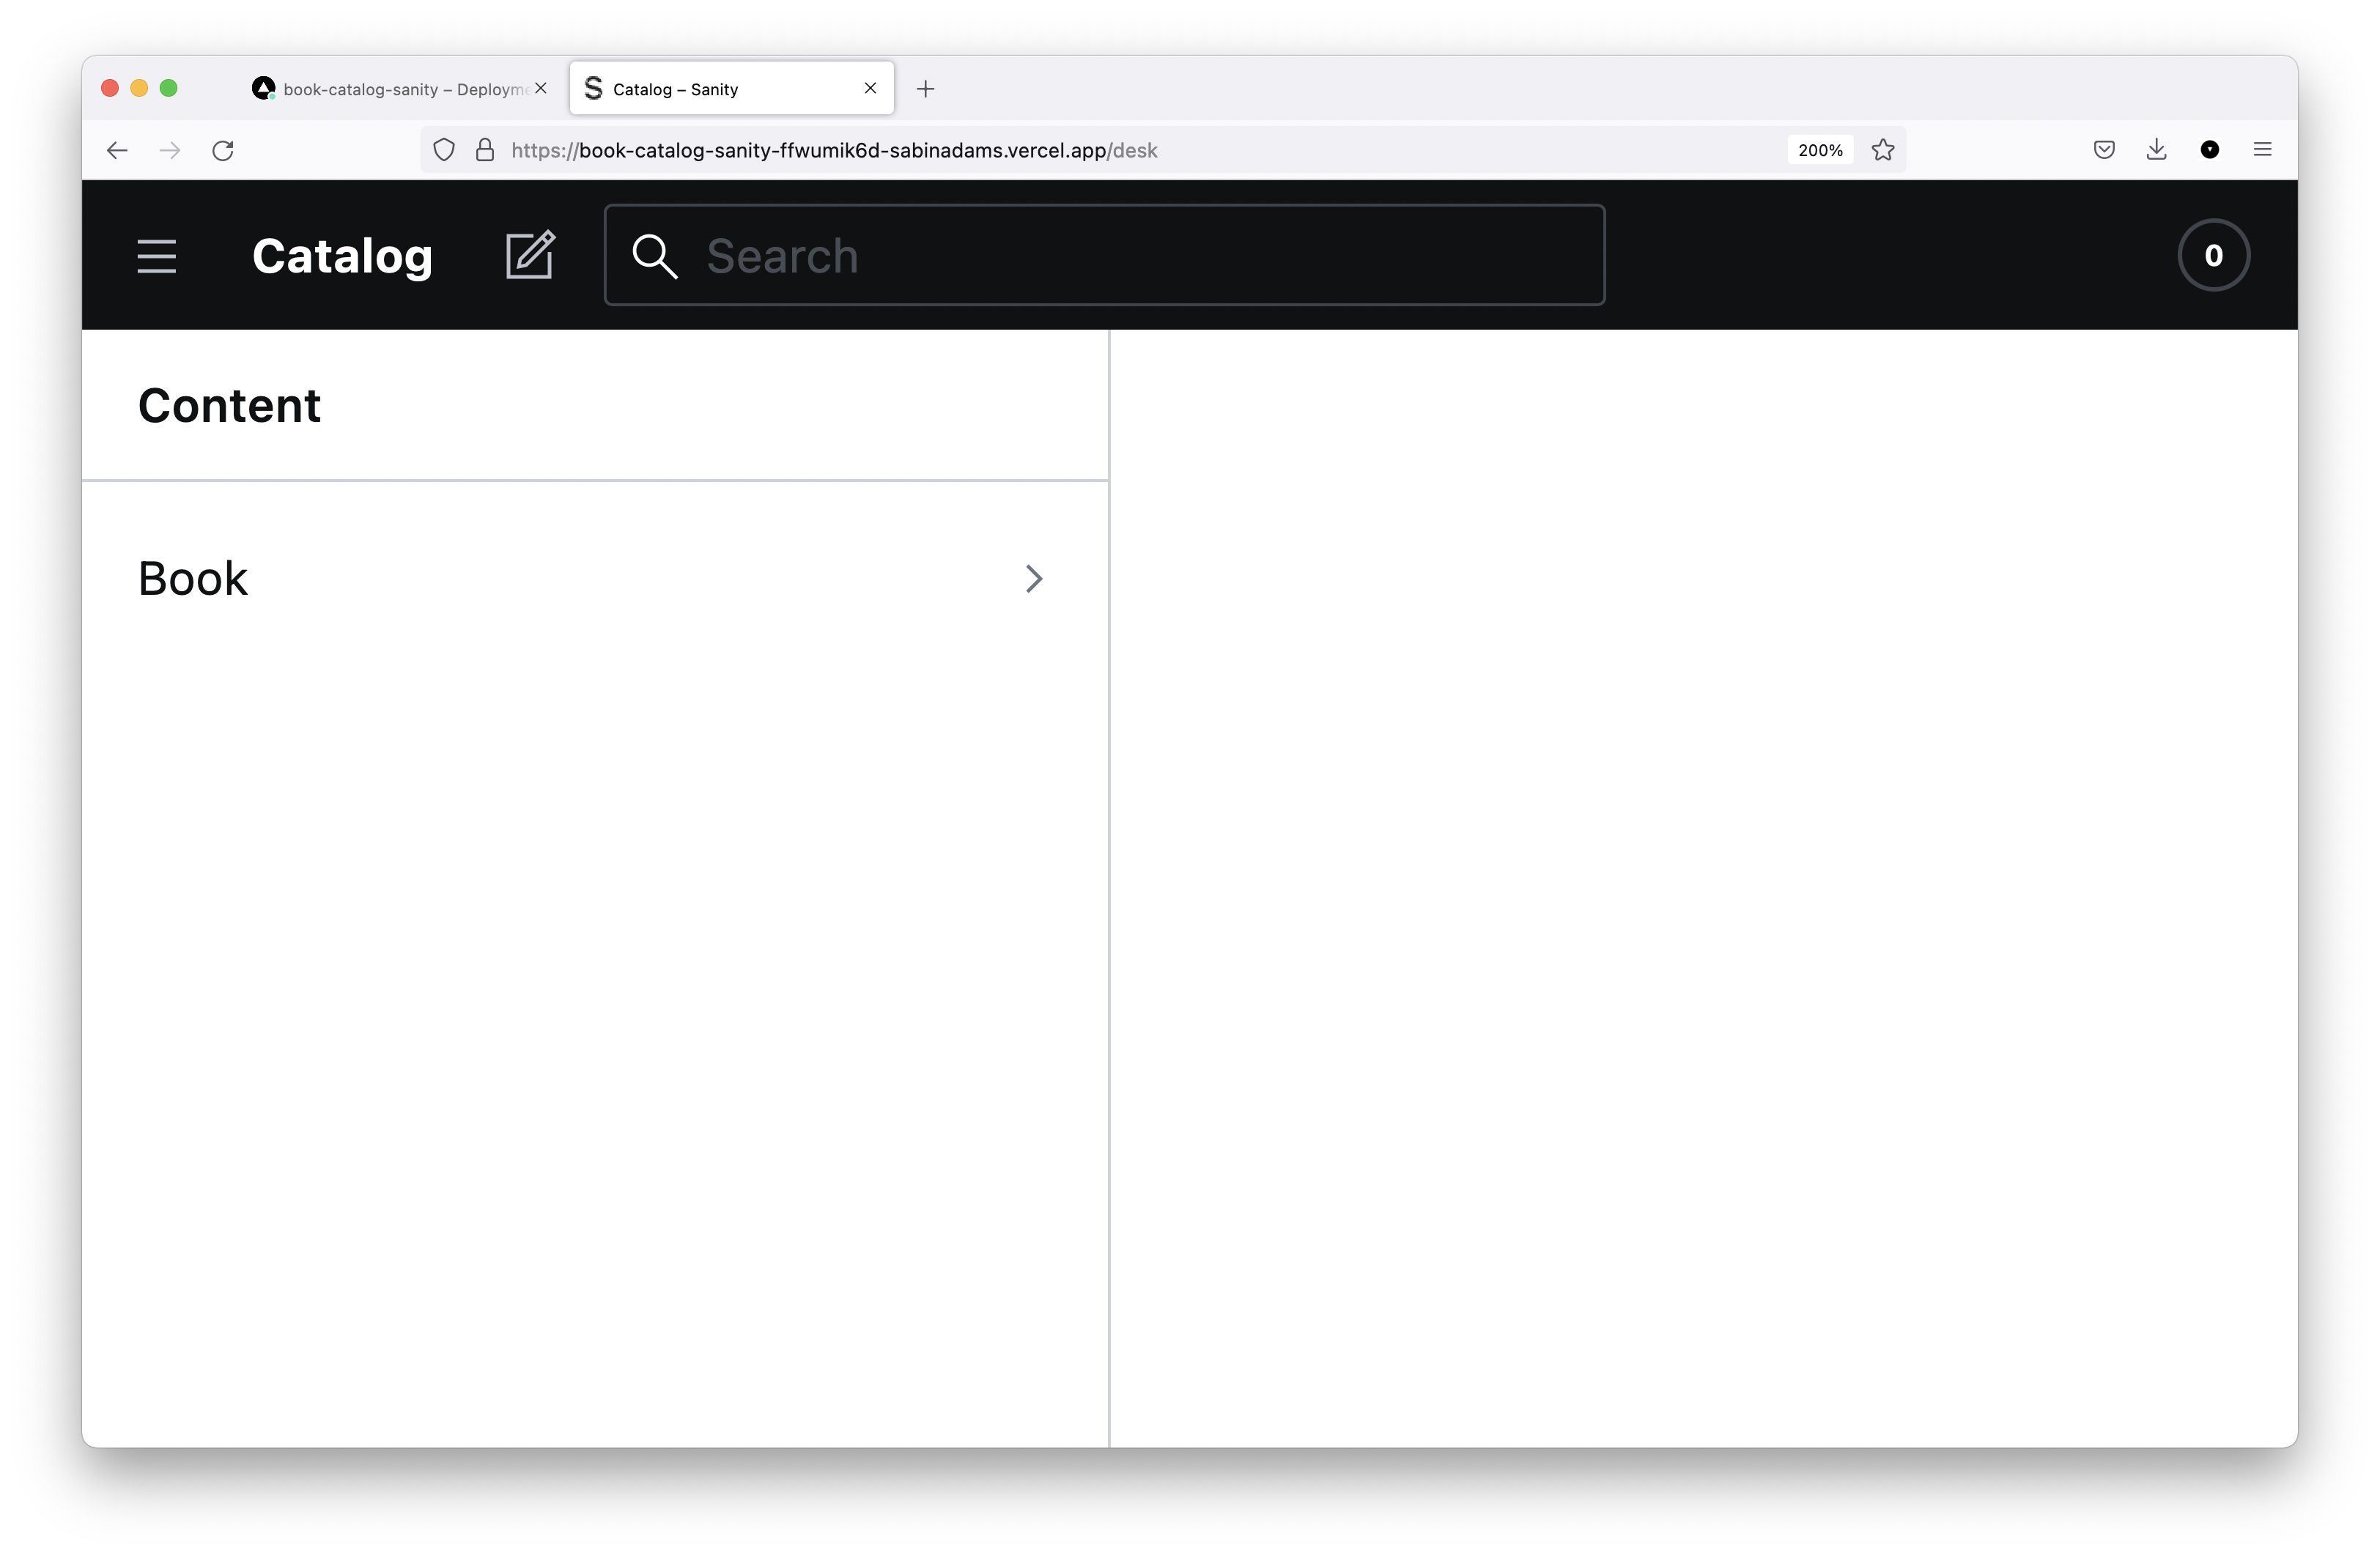
If you now head back to the browser and refresh, you should reach the Sanity Studio login page. Upon logging in, you will see your studio:
Wrapping Up
Throughout this tutorial you accomplished a lot!
Just to recap, throughout this tutorial you:
- Built a Sanity project to host your book catalog data
- Built a Remix application to retrieve and render your data
- Added both projects to GitHub
- Deployed both projects with Vercel
The end result is an easy-to-use book catalog, where you can at any time log in to your Sanity Studio from your web browser and add records to your book catalog without having to re-deploy the Remix application.
Tools like Sanity are super powerful, especially when you have complex content and/or multiple types of content to manage. They allow you to easily manage your data in an environment completely separate from your application.
If you have any questions, please feel free to reach out to me on Twitter!


