

Basic CRUD Operations in Prisma
Simple Data Interactions using Prisma and TypeScript

Welcome back to the series Playing with Prisma!
In the previous article we took a look at how to set up a simple TypeScript application and get Prisma up and running.
By the end of the tutorial we had a simple application that would print out some data when it was run. That's pretty cool, but I think we should explore some more!
If you didn't get a chance to read through the previous article, I highly recommend doing so as this tutorial will build off of our results there.
In this article we're going to be expanding upon our previous application to make use of each of Prisma’s main CRUD-y functions while learning about how Prisma's typings help make our code safer and development experience easier.
What is CRUD
If you don't already know, CRUD is an acronym for Create, Read, Update, Delete. Prisma provides the toolset we'll need to perform these operations on our data out of the box through a set of intuitive functions.
These functions are:
- Create:
create,createMany - Read:
findFirst,findMany,findUnique - Update:
update,updateMany,upsert - Delete:
delete,deleteMany
We'll take a brief look at each of these here to see how to use them.
We will also start to look at the TypeScript types that are generated for each of the functions to make our lives easier!
Where We're Starting
Just to briefly recap the state of our application built in the previous article of this series, check out the following piece of code.
import { PrismaClient } from '@prisma/client'

const prisma = new PrismaClient()

async function main() {
    const users = await prisma.user.findMany();
    console.log(JSON.stringify(users));
}

main()
    .catch( e => { throw e })
    .finally( async () => await prisma.$disconnect() )
Here we are connecting to a SQLite database via the Prisma Client that was generated off of the schema we put together, which currently contains a User model.
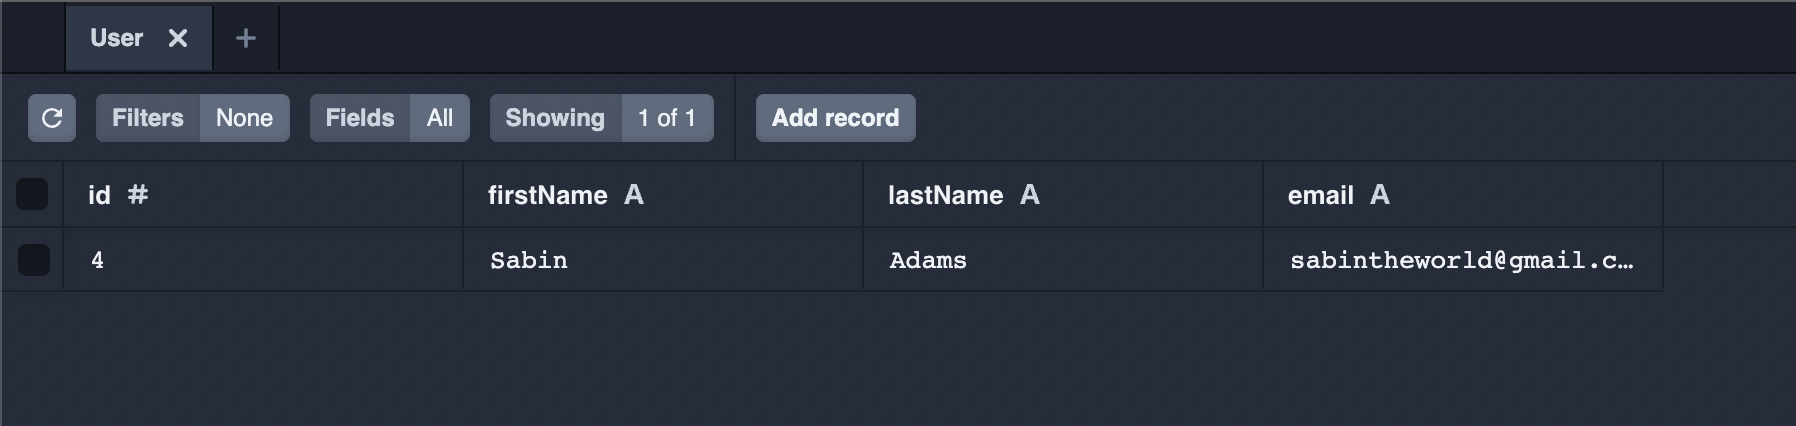
We didn’t do anything further than this though and the data in our User table was added manually via Prisma Studio.
I think a good first step to gain a better understanding of Prisma’s CRUD capabilities is learning how to create records in our User table via the code rather than the Prisma Studio UI!
Creating Data
Prisma provides two main functions that allow you to create data. These are create and createMany.
create()
Creating data is super simple with the create function.
This function takes in an object with a data key and a select key. It returns a Promise with a User object.
- data: An object of type
Prisma.UserCreateInput - select: An object of type
Prisma.UserSelect
This function by default returns the newly created record, and the optional select key allows you to define which fields you want to return if you don’t want the whole object.
Take a minute to read through this code block.
import { PrismaClient } from '@prisma/client'

const prisma = new PrismaClient()

async function main() {
    const newUser = await prisma.user.create({
        data: {
            firstName: 'Sabin',
            lastName: 'Adams',
            email: 'sabintheworld@gmail.com'
        },
        select: {
           id: true,
           email: true
        }
    })

    console.log(newUser);
}

main()
    .catch( e => { throw e })
    .finally( async () => await prisma.$disconnect() )
The code will create a new user record and return the newly generated user's Email and ID.
You may have noticed if you ran the function that the new user's ID was automatically generated because in our
schema.prismafile we set that field toautoincrement()
This is great if you already know the expected shape of your User model, but what if you aren't sure what a User looks like or are working on a larger team of people who may not know which fields are required and aren't?
When the Prisma Client is generated, Prisma automatically generates TypeScript types for the models you set up and the expected inputs for various functions such as the available fields when creating a User.
We can import those types and use them to ensure we know which keys are available and which are required.
To put this to practice, let's write a createUser function.
import { PrismaClient, Prisma, User } from '@prisma/client'

const prisma = new PrismaClient()

async function createUser(
    data: Prisma.UserCreateInput
): Promise<User> {
    return await prisma.user.create({
        data,
        select: {
            id: true,
            email: true
        }
     })
}
The function takes in a data parameter that needs to be of the type Prisma.UserCreateInput and returns a Promise that provides a User when resolved. These were made by Prisma based on your models.
If you run this code and give it some data you can see via Prisma Studio that a new user has been added to your database!
That’s much nicer! We can make this even better though. Your code editor is likely complaining about the return value of this function because it doesn't match the User model (we are picking out the id and email fields).
In order to fix this, let's tell TypeScript our function will return just a piece of the User model, also called a Partial which is a TypeScript utility type.
async function createUser(
    data: User.UserCreateInput
): Promise<Partial<User>> {...}
Nice! If you don't yet see the value of the types, start to make use of that createUser function in your main() function and see what the IntelliSense does:
As a developer this makes things super nice. We can now be fairly sure that anyone using this function will know what should get passed to that function and what to expect back because their IntelliSense will display the fields and complain if we give it the wrong data.
createMany()
This function is not yet supported in SQLite
What happens if we want to create a bunch of records at once? We don't want to have to run a bunch of separate queries to get that data into the database. That's exactly what createMany is for.
This function is similar to the create function. The difference is that its data key takes in an array of Objects matching the model's type instead of a single object.
- data:
Prisma.UserCreateManyInput[] - skipDuplicates:
Boolean
It also does not return the records it generates. It instead returns a count of the records created, which follows Prisma's BatchPayload type and looks something like:
{ "count": 3 }
Here's an example:
async function createUsers(
    data: Prisma.UserCreateManyInput[]
): Promise<Prisma.BatchPayload> {
    return await prisma.user.createMany({ data })
}

const results = await createUsers([
    {
        email: 'sabintheworld@gmail.com',
        firstName: 'Sabin',
        lastName: 'Adams'
    },
    {
        email: 'jimmyjohn@gmail.com',
        firstName: 'Jimmy',
        lastName: 'John'
    }
]);

// result = { count: 2 }
The createMany function also accepts the key skipDuplicates which can be true or false. If set to true, it will not create duplicate rows.
await prisma.user.createMany({
   data: [ ... your data ],
   skipDuplicates: true
})
I will cover the rest of the available types Prisma generates in the future, but for now just know each CRUD function has useful types similar to the ones I’ve described here
Reading Data
Just like the create functions, reading data with Prisma is very intuitive. There are certainly some complex queries and relationship-including-queries that can be built but we'll go over some of the basics here.
findFirst()
In the event you'd like to just find one record in your table that matches the criteria you give it, you can use findFirst.
This function takes in an object that tells it the parameters to use when searching your table. It then returns the first matching record it finds.
Let's see an example.
If you are curious about all of the options available check out this function's docs
import { PrismaClient, Prisma } from '@prisma/client'
const prisma = new PrismaClient()
const oldUser = await prisma.user.findFirst({
    where: {
        age: {
            gt: 20
        }
    }
})
I've also added an optional age field to our User model in the database schema. Here is the updated model in schema.prisma
model User {
  id        Int    @id @default(autoincrement())
  firstName String
  lastName  String
  email     String
  age       Int?
}
This query will look for any users that are over age 20 and return the first one that matches. You will get back a User from the function.
You can also provide other options besides where to filter down your data and configure what you want returned from the function.
For example, let's say we want the OLDEST user who is younger than 20. We could first order the table by age before selecting the first matching record using the orderBy option.
const oldestUserBelowTwenty = await prisma.user.findFirst({
   orderBy: {
       age: 'desc'
   },
    where: {
        age: {
            lt: 20
        }
    }
})
This will filter the users down to only users over 20 years old. THEN it will sort that selection from oldest to youngest. If we grab the first record off of that, we've found the oldest geezer in our database!
findMany()
This function is super similar to findUnique, except rather than grabbing the first matching record it returns ALL matching records.
If we wanted a list of users' IDs who are over 20 years old, sorted by last name A-Z, we could write:
const usersOverTwenty = await prisma.user.findMany({
    select: {
        id: true
    },
    orderBy: {
        lastName: 'asc'
    },
    where: {
        age: {
            gt: 20
        }
    }
})
findUnique()
This function, like the findFirst function, returns a single record. The difference here, though, is that the where filter only allows you to search on fields that are unique.
Think back to our User model.
model User {
  id        Int    @id @default(autoincrement())
  firstName String
  lastName  String
  email     String
  age       Int?
}
@id fields are examples of unique fields. Below is a full list of attributes that signify a field is unique.
@id: Attribute signifying the Primary Key of your table (if one exists)@@id: Compound Identifier@unique: Attribute signifying a field that should be unique@@unique: Unique Identifier
We will go over each of these and many more in the next article of this series which dives deep into the various options we have when building out our schemas.
Check out this example of the findUnique function in action
const user = await prisma.user.findUnique({
    where: {
        id: 3
    }
})
This will grab a User by it's unique identifier id. We want the user with an id of 3. As you are typing the filter out, you will notice your IntelliSense does not list each of the model's fields as available options. It only allows you to filter on the unique field in our model.
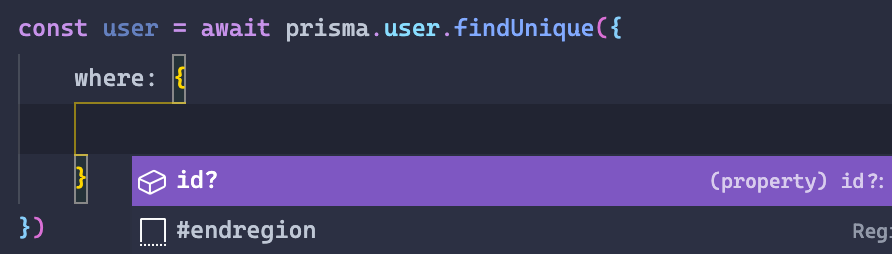
Isn't that pretty sweet?
This function also allows you to select which fields to include in the returned object and many other options just like the other "read" functions.
Now that we can read data, let's move on to updating!
Updating Data
Prisma has a bunch of cool features that allow us to update our data in various ways. We can update one or many record, or even choose to create a record if no matching record was found to update using upsert.
Below we'll go over the basics of each of these functions.
update()
The update function allows us to update a single record. You can specify which record to update the same way the findUnique function determines which record to grab. It bases its query off of only the unique identifiers of that model.
const user = await prisma.user.update({
    select: {
        id: true,
        age: true
    },
    where: {
        id: 4
    },
    data: {
        age: 7
    }
})
The query above will update a single user whose id is 4. It will set the age of that user to 7 and return an object containing the id and age fields.
If we did not provide the select key, the entire User object would have been returned.
Once cool trick I'd like to mention is that if you are updating a numeric field, there are some helper options we can use to perform mathematic operations on our number and store the results. These are the options available.
| Option | Description |
| increment | Adds the provided value to the existing value |
| decrement | Subtracts the provided value number from the existing value |
| multiply | Multiplies the existing value by the value supplied |
| divide | Divides the existing value by the value supplied |
These options are also available on the other update functions
Let's say, for example, our user's birthday passed and we need to increment her age in the database. We could use the following query to increment her age by 1 and get the user's record back.
const user = await prisma.user.update({
    where: {
        id: 4
    },
    data: {
        age: {
            increment: 1
        }
    }
})
updateMany()
We also have the ability to update many records at once using the updateMany function. This function's input takes the following options:
where: The search query to find which records to updatedata: The updates we want to make
What we get back is different than the update function though. Similar to createMany, we instead get back a Prisma.BatchPayload object, which is of the format below. The count key is a count of how many records actually received updates.
{ "count": number }
To put this to practice, let's update all users who have the lastName of Adams and Williams to have the same email address.
const results = await prisma.user.updateMany({
    where: {
        lastName: {
            in: ['Adams', 'Williams']
        }
    },
    data: {
        email: 'newemail@gmail.com'
    }
})

// results could be { "count": 5 } if five records were updated
To query for the correct users, I used another operator available in our where statments: in. This allows us to pass in an array of values to match a field against.
Easy stuff! It's so nice how Prisma allows us to compose queries and operations in a way that is so intuitive. Let's move on to the last update function.
upsert()
Upsert is a special update. I wasn't sure whether to stick this one in the Create section or here with the Updates. The reason for this is that it does both depending on what it finds in the database!
If you aren't familiar with the database terminology, an upsert is an update that, if it does not find any records to update matching its search criteria, will create a record instead.
Say we have some user data. We want to update a user with that data, but if this is related to a new user who doesn't exist in the database yet, it should create the user with the new data instead. That's exactly what upsert is for!
If that doesn't quite make sense, take a look at this sample.
const user: User = {
    id: 3
    firstName: 'Johnny',
    lastName: 'Bravo',
    email: 'somedude@gmail.com',
    age: 25
}

const user = await prisma.user.upsert({
    select: { id: true },
    where: {
        id: userId
    },
    update: {
        age: user.age
    },
    create: user
})
Okay, what's going on here?
We start off with some user details. We can pretend someone maybe made some changes to their account and hit Save. These are the values that got sent to our server.
We then via Prisma run a query that will look up the user with the given id and update the age value of that record.
An upsert's
whereoption filters on unique identifiers only
What if this was a user creating a new account and this is a general saveUser endpoint that handles creating new users and updating existing ones? With our upsert we can specify that if no matches were made via the where clause we should run the create function instead with some data (in this case the whole user data object that was sent).
And lastly, via the select option we've specified that we want to get the ID of the updated (or created) user back. If this was left out we'd get the whole User object.
Those are the major Update-related functions! We've gone through a bunch of content so far and are close to wrapping up the overview of our CRUD functions, so kudos for hanging in there with me so far!
On to the Delete functions!
Deleting Data
The last piece of CRUD (hah) we'll be taking a look at is the Delete functions. These functions are pretty simple and straightforward so let's jump right in.
delete()
The delete function does exactly what it sounds like it would do, it deletes a record of data in your table.
It takes two options in its input:
where: The where option filters on unique fields onlyselect: This allows you to select data from the record you are deleting
const deleted = await prisma.user.delete({
    where: {
        id: 3
    },
    select: {
        email: true
    }
})
In this query, we are deleting a User with the id of 3. We are also returning the email of this user to do some post-processing with afterwards (or something like that...).
If we left select blank we would get back the entire User record we deleted.
deleteMany()
The last function we'll be looking at in this article is deleteMany. This is a pretty simple one and follows a lot of the conventions we've seen above.
This function takes in an input with a where option. This allows us to filter down the the records we want to delete.
What we get back is a Prisma.BatchPayload object containing the count of records that were deleted.
Here it is in action:
const results = await prisma.user.deleteMany({
    where: {
        id: {
            notIn: [1,3,4]
        },
        email: {
            endsWith: '@gmail.com'
        }
    }
})
The query above deletes all of the users whose ids are not one, three, or four. It also only deletes the record if it has a @gmail.com email.
And that's it, pretty simple!
Wrapping Up
That's a lot of stuff to get through! Great job following a long and I hope you were able to glean something from the overviews and examples above.
Of course, this just scratches the surface of what Prisma can do and the complexity of queries it allows. We touched on a few of the cool utility filtering, updating, and inserting options that are available through the Prisma Client, but we will certainly be digging deeper in future articles.
For now, thanks so much for reading! If you are curious and would like to know more about the CRUD functionality Prisma offers or any of the other CRUD operations, check out the documentation Prisma provides.
Happy coding!


