


Managing Lambda Size with Multiple Prisma Clients
Learn to use Serverless Framework to deploy a function with multiple Prisma Clients while maintaining a decent artifact size


The serverless architecture allows you to set up your applications in a way that is massively scalable, highly available, potentially cheap, and hands-off in terms of managing the host server.
These benefits have drawn many to begin adopting this architecture. There are, however, some snags you may run into along the way.
The one we'll be looking at today is Lambda's size-limit, specifically when your application uses Prisma, and how to architect your system in a way that maintains a low lambda size.
Let's jump right in!
Prerequisites
We will be talking about and building out a sample serverless function on AWS Lambda using the Serverless framework. As such, you should be at least somewhat familiar with:
- Node.js
- ExpressJS Framework
- Serverless concepts
- Serverless Framework
- Prisma
- AWS ecosystem
If you aren't super familiar with any or all of these, don't sweat it. I'll try to explain as we go. But a basic understanding will be helpful.
- Make sure you've got Node.js installed
- Also make sure you have an AWS Account
The full code for the sample project can be found here
The Problem We're Solving
Prisma is a fantastic tool that allows you to easily set up a fully type-safe "next-gen ORM" and generate a feature-rich library that you can use to interact with your database.
As Prisma grows in popularity, more and more people are starting to use it in their serverless applications and functions. One finding resulting from this, however, is that the Prisma library can be pretty expensive in terms of file-size, especially when using multiple Prisma Clients.
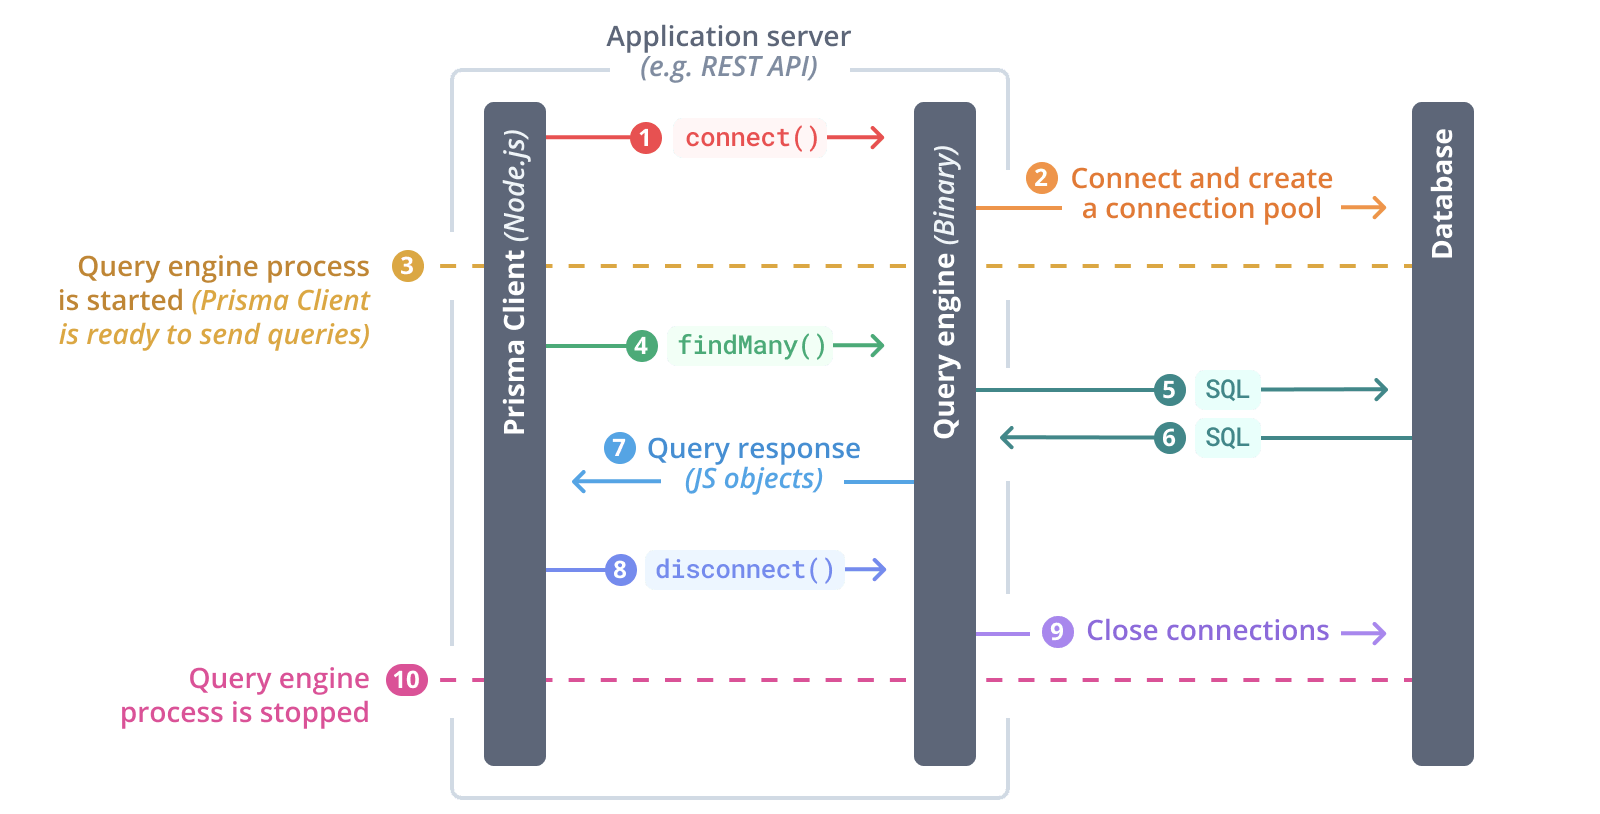
This problem is largely due to the size of the Prisma Engine binaries, which are files that handle the connections and interactions with the database.
Each Prisma Client includes a copy of the binary for your OS (or whichever OS you have configured Prisma to use) and currently you need a separate Prisma Client for each database and each schema within those databases you would like to use.
NOTE: The prisma team is working on an enhancement to alleviate a part of this issue and allow multiple schemas in one client.
There are multiple different operating systems the Prisma Engine binary can be built for. AWS Lambda uses the rhel-openssl-1.0.x binary, which is downloaded into each generated Prisma Client as well as into the node_modules/@prisma folder. This binary tends to be around 41mb at the time of writing this article.
AWS Lambda has upload limits of 50mb for zipped artifacts (unless you opt to use S3 to store your deployment package and download it when the function is invoked) and 250mb for the unzipped version.
As you can imagine, as you add Prisma Clients (maybe your database has 5 schemas you want access to and you therefore need 5 clients), the sizes of all those files add up quickly!
In order for this awesome technology to be feasible in a serverless setting, we need to figure out a way to get that file size down...
To demonstrate the method I've come up with to alleviate this size problem, let's build out a simple ExpressJS application with a couple of Prisma Clients and deploy it in a way that keeps the file size manageable.
Setting Up An ExpressJS Server
First off, we'll get the basic skeleton of our Express server started. Head over to your directory of choice and create a folder to hold your project. I'll be creating a function that handles recording Dogs and Cats in my pet store 🐶🐈.
mkdir petstore && cd petstore
We're going to want a few dependencies to allow us to use and run Express and perform a few tasks later on.
npm init -y
npm i -s express dotenv fs-extra serverless-http
We'll also need a few development dependencies to allow us to use Prisma, run our server with live-reload, and configure custom scripts in our Serverless config later on.
npm i -d nodemon prisma serverless-scriptable-plugin
Open up the project (code . for VSCode users) and create a file named index.js at the root of the project with the following boilerplate code to start off our Express app:
const express = require("express");
const port = process.env.PORT || 8000;

// Get express application
const app = express();

// Set up default route
app.get("/", (req, res) => {
    res.status(200).send(`Welcome to the Petstore!`);
});

// Start 'er up!
app.listen(port, async () => {
  console.log(
    `Listening on: http://localhost:${port} `
  );
});
Go ahead and run the application using Nodemon
nodemon index
You should see your server come up! If you hit that default route at localhost:8000, either using some HTTP client or your browser, you should see your response come back successfully!
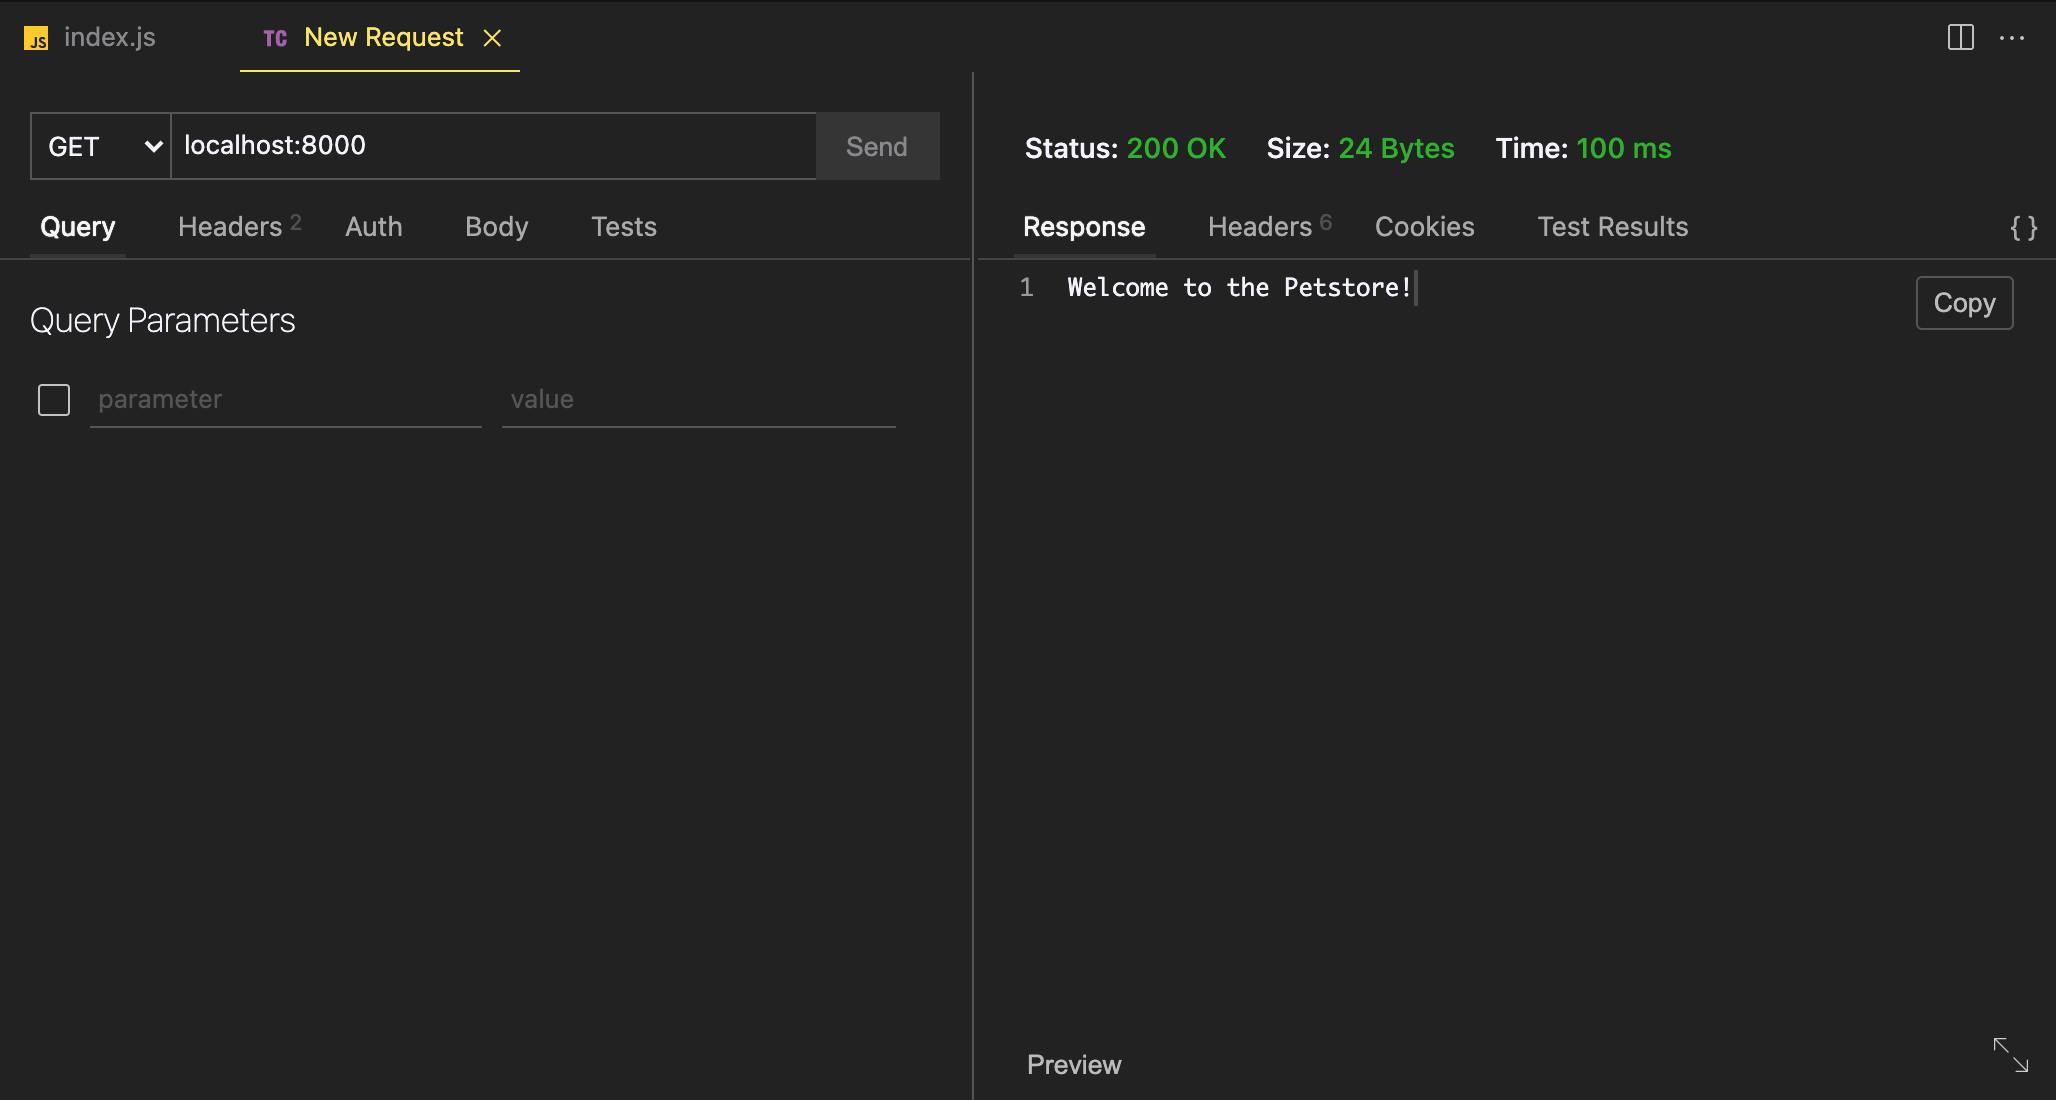
NOTE: I'm using Thunder Client, an HTTP client extension for VSCode. It's amazing, give it a try if you haven't already!
Setting Up Multiple Prisma Clients
The next thing we'll want to do is set up two Prisma Clients so we can interact with two different databases in our Express app. We'll first use the Prisma CLI to initialize Prisma in our project and scaffold out our first schema.
prisma init
This will create a /prisma folder and a fresh schema for you to work with. If you aren't familiar with Prisma and its set of tools, definitely check out the docs! It's a powerful piece of software!
We'll go ahead and rename that initial schema.prisma to dog.prisma, as it will define our Dog database. That file should contain a default shell of a schema already set up. We're going to update those contents to use SQLite as the database and add a Dog model.
generator client {
  provider      = "prisma-client-js"
  output        = "../node_modules/.prisma/dog-client"
  binaryTargets = ["native", "rhel-openssl-1.0.x"]
}

datasource db {
  provider = "sqlite"
  url      = env("DOG_URL")
}

model Dog {
  id    String @id @default(cuid())
  name  String
  color String
}
So what does this do exactly?
- Sets up a datasource that will connect to a SQLite database found at a path provided in the environment (we'll set that up in a sec).
- Defines a
Dogmodel that will correlate to aDogtable in our database. - Important: Specifies that we want to download the
rhel-openssl-1.0.xbinary along with the native binary, which is the binary needed by AWS Lambda - Important: Specifies an output directory for our generated client.
By default the output of the Prisma Client is node_modules/.prisma/client. This is fine for a single client, but we are going to use multiple clients! We are creating our own folder in .prisma to hold our dog client.
NOTE: You can output the client anywhere, even outside of
node_modules, but I've chosen here to allow us to easily make use of Layers in AWS later on.
The prisma init command also created a .env file. Go ahead and replace the contents with the following to set up our database's file path:
DOG_URL="file:./dog.db"
We'll now do the same exact process, but create a Cat database! Add another file to the /prisma folder called cat.prisma with these contents:
generator client {
    provider      = "prisma-client-js"
    output        = "../node_modules/.prisma/cat-client"
    binaryTargets = ["native", "rhel-openssl-1.0.x"]
}

datasource db {
    provider = "sqlite"
    url      = env("CAT_URL")
}

model Cat {
    id    String @id @default(cuid())
    name  String
    color String
}
And update .env to add an environment variable named CAT_URL:
CAT_URL="file:./cat.db"
We can now generate our databases and Prisma Clients.
# Create the DBs using Migrations
prisma migrate dev -name init --schema=prisma/dog.prisma
prisma migrate dev -name init --schema=prisma/cat.prisma
Great! Your file tree should look something like this at this point:

Those migrate commands set up a migration history for your databases, created the database files (because we are using SQLite) and generated the Prisma Clients for us to use in our application!
Let's put those to use and start playing with data.
We'll need to import the Prisma Clients and instantiate them in index.js so we can use them in our routes.
const express = require("express");
+ const { PrismaClient: DogClient } = require('.prisma/dog-client')
+ const { PrismaClient: CatClient } = require('.prisma/cat-client')
const port = process.env.PORT || 8000;

+ const dogClient = new DogClient()
+ const catClient = new CatClient()
Error Handling and Middlewares
Our routes will have some asynchronous actions, so let's add a utility function after we instantiate our Express app to wrap our routes in. We'll use this to gracefully throw errors in the asynchronous context.
I'm also adding a middleware here to parse out JSON bodies in our requests.
const app = express();

// Parse JSON bodies in requests
app.use(express.json());

// Wrapper for async routes
const asyncHandler = (fn) => (req, res, next) => {
  Promise.resolve(fn(req, res, next)).catch(next);
};
Next we'll want to set up an error handler to gracefully catch our application's errors. Add this near the bottom of the file, right before we call app.listen.
// Catch any errors, throw detailed info if in development
app.use((err, req, res, next) => {
  res.status(500).json({
    message: "Something went wrong",
    ...(process.env.NODE_ENV === "development"
      ? { devMessage: err.message, devStack: err.stack }
      : {}),
  });
});
Adding Routes To Our API
Great, now we're ready to add some routes! We're going to create four endpoints in our API:
POST /dog: Creates a dogGET /dog: Gets all dogsPOST /cat: Creates a catGET /cat: Gets all cats
Make sure to add these routes before the error handler middleware we added previously
We'll keep these routes super simple:
// Get all dogs
app.get(
"/dog",
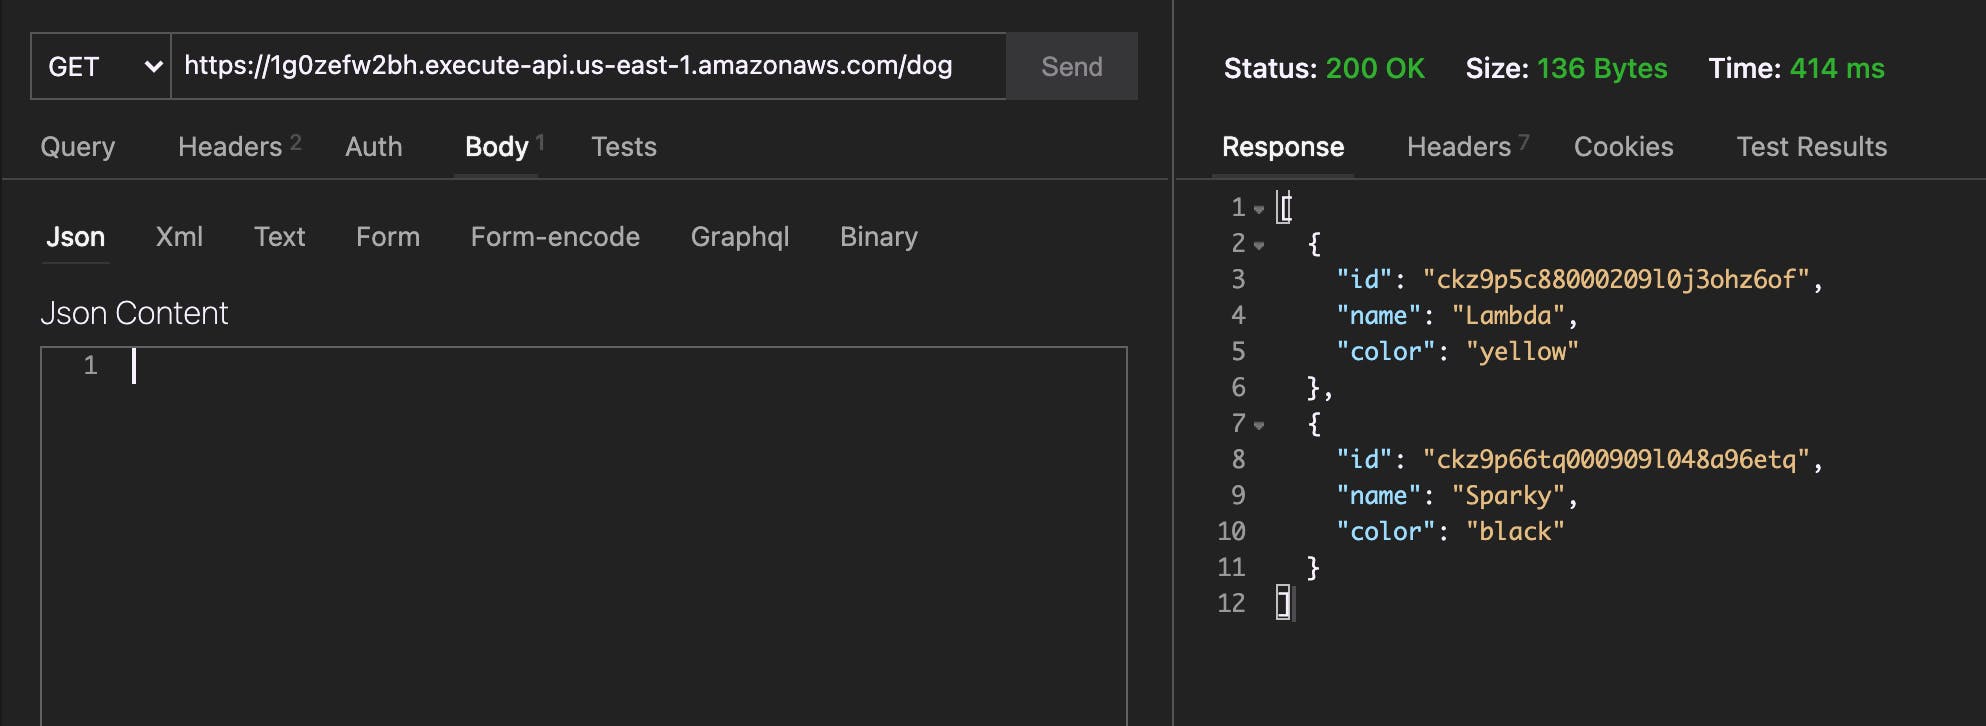
asyncHandler(async (req, res) => {
const dogs = await dogClient.dog.findMany();
res.json(dogs);
})
);
// Create a dog
app.post(
"/dog",
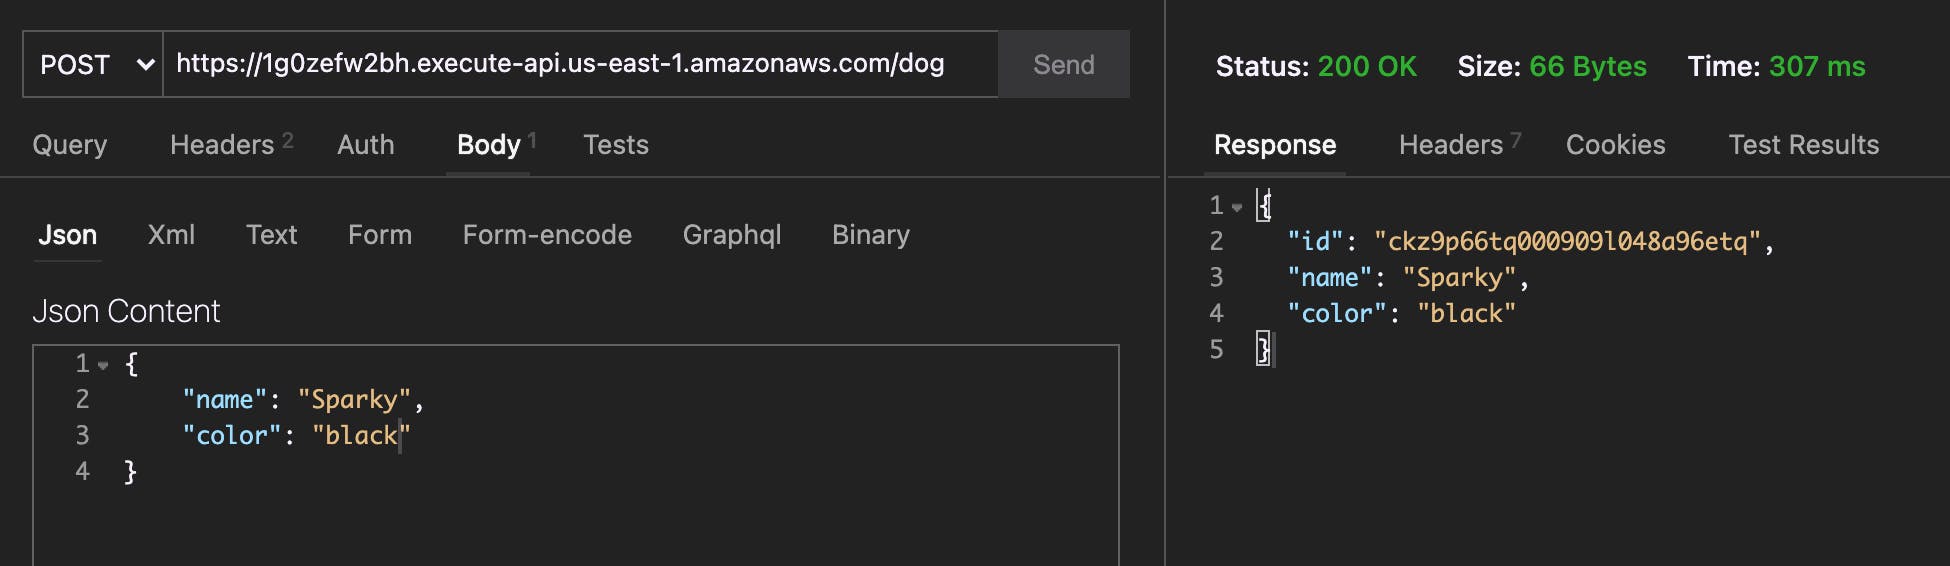
asyncHandler(async (req, res) => {
const { name, color } = req.body;
const newDog = await dogClient.dog.create({
data: { name, color },
});
res.status(200).json(newDog);
})
);
// Get all cats
app.get(
"/cat",
asyncHandler(async (req, res) => {
const cats = await catClient.cat.findMany();
res.json(cats);
})
);
// Create a cat
app.post(
"/cat",
asyncHandler(async (req, res) => {
const { name, color } = req.body;
const newCat = await catClient.cat.create({
data: { name, color },
});
res.status(200).json(newCat);
})
);
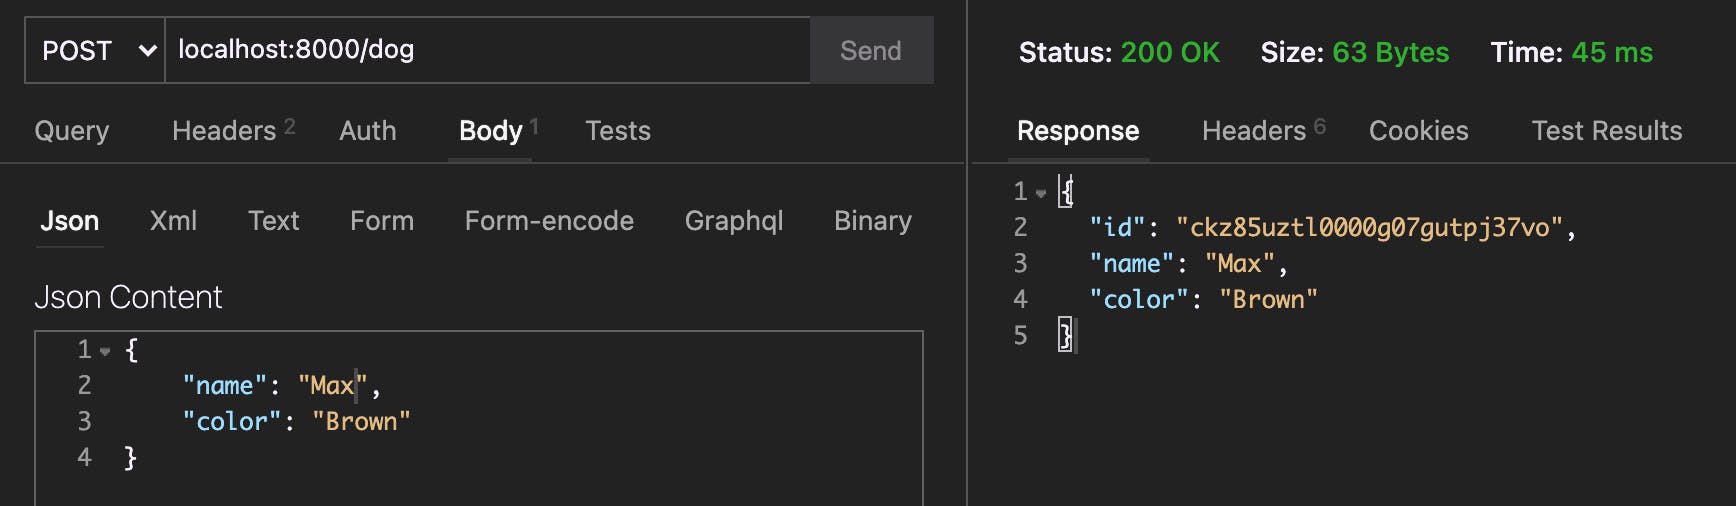
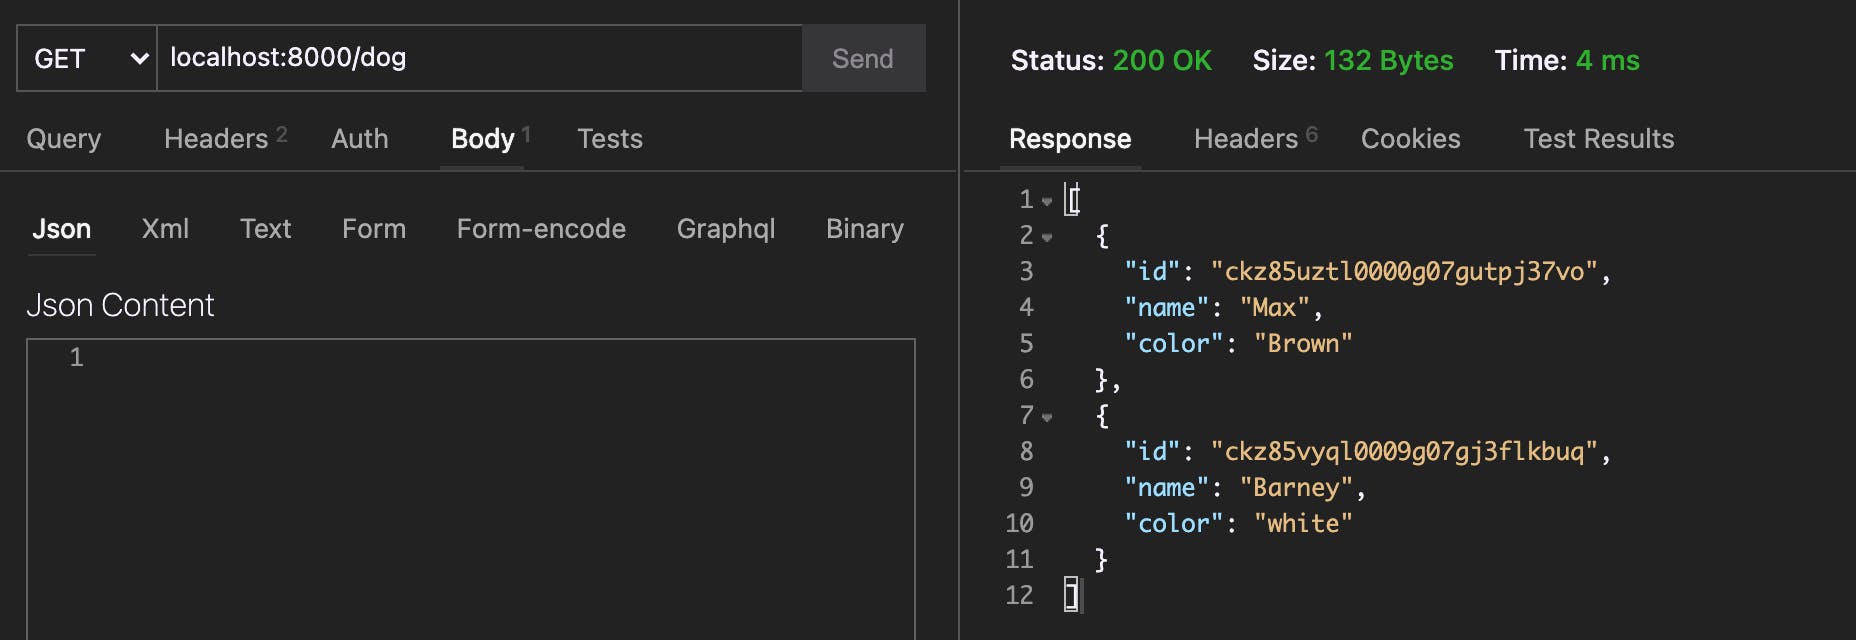
Beautiful! We've got ourselves an API in the works! If you hit a few of the endpoints, you should find you are able to create and view your Cats and Dogs.
NOTE: You can also use Prisma Studio to view this data in your database. Run
prisma studio --schema=prisma/dogs.prismato check out the Dogs database. Change the schema file tocats.prismato see the Cats.
Configuring Serverless
Okay enough setup, we've got our app going and working! Let's deploy this sucker to AWS Lambda so we can start analyzing and trimming things down!
Wrapping The Express App
In order to run this application in a serverless environment, we'll need to wrap our app using serverless-http and export that as our serverless function handler.
const express = require("express");
const { PrismaClient: DogClient } = require(".prisma/dog-client");
const { PrismaClient: CatClient } = require(".prisma/cat-client");
+ const serverless = require('serverless-http');
const port = process.env.PORT || 8000;

// Our code...

+ module.exports.handler = serverless(app);
Our application should be runnable in a serverless environment now!
Setting Up Credentials in Serverless Framework
The next thing we need to do is install the Serverless Framework CLI globally.
npm i -g serverless
This provides us with a set of tools and a framework to help us easily build out our AWS deployment configurations and architecture.
We'll also need to configure our AWS access keys so the Serverless Framework will have access to deploy to our AWS account. Sign in to your AWS account and grab your access keys. You can find them by following along below:
Once you've got those, run this command to configure your credentials locally in Serverless Framework.
serverless config credentials \
  --provider aws \
  --key <access-key> \
  --secret <secret-access-key>
More details on setting up your credentials here
Configuring The Service
Next we'll create a serverless.yml file in the root of the application where we will configure what to deploy to AWS and how.
service: petstore
frameworkVersion: '3'
provider:
  name: aws
  runtime: nodejs12.x
  stage: dev
  region: us-east-1
functions:
  petstore-api:
    handler: index.handler
    events:
      - httpApi: '*'
This does a few different things. Notably:
- Defines a service we are going to deploy
- Defines the
petstore-apifunction we want to deploy - Sets up our Express API as the function handler (index.handler corresponds to the
handlerexport inindex.js) - Allows the function to handle ALL HTTP requests
That's all the config we need to get this thing up and running. It won't be slimmed down yet, but this is the most basic setup.
Go ahead and run sls deploy to deploy this function. This will take a few minutes, but as you are waiting you may notice this output:
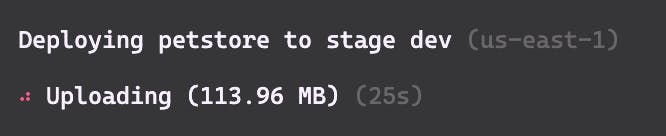
Our function is already almost 114mb! And that's the zipped artifact! That's already above the limit enforced in AWS Lambda functions. This deployment will fail.

If we unzip the artifact we attempted to deploy (found in the .serverless folder) and take a look at where the size is coming from you'll find something like this:
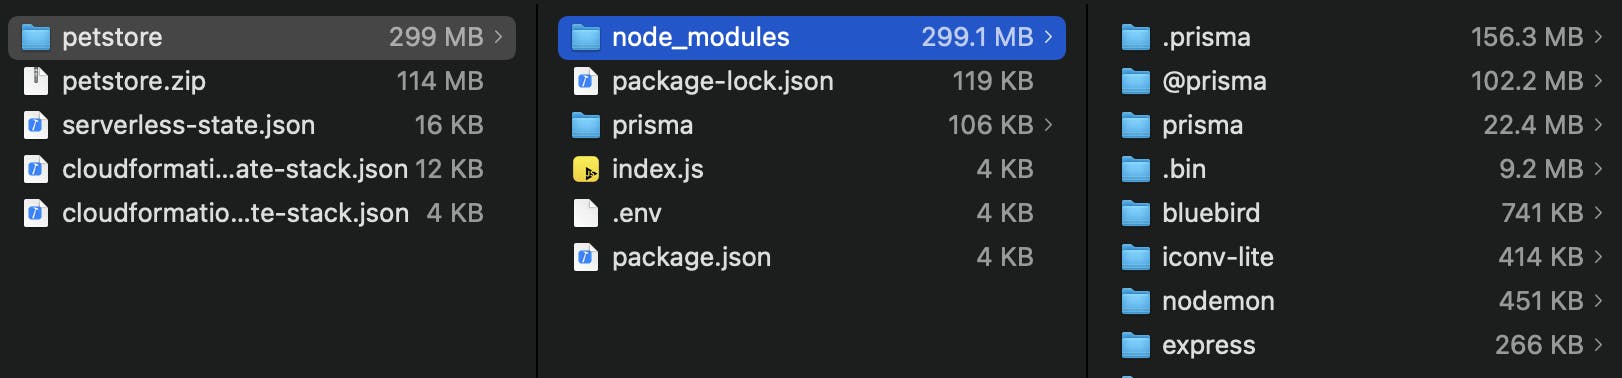
As you can see here, unzipped we're at ~299mb, and ~281mb of that is coming from Prisma's files!
So with two minimal Prisma Clients configured we can't even deploy! We're going to need to trim some of this down to get things going. No problem though, there are a few things we can do to accomplish this.
Trimming Things Down
We have a few different tricks we can use to get this file size down and to keep it low as we add more and more Prisma Clients. These can be used individually, or in combinations. In this example, we'll employ each different method together to get a super slim deployment.
Using Patterns To Exclude Files
The first thing we can do is use patterns to exclude files from the zipped output. Prisma generates files in node_modules within folder called @prisma, prisma, and .prisma.
A lot of these files are not needed for our application to run. For example, @prisma contains a bunch of engine binary files we don't need and that take up a lot of space.
Add the following configurations above your function definition in serverless.yml:
package:
  patterns:
    - '!node_modules/@prisma/engines'
    - '!node_modules/prisma'
    - '!node_modules/.prisma/**/libquery_engine-*'
    - 'node_modules/.prisma/**/libquery_engine-rhel-openssl-1.0.x.so.node'
Here we are:
- Excluding every engine from
@prisma/engines - Excluding the
node_modules/prismafolder. It's only used locally for things like CLI operations that aren't needed in our running application - Excluding all engines from the generated clients except for the
openssl-1.0.xfile Lambda needs.
If you go to deploy this you'll notice your file size is already significantly smaller and should actually succeed (my deployment ended up around ~42mb).

Does This Solve All The Size Problems?
This is fantastic and should alleviate the majority of your size issues. There is, however, still a potential problem depending on your use-case.
As more and more clients get added, each of those clients will still have their openssl-1.0.x binary file. Soon enough we'll get right back to the size we were at before!
Let's say we add Bird, Snake, and Rabbit clients to the project. Go ahead and create new schemas for each of these, run your migration and generate the Prisma Client for each.
Now, to make our lives a little easier, create a folder called ci and add a file named generate-prisma.sh with these contents:
echo "Building Libraries to ensure binaries are available..."
for file in **/*.prisma
do
    echo "Generating ${file##*/}"
    npx prisma generate --schema=${file}
done
This will go through every schema file and generate the Prisma Client. We'll run this automatically every time we start to package a deployment using the serverless-scriptable-plugin to make sure we have our client generated and ready for use. Over in serverless.yml add the following config:
plugins:
  - serverless-scriptable-plugin
custom:
  scriptable:
    hooks:
      'package:initialize': 'sh ./ci/generate-prisma.sh'
If you run sls deploy again you should see your Prisma Clients all get generated and packaged. My package ended up being around ~95mb, even with the excludes we configured before! That's getting awful big again and doesn't allow much space for your actual function's code.

We need to set something up to consolidate those engine binaries to one location and share it across all clients.
Setting Up A Layer
The next thing we can do is make use of the concept of Layers in AWS. A layer allows us to split out libraries and dependencies into a "layer" that can then be applied to our serverless function to help with code-sharing and maintaining a small file size.
Each function can have up to five layers attached, however in our scenario we are only going to use one.
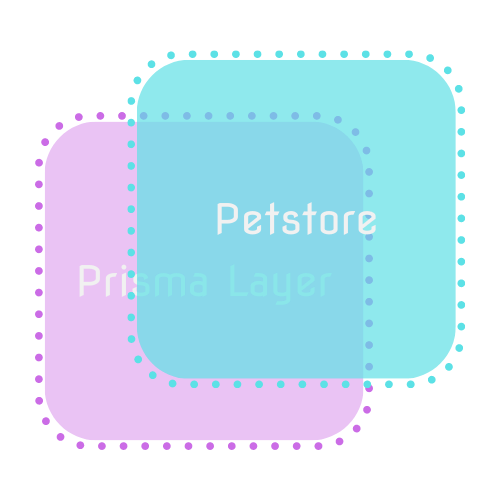
The goal here is to break out our Prisma-related dependencies from node_modules into a layer and apply that layer to our function when invoked.
To start this off, let's create another script in the ci folder named create-prisma-layer.sh that will be responsible for building out our layer.
echo "Clearing out old layer..."
rm -rf .prisma-layer

echo "Generating Prisma Client"
sh ci/generate-prisma.sh

echo "Creating Prisma Layer..."
mkdir -p .prisma-layer/nodejs/node_modules/.prisma
mkdir -p .prisma-layer/nodejs/node_modules/@prisma

echo "Copying over @prisma and .prisma to the layer"
cp -r node_modules/.prisma .prisma-layer/nodejs/node_modules
cp -r node_modules/@prisma .prisma-layer/nodejs/node_modules

echo "Copying over the prisma folder, where our SQLite DBs are (not necessary for non-sqlite)"
cp -r prisma .prisma-layer/nodejs/prisma

echo "Layer Built"
This creates a folder called .prisma-layer that will hold our generated layer. Then we move in all of the modules we need.
I am also moving over the prisma folder that contains our SQLite DBs so we don't have to package those up with our actual function.
Now over in serverless.yml, replace the custom hook we added with this to run our script before packaging our artifacts:
custom:
  scriptable:
    hooks:
      'package:initialize': 'sh ./ci/create-prisma-layer.sh'
We can then describe that layer in our service configuration:
layers:
  prisma:
    path: .prisma-layer
    description: 'Layer for Prisma Clients'
    package:
      patterns:
        - '!nodejs/node_modules/@prisma/engines/*'
        - '!nodejs/node_modules/.prisma/**/libquery_engine-*'
        - 'nodejs/node_modules/.prisma/**/libquery_engine-rhel-openssl-1.0.x.so.node'
        - '!nodejs/prisma/**'
        - 'nodejs/prisma/*.db'
And apply that new layer to our function:
functions:
  petstore-api:
    handler: index.handler
    layers:
      - { Ref: PrismaLambdaLayer }
    events:
      - httpApi: '*'
For info on how to use Layers, check out the AWS docs
Because we've done this, we no longer need to include any of those Prisma dependencies in our function's package. Let's be sure to filter those out using our patterns configuration. Replace the current config with the following:
package:
  patterns:
    - '!node_modules/prisma'
    - '!node_modules/.prisma'
    - '!node_modules/@prisma'
    - '!.prisma-layer'
    - '!prisma'
    - '!ci'
    - '!*.*'
    - '!.env'
    - 'index.js'
This essentially tells the Serverless Framework not to package any files in the root except index.js and to not include the modules, temporary folders, and util folders we don't need in our deployment.
Alright, we've got our CI functions generating Prisma and building out a Prisma layer. We've got the deployment for our function and layer configured.
Let's give it a shot! Go ahead and deploy the project.

Fantastic! Our function's artifact size is down to ~4.3mb! But look at the size of that layer! 💥 We just moved the bulk from one place to another...
A layer has the same size constraints as a full function does, so this deployment is going to fail.
This is because even though we moved off our Prisma dependencies to a layer, that layer still has all those copies of the Prisma Engine binaries!
We'll need to somehow find a way to only keep one copy and make sure every Prisma Client uses it... 🤔
Fortunately I've got a trick for that!
Slimming Down The Layer
When a Prisma Client is instantiated in your code it will look in .prisma/<client-folder> to find the binary it needs. If it doesn't find it there, it searches a number of other places where the binary might be hiding.
One of those places is a folder called .prisma/client.
What this means for us is that if we create a folder called .prisma/client in our layer and place the binary there, we can delete it everywhere else and all the clients should use that one!
Let's see it in action. Pop open that /ci/create-lambda-layer.sh file and make the following changes:
echo "Clearing out old layer..."
rm -rf .prisma-layer

echo "Generating Prisma Client"
sh ci/generate-prisma.sh

echo "Creating Prisma Layer..."
mkdir -p .prisma-layer/nodejs/node_modules/.prisma
mkdir -p .prisma-layer/nodejs/node_modules/@prisma

echo "Copying over @prisma and .prisma to the layer"
cp -r node_modules/.prisma .prisma-layer/nodejs/node_modules
cp -r node_modules/@prisma .prisma-layer/nodejs/node_modules

echo "Copying over the prisma folder, where our SQLite DBs are (not necessary for non-sqlite)"
cp -r prisma .prisma-layer/nodejs/prisma

+ echo "Copying over the OpenSSL 1.0.x Binary to the generic client folder in the layer"
+ mkdir -p .prisma-layer/nodejs/node_modules/.prisma/client
+ cp -f node_modules/.prisma/**/libquery_engine-rhel-openssl-1.0.x.so.node .prisma-layer/nodejs/node_modules/.prisma/client

echo "Layer Built"
This will go through each client folder and copy (with a replace) the binary we want into our layer at .prisma/client. The result is we get one binary file in that folder.
Now over in our serverless.yml we can configure our Prisma layer's package pattern matcher to exclude binary files that aren't in this folder:
layers:
  prisma:
    path: .prisma-layer
    description: 'Layer for Prisma Clients'
    package:
      patterns:
        - '!nodejs/node_modules/@prisma/engines/*'
        - '!nodejs/node_modules/.prisma/**/libquery_engine-*'
        - 'nodejs/node_modules/.prisma/client/libquery_engine-rhel-openssl-1.0.x.so.node'
        - 'nodejs/node_modules/.prisma/**/libquery_engine-rhel-openssl-1.0.x.so.node'
        - '!nodejs/prisma/**'
        - 'nodejs/prisma/*.db'
Give that a run and see what you get!

Now that's more like it! 🎉
Our function and layer are pretty slim and should be able to deploy successfully!
Setting Up Environment Variables For Lambda
The only problem at this point is that in order to test out the API running on our serverless function, we need to set up some environment variables and handle an issue with SQLite on serverless.
In the configuration for your function, we'll add a few environment variables our function needs.
functions:
  petstore-api:
    environment:
      DOG_URL: file:/tmp/prisma/dog.db
      CAT_URL: file:/tmp/prisma/cat.db
      BIRD_URL: file:/tmp/prisma/bird.db
      SNAKE_URL: file:/tmp/prisma/snake.db
      RABBIT_URL: file:/tmp/prisma/rabbit.db
      NODE_ENV: aws-testing
    handler: index.handler
    layers:
      - { Ref: PrismaLambdaLayer }
    events:
      - httpApi: '*'
You may be confused about why we're pointing to /tmp/prisma to find the SQLite db files. That's because in a Lambda function's file system, only the /tmp folder is writable.
If we leave the db files outside of that directory, we would only be able to perform READ operations on the database!
Because of this limitation, in our code we need to copy those files over to /tmp when the application starts up in an AWS Lambda environment.
const fs = require("fs-extra");

// ... application code ...

// Start 'er up!
app.listen(port, async () => {
  // Only needed for SQLite
  if (process.env.NODE_ENV === "aws-testing") {
    // If we are on AWS, our SQLite DBs aren't writable unless in tmp
    await fs.copy("/opt/nodejs/prisma", "/tmp/prisma");
  }
  console.log(`Listening on: http://localhost:${port} `);
});
This is just a workaround to get our example working. In a production setting using a database other than SQLite these steps wouldn't be necessary.
Alright, that's all configured. Now we should be able to re-deploy and actually use our function!
NOTE: This data will be short-lived as it will only exist as long as the Lambda function exists
Awesome! We're able to save and return our Dogs! The same should work with Cats. And we're doing it all on a super slimmed-down function with multiple databases!
Pretty rad 🤘🏻
Conclusion
The solutions we looked at above make it super possible to use Prisma in a serverless setting without having to worry about hitting size constraints.
While we took a specific path to fit our specific needs, the same concepts can be applied to nearly any project structure you may have with some careful thought.
The main goals are:
- ✂️ Remove any un-necessary files
- 🖖🏻 Split out the large Prisma files into a layer
- ♻️ Slim that layer down and consolidate the binaries to one shared location
Hopefully this example has helped and gives you the information you need to slim down your serverless functions that are using Prisma!
If you have any other tips or tricks to accomplish this same goal, I'd love to hear them! Shoot me a message on Twitter!
Thanks for reading, and have fun deploying some serverless functions using Prisma!