

End-To-End Type Safety: What, Why and How
Learn the concept of End-To-End Type Safety by implementing it in a full-stack application using Nx, NestJS, React, and Prisma


A difficult challenge developers often face is creating and managing types across the entirety of their software stack in a way that allows for quick and easy error and change detection.
Without a proper system in place, simple changes to your database's schema, your API layer's definition of an object, or even your web client's definition of that object could result in missing or malformed data somewhere in the chain of commands if each place wasn't updated properly.
These kinds of problems are NO FUN to debug!
In this article we're going to take a look at the cause of this issue, what a safe solution might look like, and then work through a simple full-stack application that puts a solution in place to solve the problem, making the DX (developer experience) a million times better!
Prerequisites
The application we will be building will require the following:
- Node.js installed on your machine
- A basic understanding of JavaScript, TypeScript, and their ecosystem
We will be using the these technologies and tools to build our application:
- Nx: A build system that makes developing monorepos simple
- React: Front-end library
- NestJS: Back-end Node.js Framework
- Prisma: ORM
- SQLite: Database
Don't worry if you aren't familiar with the individual pieces. I'll explain as we go!
You can find the final application on GitHub
A Little History
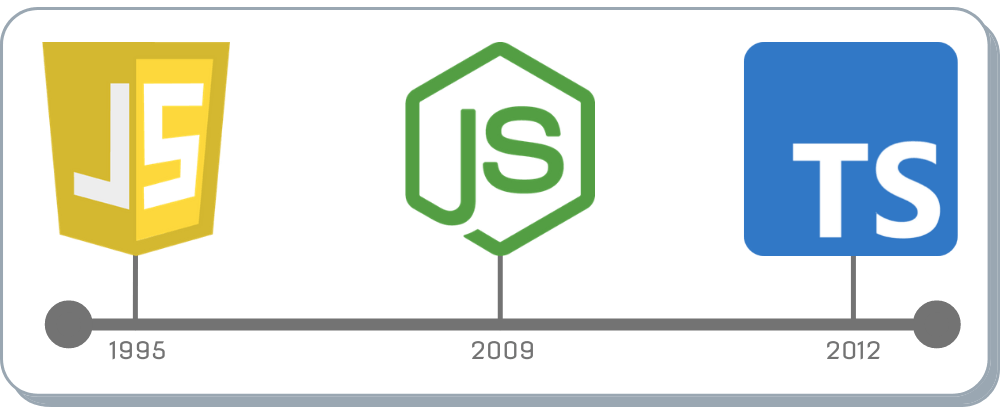
Let's take a step back in time for a second. It's the early 2010's and Node.js is the cool new kid on the block. Every developer is eager to jump in and get their hands into some JavaScript that magically runs on a server!
More and more people begin adopting and contributing to this new technology, and soon even large companies like Uber and LinkedIn start switching over to the shiny new toy!
But then the applications start to get big... a little too big for their developers to remember things like "What does my createUser function actually expect as its parameters? And what does it return? What all is available from the database?".
Organizing functionality becomes tedious as the concept of Object Oriented programming doesn't exist in JavaScript and every time you hit deploy you have a little voice in the back of your head that wonders if you're sure everything was set up correctly...
Enter, TypeScript

This exact scenario is what lead to the development of what we know today as TypeScript.
TypeScript brought with it a whole new world of tooling and type-safety that was previously impossible. You could organize your code into classes, provide interfaces for those classes, and set up types for various pieces of your code.
Editor tooling also evolved in a way that made it super easy to develop efficiently and detect bugs before even compiling your code!
This all sounds great and was a huge step in the right direction, but it shed light on another problem.
The Problem
While TypeScript made development way smoother, safer, and less error-prone, developers began to realize that there was some disconnect in their applications even with these types.
Here's why:
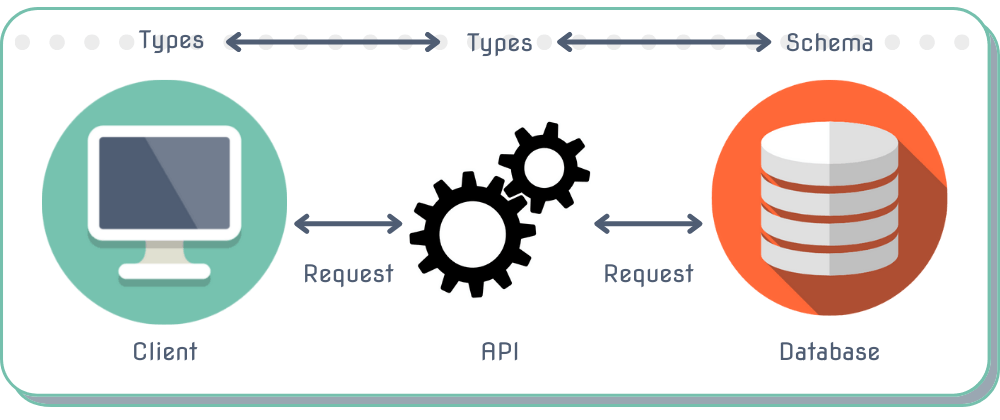
A typical application nowadays is organized generally into three main layers:
- Client Layer: The website you interact with
- API Layer: The layer that allows your client to indirectly interact with the database
- Database Layer: The layer where your data is kept

Let's imagine we have an application following this structure and in our database we have a table called users.
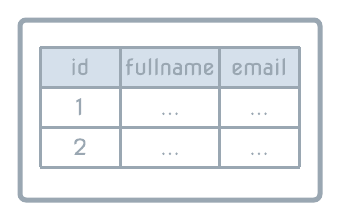
Your front-end code (the client layer) and your back-end code (the api layer) each have their own typings that describe what a User from your database schema (the database layer) should look like:
type User = {
  id: number;
  fullname: string;
  email: string;
}
If everything was set up correctly, we can assume our imaginary application is working great! Your front-end might be able to fetch an array of users from the API. Both of those ends are aware of what a user is and how to handle it within its own layer and all is well.
... But then things change. A nit-picky database admin decides the fullname column should be split into two: firstName and lastName. A schema update is prepared and it's up to you as a developer to make absolutely sure the code and types are updated to reflect the new schema changes.
type User = {
  id: number;
-  fullname: string;
+  firstName: string;
+  lastName: string;
  email: string;
}
What happens, however, if you forget to update the front-end code? Your editor and the TypeScript compiler won't throw any errors because, as far as they're concerned, in the front-end a User still only has the fullname column!
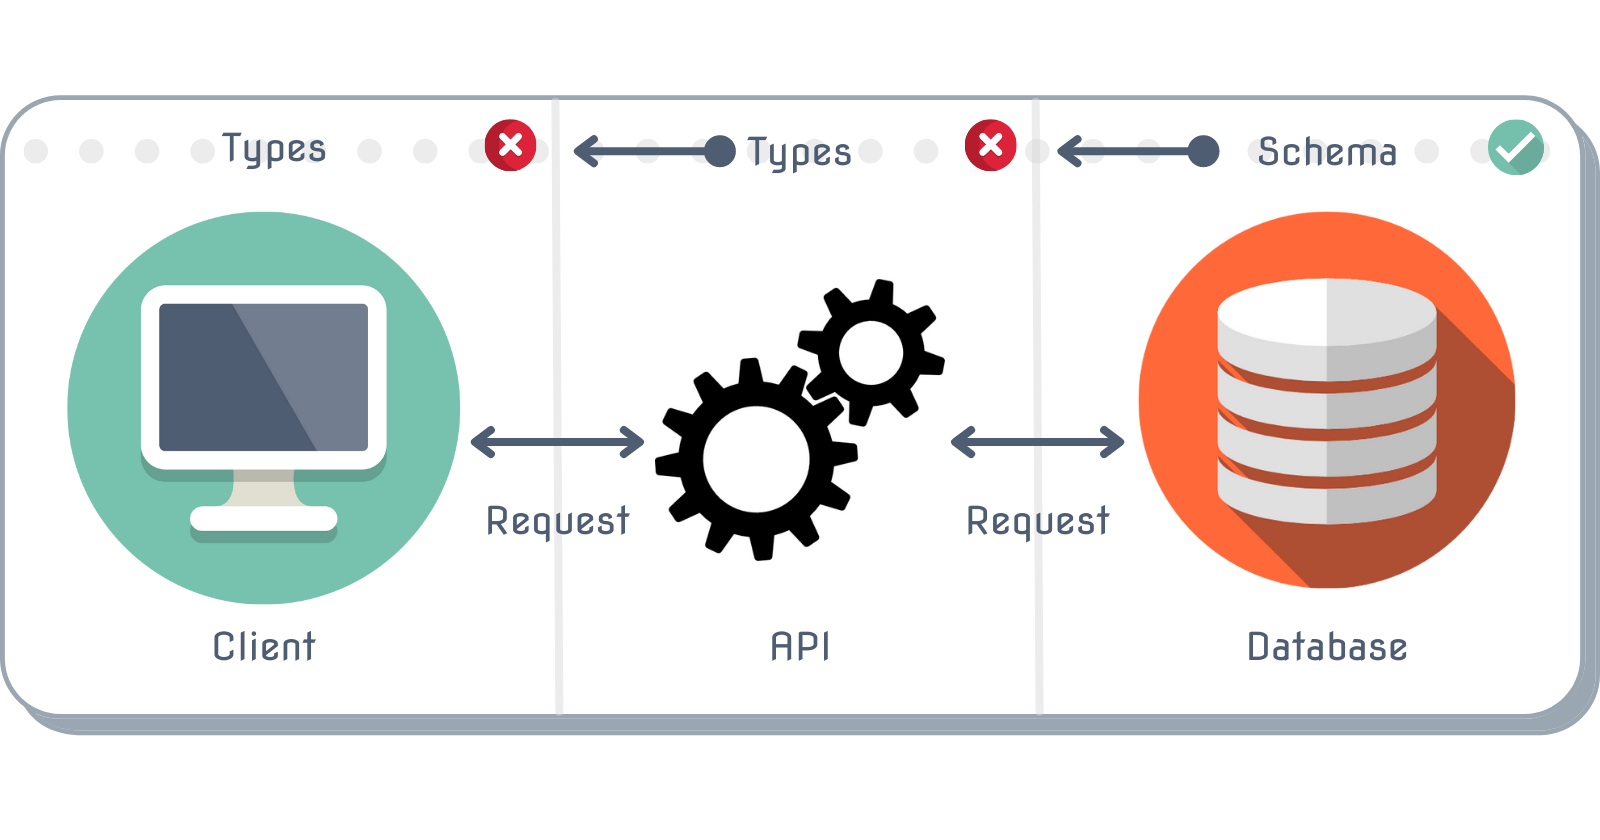
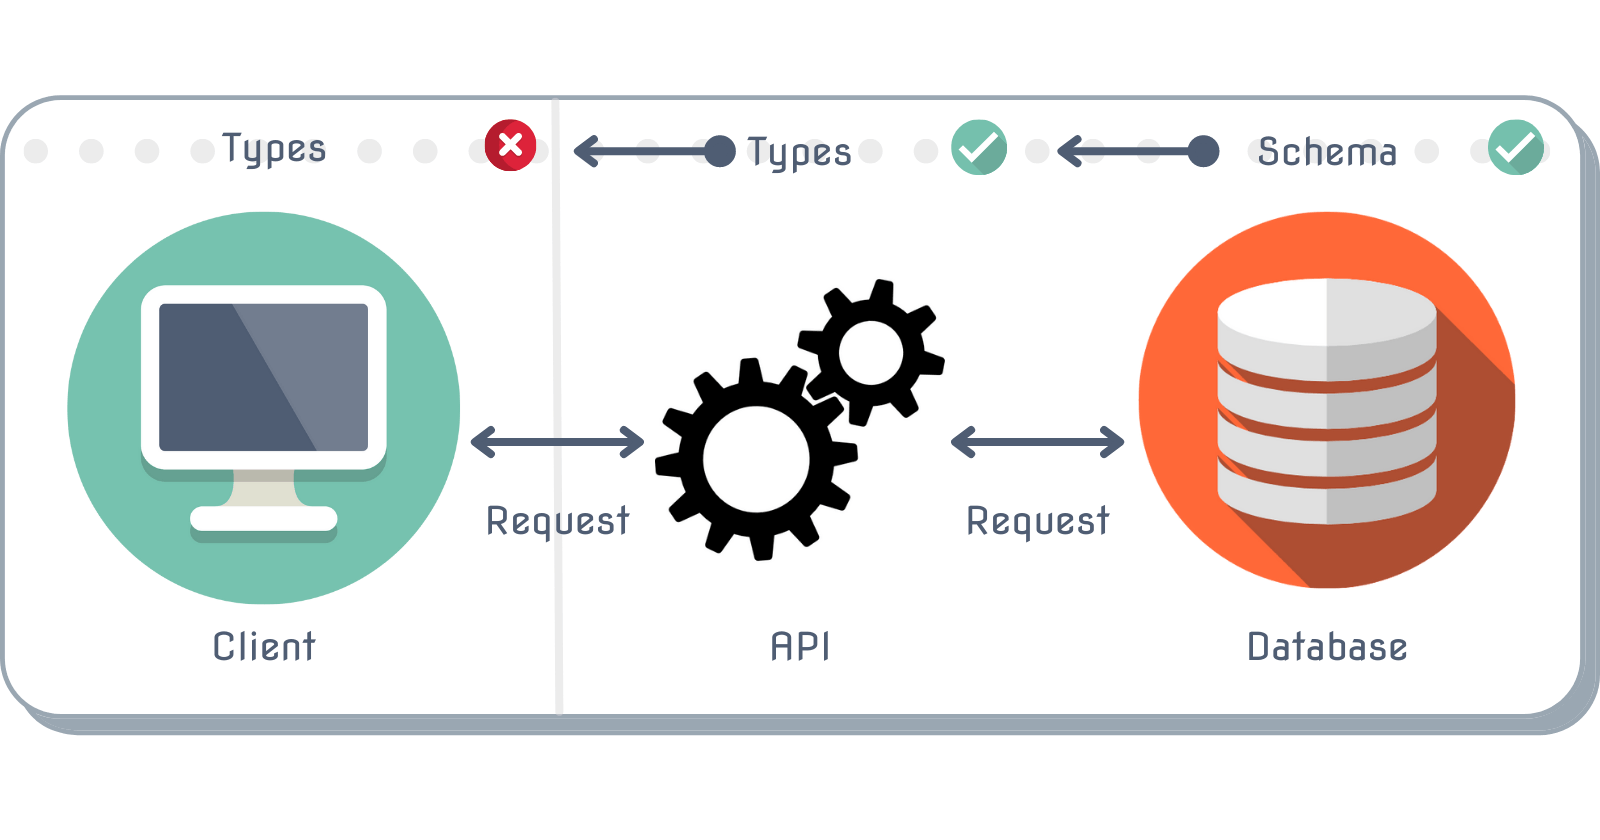
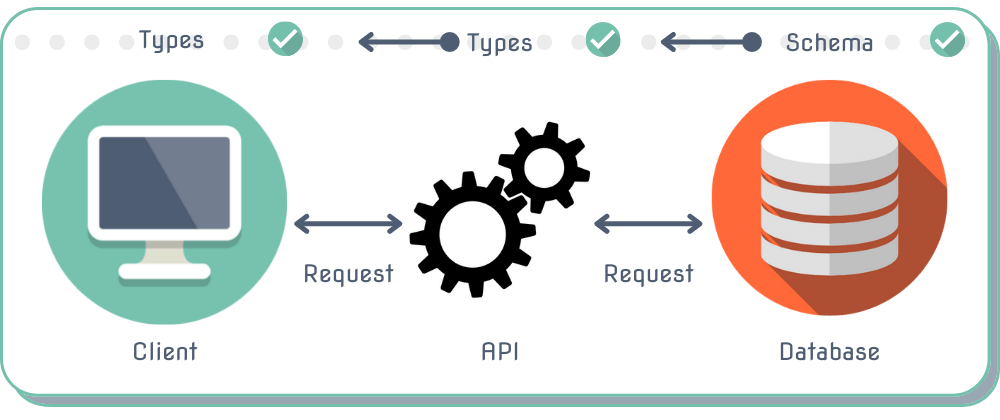
We can imagine our layers currently look like this:

Each individual layer has its own definition of the object's shape, or a type. But they are unaware of their counterpart's version of that type because they live in their own box.
Requests made between the individual layers are working fine, but the shape of the data being passed around can't be known for sure as it crosses borders.
This issue is what can, and tends to, arise as an application grows without implementing end-to-end type safety.
Fixing the type in your front-end code would suddenly reveal a bunch of squiggly red lines under every instance of user.fullname that was accidentally left behind, but you would never have known unless the type was fixed or an error popped up after thorough testing (or a deployment 😬)!
In a less-severe scenario, we can imagine all of the types were properly updated throughout the stack and everything works fine. While the end-result is functional, the developer experience is not great at all because every change to a type or the database schema would require the developer to have to make the same change in a bunch of different locations.
End-To-End Type Safety
With end-to-end type safety, the goal is to have a single source of truth for your types across all layers of your application. Ideally this would occur in an automated fashion as your database schema changes.
If this is achieved, the walls between each layer are essentially broken down and allow the data to flow to and from each layer in a much more simple way that makes sense to the developer who has to work with it.
As data passes through each layer of the application, crossing borders via requests, we can be sure that in each area of the stack we are expecting the same object.
The benefits of this implementation include:
- Great DX
- Less testing, because TypeScript handles a lot of what we would normally test for
- Easier debugging because of the tooling and linting TypeScript comes with
- Ease-of-mind when making changes because we can allow ourselves to lean on the TypeScript Compiler
- A lot of your code ends up becoming self-documented across your stack
There are, of course, many different ways to achieve end-to-end type safety, and those implementations can vary depending on your tech stack.
Putting It Into Practice
As a developer myself, I understand that the best way for a developer to grasp a concept like this is to jump in and get your hands dirty, so let's take a look at one possible implementation of end-to-end type safety.
We'll set up a Monorepo with Nx that has a NestJS API and a React client. The API will consume a SQLite database.
Our goal with the application will be to have fully automated type safety across all three layers. Making changes to our database should automatically update the type definitions in the API and Client layers.
Generate an Nx Workspace
We'll start up by setting up the Nx Workspace. Navigate to a directory where you'd like to generate your project and run the following command:
npx create-nx-workspace bookstore
This should take you through a series of prompts asking you how to initialize your monorepo. Go ahead and pick nest to start off and name the nest application api. I chose no for the Nx Cloud option.
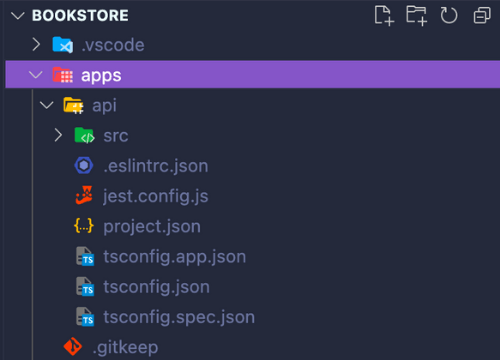
If you pop open the workspace that was generated, inside of the /apps/api folder you should find a boilerplate NestJS application!
cd bookstore
code . # if you're using VSCode
This was conveniently set up for you by Nx and is ready to run!
We're going to also need our React front-end, so lets download Nx's React project generator and generate a project in our monorepo.
npm i -D @nrwl/react
nx g @nrwl/react:app
These are the options I went with for the react app:

Note: A
client-e2efolder was also generated. This is where any e2e tests for your react application will live. We'll ignore that folder in this tutorial.
And viola! We have a monorepo set up with a NestJS API and React application all ready to serve.
If you'd like to serve the projects, you can use:
nx serve client # The react app
nx serve api    # The nest api
nx run-many --parallel --target=serve --projects=client,api # Both
If you are unfamiliar with Nx and want to learn more about what it can do, check out the docs here.
Initialize Prisma
The next thing we'll want to set up is our database, and we're going to do that through Prisma.
Prisma has a rich set up features that go beyond just being a fantastic ORM. Through it we can define the shape of our database in a schema file, apply our schema to the actual database, and manage deployments and our migration history.
Along with this, Prisma generates an ORM that is derived from the schema we define and is fully type safe. This allows us to already tick a few things off our list of type-related concerns!
To use Prisma we'll first need to install it as a development dependency and initialize Prisma in our project:
npm i -D prisma
npx prisma init
This will generate a /prisma folder at the root of your project with a file inside named schema.prisma.
schema.prisma is what we'll call our source of truth. We'll see more about why later on, but for now let's move on to setting up an actual database for Prisma to interact with.
Set Up SQLite
To keep things nice and simple, we're going to use SQLite as our database.
Add the following blocks to your schema.prisma file:
generator client {
  provider = "prisma-client-js"
}

datasource db {
  provider = "sqlite"
  url = "file:./dev.db"
}
This tells Prisma we are using SQLite and it should generate the db file into the same directory as the schema file.
It also lets Prisma know we want to generate the Prisma Client.
For more information about Prisma's
PSL(Prisma Schema Language), check out their docs.
Add A Model
Now that we've got a database set up and Prisma configured, let's model out our data. We'll keep things clean and just add a Book model to the schema.Prisma file.
model Book {
  id         Int    @id @default(autoincrement())
  title      String
  authorName String
  pages      Int
}
Remember, this schema is the source of truth that not only describes the database schema, but will generate types for us to use in our code via the Prisma Client!
To apply the new model (or table) to our SQLite database, we can run Prisma's migrate tool.
prisma migrate dev --name init
This command generates a migration file in /prisma/migrations, applies that migration to our database, and finishes by generating our Prisma client.
At this point, we have successfully set up control of our database schema, but those walls are still up between each layer.
Set Up An API Endpoint
Okay, so we've got a database set up, our API and Client generated, and the Prisma client automatically modeled around our database. Let's put these to use.
Inside of your /apps/api/src folder, create a new file called prisma.service.ts. This file will initialize and handle the Prisma Client that was generated when we ran our migration.
// prisma.service.ts

import { Injectable, OnModuleInit, OnModuleDestroy } from '@nestjs/common';
import { PrismaClient } from '@prisma/client';

@Injectable()
export class PrismaService extends PrismaClient
  implements OnModuleInit, OnModuleDestroy {
  async onModuleInit() {
    await this.$connect();
  }
  async onModuleDestroy() {
    await this.$disconnect();
  }
}
Here we are wrapping Prisma in a service so that it can be provided via NestJS's dependency injection system
Now, over in your app.module.ts we need to register the new PrismaService as a provider for that module.
First, go ahead and get rid of the existing app.service.ts and app.service.spec.ts files and remove that service's references in the app module file. We won't be needing those.
Once those are cleaned out, replace them with references to the PrismaService we created.
Your app.module.ts file should look like this:
import { Module } from '@nestjs/common';
import { AppController } from './app.controller';
import { PrismaService } from './prisma.service'

@Module({
  imports: [],
  controllers: [AppController],
  providers: [PrismaService],
})
export class AppModule {}
Now our service is registered in NestJS's DI (Dependency Injection) system, so we should be able to reference the PrismaService in our controller. Open up app.controller.ts and update it to match the code below:
import { Controller, Get } from '@nestjs/common';
import { PrismaService } from './prisma.service'

@Controller()
export class AppController {
  constructor(private readonly prisma: PrismaService) {}

  @Get()
  getData() {
    return {}
  }
}
This controller is where we can set up our API routes. The @Get decorator on getData lets NestJS know that it can be accessed at the base route: /.
We want this endpoint to return all of the books in our database.
In the return of getData, if we begin to type out a query with Prisma, you will see we get some nice autocompleting features.
Once the query for all of the books is written, if you hover over the function definition you should notice the return type of that function is PrismaPromise<Book[]>.
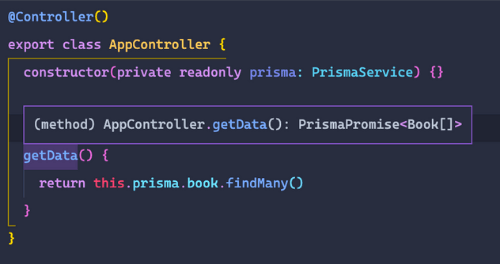
That's super convenient! ...but where did the Book type come from?? That was Prisma, our source of truth!
We have now broken down the wall between our database schema's shape and our API types by having a single source defining each of those.
Our types in the API are automatically updated whenever the database changes and the prisma client gets re-generated! If you play around with the query a bit and narrow down the selected fields, you should see that the return type of the route function dynamically changes based on the fields you select.
That's pretty slick, and checks off two layers of the three layers we need to worry about!
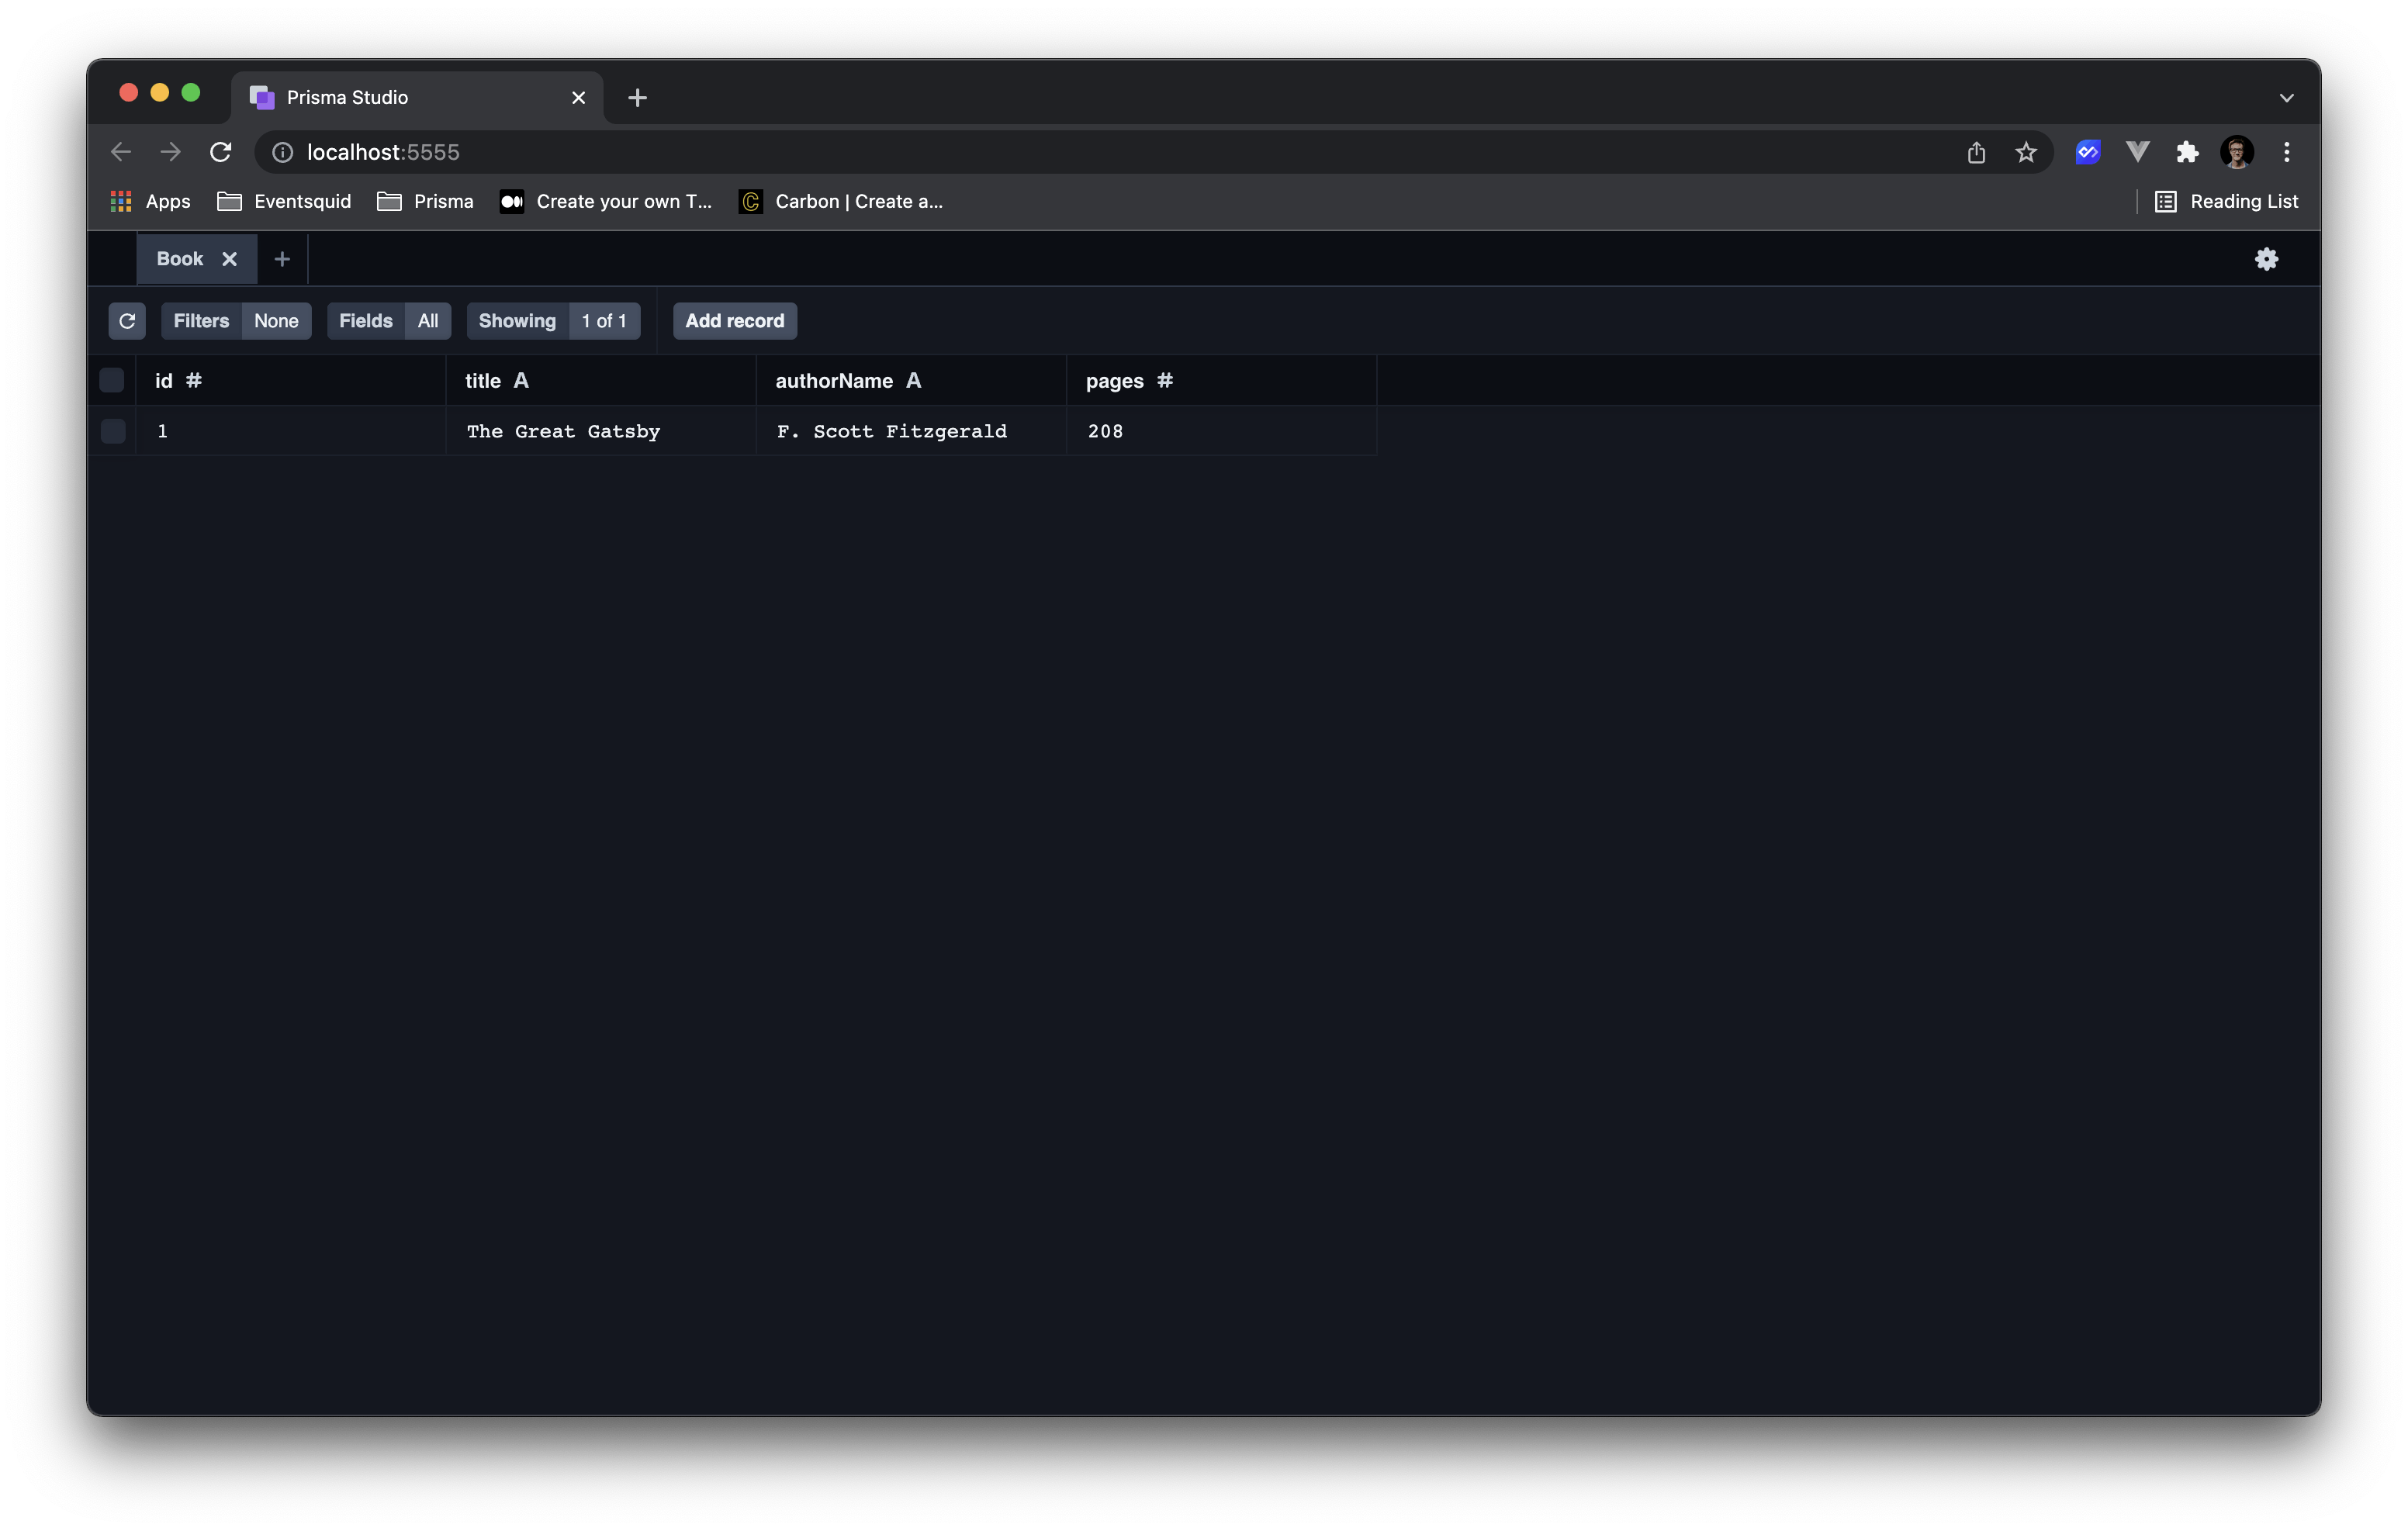
Before moving on to that third layer though, let's add some data to the database via Prisma Studio so we can query it and make sure everything is working nicely.
prisma studio
This command should open up the studio to a list of models. If you click into the Book model you should see a table view of our Book table. Go ahead and add a few records to the database.
Finally, serve up the api via Nx and head over to http://localhost:3333/api to check out your data.
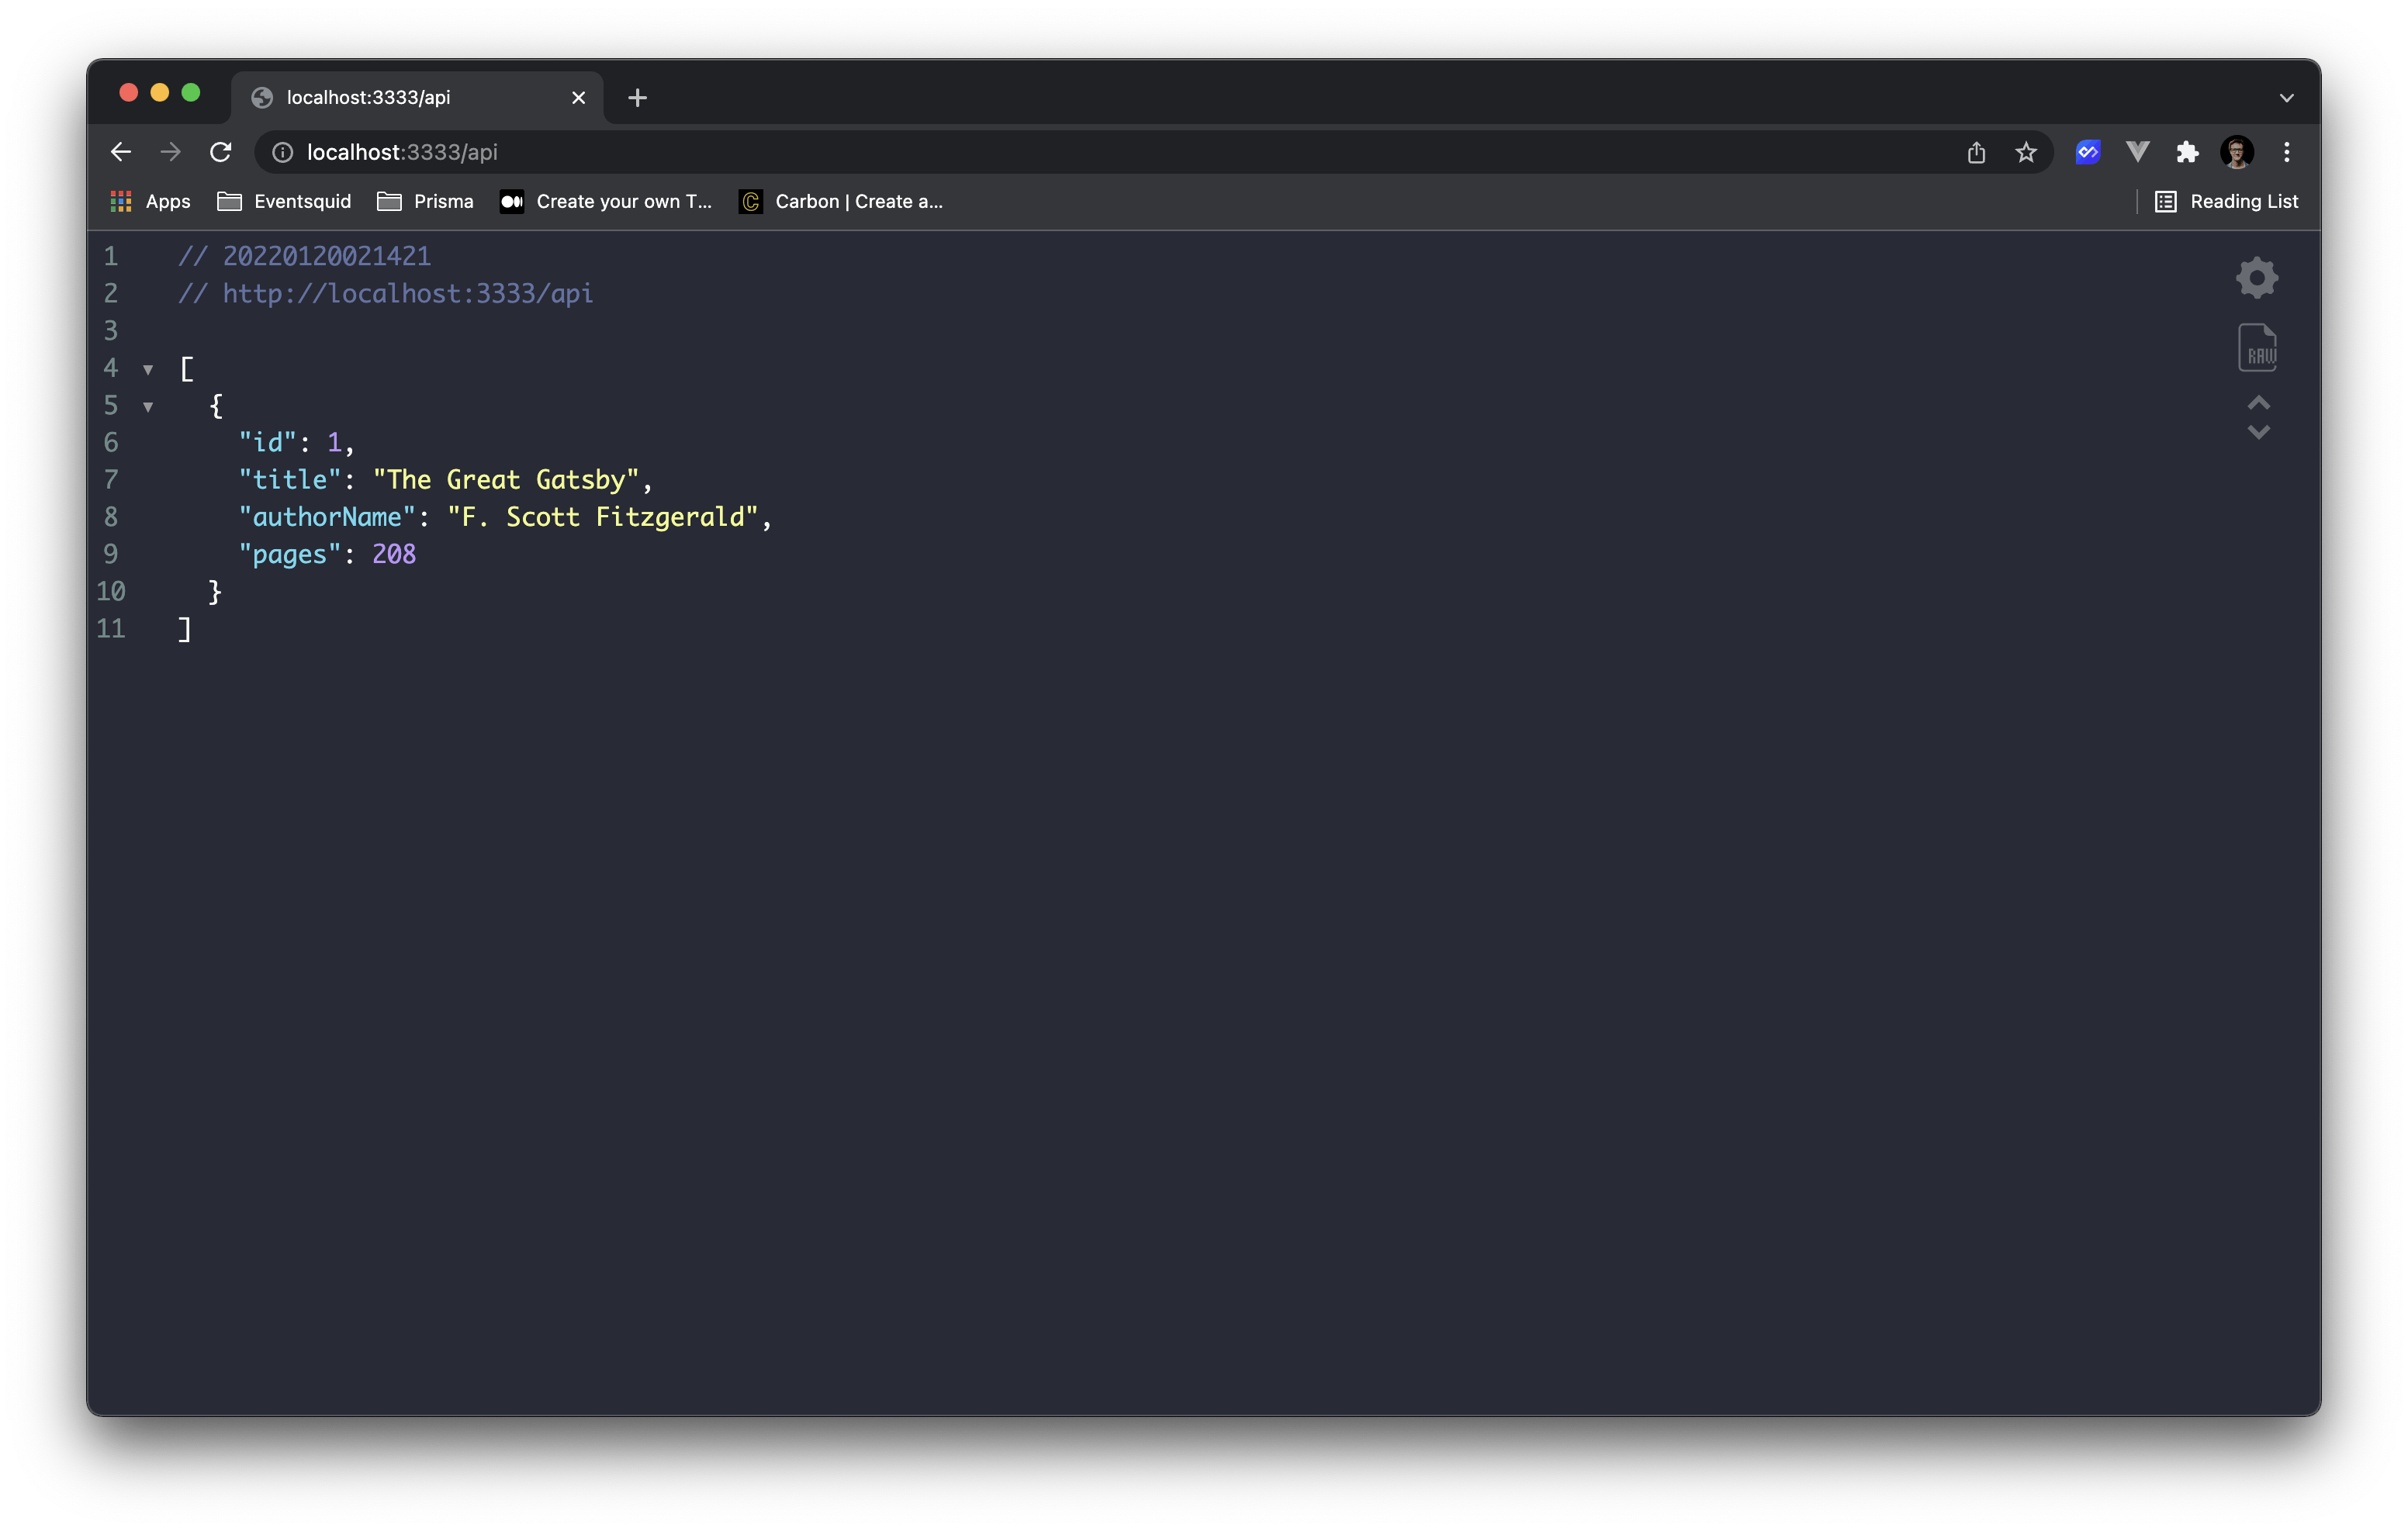
Awesome! We're getting data and ready to set up our front-end to safely consume that data.
Build The Front-End
In order to interact with our api, we'll first need to enable cors on the server. In /apps/api/src/main.ts, we can use our NestJS app's enableCors method to accomplish this.
// main.ts
async function bootstrap() {
  ...
  const app = await NestFactory.create(AppModule);
  app.enableCors();
  ...
}
Now we should be okay to make requests from our client to our api. In /app/client/src/app/app.tsx, we'll start off by fetching our list of books from the api.
Add this effect and state variable to the top of the App component function.
const [books, setBooks] = useState([])

useEffect(() => {
  fetch('http://localhost:3333/api')
    .then( result => result.json())
    .then( setBooks )
}, [])
And to display those books, we'll replace the return of that function with:
return (
  <>
    {
      books.map( (book: any) => (
        <div key={book.id} style={{ border: '1px solid black', padding: '2rem'}}>
          <p>{book.id}</p>
          <p>{book.title}</p>
          <p>{book.authorName}</p>
        </div>
      ))
    }
  </>
);
If you serve up the API and Client and navigate to http://localhost:4200/, you should see our books beautifully displayed 🎨 (or not so beautifully...)
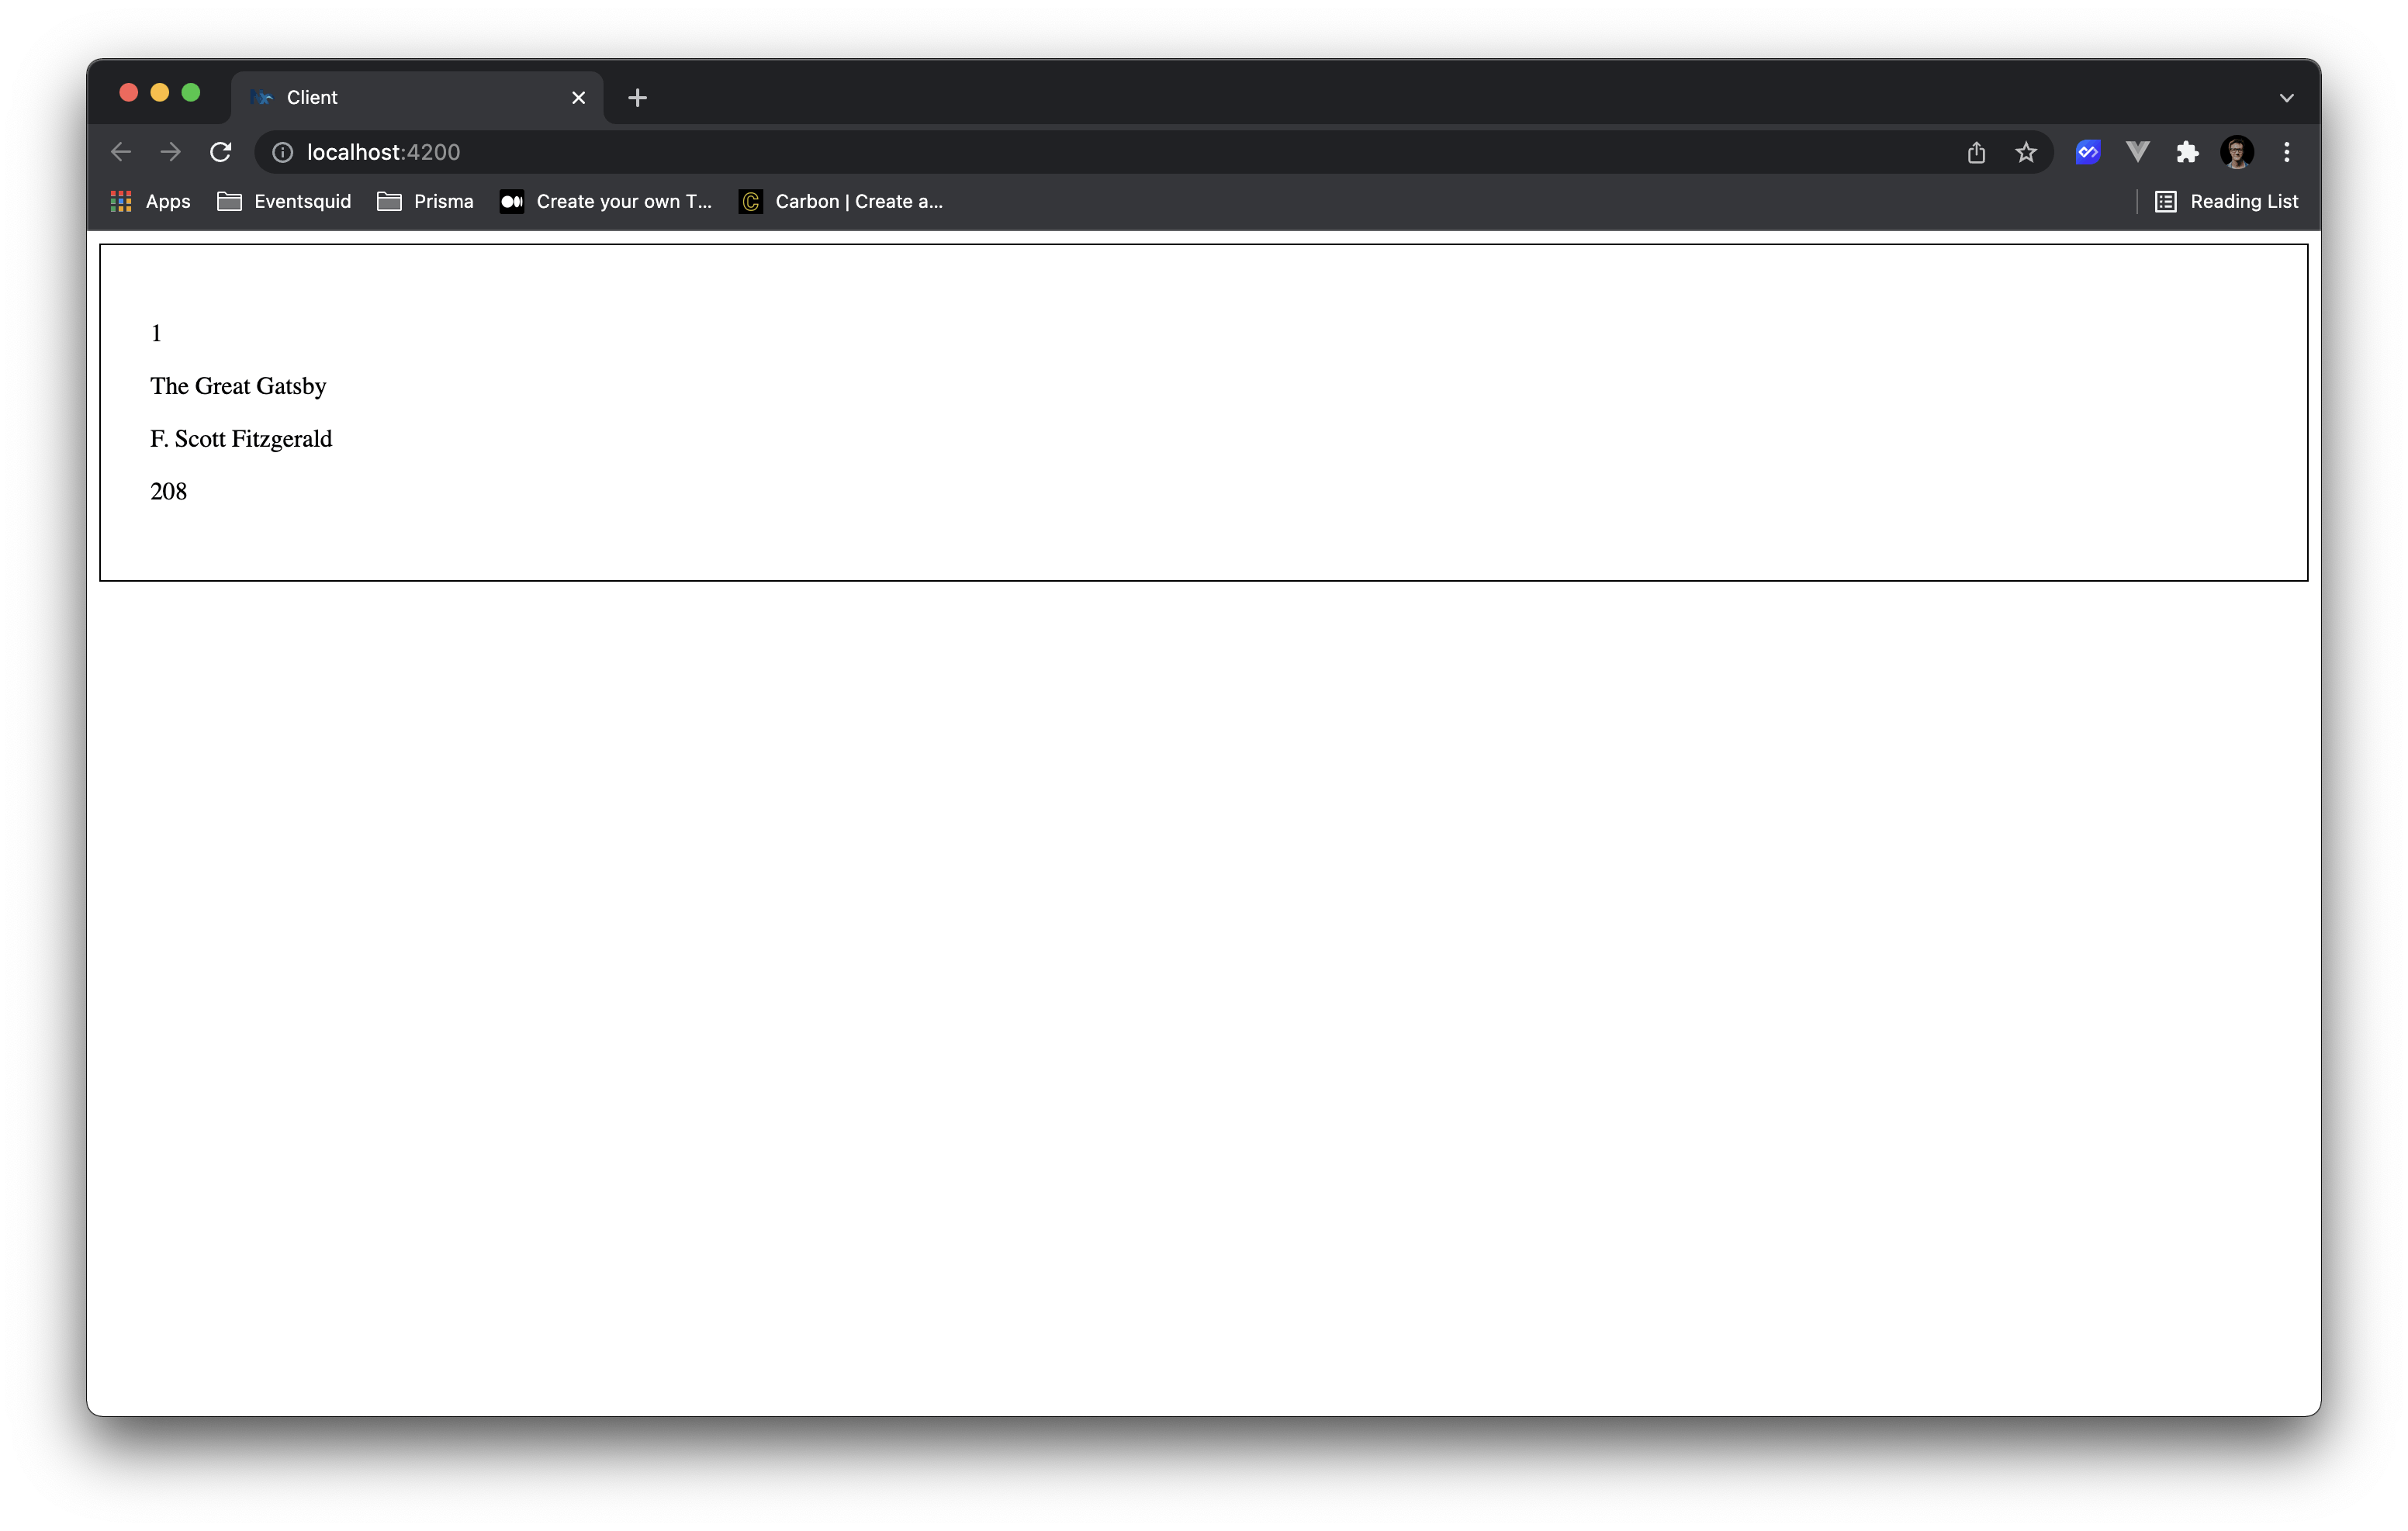
Okay, before you TypeScript junkies start getting queazy seeing that any type, let me explain.
Currently, even though our Database knows what a Book looks like and our API knows what it looks like, our front-end has no clue! The TypeScript compiler complains about that when we try to access properties on the mapped books.
Fortunately, we're implementing an end-to-end type safe system and Prisma gives us access to those types.
At the top of this file, let's import the Book type Prisma generated for us (yes, the same book type we're using in the API layer!).
import { Book } from '@prisma/client';
And we'll tell our state variable that it should hold an array of books.
const [books, setBooks] = useState<Book[]>([])
If you remove the any type now from the mapped books, you should see that the editor stopped complaining!
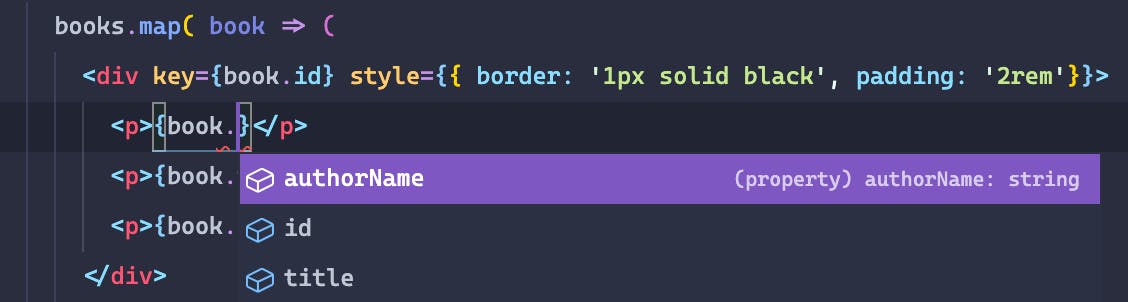
Also, if you go to modify a key being accessed on the book variable, you should see you get a nice set of auto-complete options that show the fields available to a Book.
That's pretty awesome if you ask me! We now have a single source of truth for:
- Our database schema
- Our back-end types
- Our front-end types
All the walls between layers have been broken down and our types and data flow nicely and automatically across our entire stack!
Congratulations, you have implemented an end-to-end type safe full-stack application!
Now We Break It
Alright, enough celebrating! What fun is building a working project if you don't get to break it in the end?
I've decided I don't really care how many pages a book has. That data is taking up precious (and expensive) space in my database server, so let's get rid of it.
Pop open that schema.prisma file we worked in before and remove the pages field from the model.
model Book {
  id         Int    @id @default(autoincrement())
  title      String
  authorName String
-  pages      Int
}
Since our schema definition changed, run a new migration to apply that to our database and generate the new Prisma Client.
prisma migrate dev --name removed-field
You will get some prompts letting you know you have non-null values in the field you are removing.
- That's pretty awesome Prisma thinks to warn you about that!
- Go ahead and allow it, we aren't concerned about data loss here 💣
Now that our schema is migrated and the new client generated, let's find out what we broke!
Run both the API and the Client:
nx run-many --parallel --target=serve --projects=client,api
Aha! We broke it! You should see an error in your console letting you know what the problem is. Also in your code you'll see those red squiggly lines I mentioned earlier.
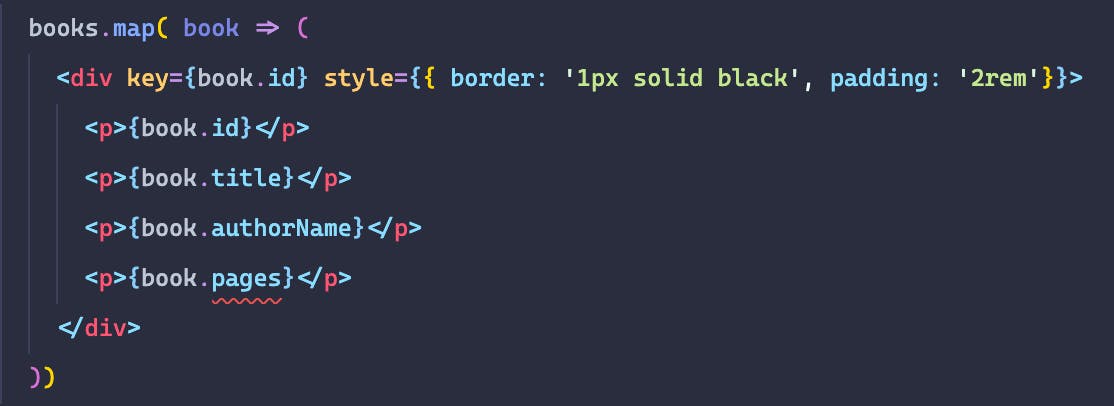
Think about what just happened. Our Database changed and because we have implemented end-to-end type safety our front-end code was smart enough to tell us it needs to be updated because of that! All without us having to change anything in the code!
Our back-end code would have done the same if we were actually accessing the pages field directly anywhere.
That is the power of TypeScript and end-to-end type safety. Because of this, we would have been able to easily catch any problems using the TypeScript compiler.
Okay, I know the developer inside you is dying to fix the bug, so go ahead and remove that <p> tag with the erroneous key.
Wrapping Up
I hope after following through that example you're as excited as I am about how powerful TypeScript is when combined with tools like Prisma and Nx that allow you to generate and share types across the entire stack of your application.
Of course, as mentioned near the beginning of this article, there is no one-size-fits-all solution and this example was one specific case. Maybe you need partial types, are using GraphQL, or have some other requirement. Implementing a end-to-end type safe experience is possible with the proper tools and configuration.
Thanks so much for following along and I hope you found this useful